Archives

Ms & Ws Rayon Scarves

After making a mess of the warp, I figured I should show you the good news…the story of a happy warp.

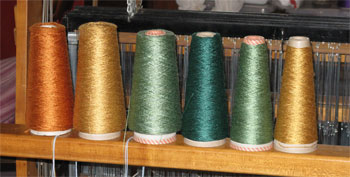
It started with several cones of a lovely, shimmery lightweight rayon yarn. Orange, gold, light green, and dark green, then back down to orange again.
fall rayon yarn on cones (I used up one of the orange cones, so you don’t see it at the right end.)

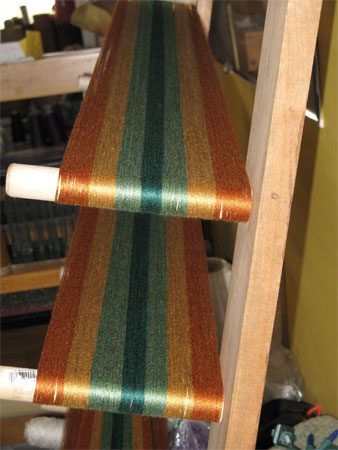
Here it is on the warping board. Of course, this is when I wound twice as much as I needed, but it gives you a great view of how the colors look together.
fall rayon yarn on warping board

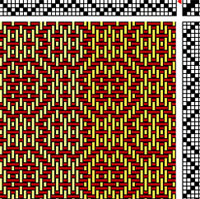
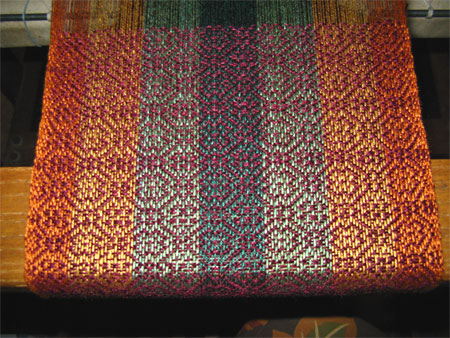
You saw the mess I created when I went to put this too-wide warp on the loom. After I fixed it, I threaded the loom in an M & W pattern.
M&W weaving draft

I then wove the three scarves using a nice burgundy weft. I love the look of these scarves. As much now as I did when I first wove them last year. I made 2 last year with this burgundy weft, and one with dark green, and they flew off my display the first day I put them out. Since I much prefer the burgundy weft, that’s the only color I did this time. After all, it is all about what I like, isn’t it? 🙂

I still have to finish the fringe and then wet finish the scarves, hopefully tomorrow.
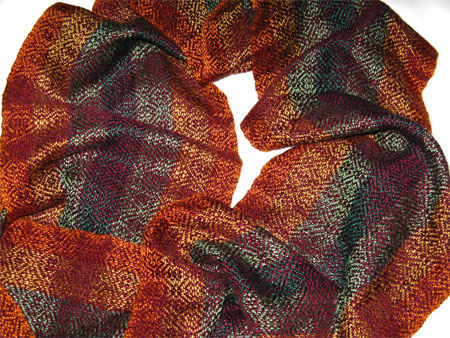
fall M&W handwoven rayon scarf

I plan to apply to be a Roycroft Artisan this year. Pictures have to be in to them by March 1, and then they need to get finished pieces in April. I want one of these scarves to be in both the photos and the finished pieces. The challenge now will be getting a good picture of it. I had a lot of trouble getting the colors even close to right on the loom, and I’m still not happy with it, and don’t know that it’ll be any easier after it’s wet finished. Add to that rayon’s sheen bouncing the light around, and I know I’ll have to work at getting a good photo for jurying.

This one shows the colors up better, but I don’t think it’s the image I want to use for jurying.
fall & burgundy M&W scarf
It does show how wonderfully soft the scarf is, and what a great drape it has, but somehow doesn’t strike me as right. I still think it looks so much better in person. Not sure how I’ll proceed.

Make A Mess, Clean It Up

In my experience, a weaver is nothing if not a problem solver. That’s all well and good when I’m learning how to do some new pattern or technique; it’s quite another thing all together when the problem was caused by my own goofiness. That’s what happened today. (Sorry to my non-weaver readers; I use lots of weaving terms in this post that probably won’t make sense to you.)

I wanted to make some scarves that had been very popular last spring. So I got out my notes, and saw that I needed 44 ends of each of 4 colors. Swell. I duly wind the warp and get it on the lease sticks on my loom. As I’m spreading it out in the raddle, I say to myself, “That’s not right! This warp should only be about 8 1/2″ wide, and clearly that’s not what I have here.”
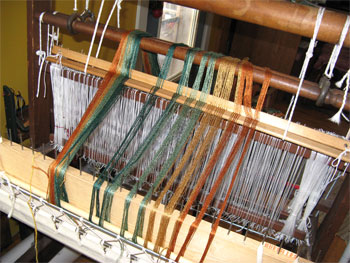
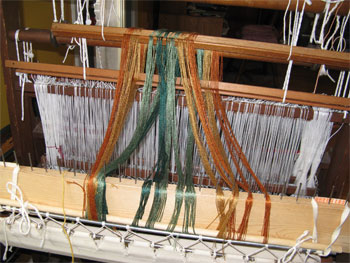
rayon threads on loom
So I step back and think…what’s the problem?

Ohhhhhhhh. Sure, I needed 44 ends of each color – 22 on each side! Not 44 on each side — that’d be 88 of each, you dope!

So I sit in my chair and look at the loom and think. Do I want to make this warp into shawls instead of scarves? No, I really don’t. And besides, they’d be rather narrow for shawls.

That leaves me with only one option that I can see — separate this warp into two warps. How the heck will I do that?!

It doesn’t take long for me to decide on a course of action. I have no idea if it’ll work, but it’s an approach.

I’ll grab another set of lease sticks, and slide half of each color off onto this second set.

Nice thinking. Faulty, but nice.

I slide off the copper color, being careful to maintain the cross. But wait. I can’t slide off half of the gold now — the remaining coppers are in the way. Oh my god, I need THREE sets of lease sticks! And each set needs its own cords to hang from, or I’ll surely drop whole sets of threads. YIKES!

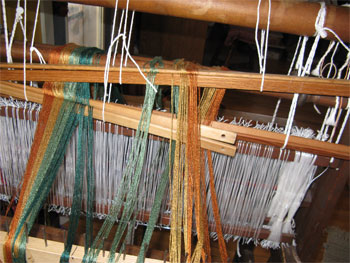
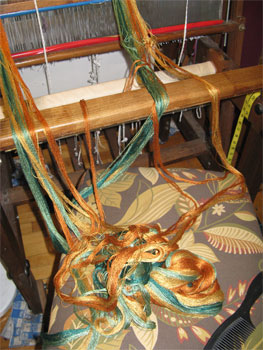
I manage to make this happen. It’s not pretty, but I use 3 sets of lease sticks; here you see me mid-stream of making the transfers.

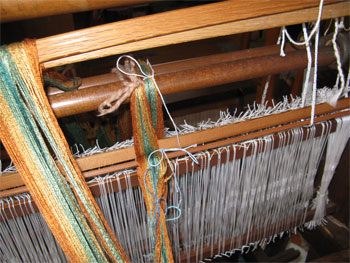
rayon threads on 3 lease sticks

Working carefully, I finally manage to get the thread completely separated onto 2 sets of lease sticks, maintaining the cross every time I make a transfer.
rayon on two set of lease sticks
I re-tie the choke ties on the cross of the set I plan to take off the loom. But they’re all still on one end stick. That still has to be separated. And I hope I’ve managed to separate the threads in such a way that I won’t need to cut and tie the ends when I try to slip them off the end stick.

new cross ties
Whew, that worked well.

rayon with ends separated

But it was time to sit back down and look at it all again. I had the threads separated on two sets of lease sticks and the cross re-tied. That was all swell. But those threads were interlaced along the entire length of my warp. How could I possibly separate them all the way?

I moved some furniture to set up my warping board behind the loom. I’d put the cross on there and wind the second warp back onto the warping board while I wound the first one on the loom. Wait a minute — my warping board won’t stay upright on a chair! With all that empty space in the middle, there’s nothing for it to lean up against. And even if I moved it up next to the window, that wouldn’t work — I had to be able to get behind it to wind the first warp onto the back beam. So how did I solve this new problem? I grabbed my extra raddle & leaned it up against the back of the chair, then leaned the warping board against that. Now don’t breathe, or everything will slip. Don’t let one of the dogs bump into it. Don’t bump into it myself while I was walking behind it to wind the warp, then back around to the other side to comb, untie, & re-tie chokes.
loom with warping board

Amazingly, it all worked. Rather beautifully, I might add. Only because I was working with a lovely, slippery, shiny rayon yarn.
rayon threads being separated

Had I been working with rayon chenille, cashmere, or some other challenging fiber, my only option would have been to make my fabric double wide or tighter sett.

Now I can finally sit down and thread the heddles in my planned Ms & Ws pattern. Another afternoon wasted due to my own dopiness. But I bet I won’t make THAT mistake again! After all, there are plenty of new ones to make. 😉

V7N logo

Join the V7N Challenge – learn something new every day

“When the student is ready…

…the teacher will appear.”

It’s a pretty famous Buddhist saying. And it just became real for me.

When I posted my 2010 wannas, one of the things I mentioned was that I wanted to learn new weaving techniques. And that I’d joined a Su Butler’s napkin exchange as one concrete strategy to help me do so. I’d already told Su that block weaves was one of the options for things that I’d like to try.
block theory book
I hadn’t done any block weaving before. The last few times I’d looked at that chapter in Deborah Chandler’s Learning To Weave book, she may as well have been speaking Zubulian — I didn’t understand anything she was trying to tell me.

At the February Southern Tier Fiber Arts Guild meeting, I asked a woman if she had a good handle on block theory, figuring I could get the concept if someone was telling me vs. reading a book. Unfortunately, she didn’t.

handwoven magazineA few days later I got the new issue of Handwoven, and there were designs in there that were similar to what I had in mind for the napkins. So I got out my graph paper and started drawing, thinking that was the place to start.

Hah! I couldn’t even replicate the design in the magazine, much less create one of my own! And I sure wasn’t any closer to understanding what the heck I was doing.

So I pulled out Chandler’s book again. I started reading. Still looked like Zubulian to me.

block draftThen all of a sudden something clicked and those foreign characters start to turn into English! I went back to the graph paper again, and could actually draw something that made sense! And I understood that each of those graph paper squares represents 4 threaded heddles and 4 throws of the shuttle, and how to plan all that detail.

Amazingly, within about 24 hours, I got an email hawking a new book – delivered electronically in PDF format – all about weaving block theory.

I haven’t yet figured out how many threads I’ll need in the napkins, so haven’t begun to do the final planning yet, but I KNOW I can design what I want. Even more surprising to me, I know that there’s at least an 85% chance that the design in my head can be woven on my beloved four-harness counterbalance loom.

Sometimes life is sweet. I try to really appreciate it when it is.

It Can’t Hurt To Ask

I’m used to selling my handwoven scarves at art & craft shows, and from my website. That’s how I sell what I make. That’s what I need to focus on.

Or is it?

NY Wine & Culinary CenterThe other day I got a fairly standard marketing email from the New York Wine & Culinary Center, a lovely organization about 75 miles from me. They told me about some cooking classes, a Valentine’s Day celebration, and a 1-day, indoor, winter festival to promote NYS wines, cheeses, and other yummies.

When I was reading the email, something in my subconscious brain told me to click on the link to their festival. Once I’d read more about it, I decided, “Hmmm…I know that this place is really serious about promoting buying local. Although they focus on foods and wines, maybe they’d like to offer some wonderful handwoven scarves as another option for their visitors.”

So, completely out of character for me, I called them up & asked. It took a few phone calls & an email, but the end result is very positive – they’re eager to have me there. AT NO COST TO ME!

I will have a very small space for display of my scarves, so I’ll need to plan carefully about what I bring with me — likely mostly winter weights (mohair, alpaca, & rayon chenille) with some lighter scarves perfect for indoor wear thrown in for good measure. If you’re anywhere in the area, do stop by the nICE Festival in Canandaigua on February 26. There’ll be samplings, music, demos, and more.

I’m psyched! I went outside my comfort zone and asked, and got invited to join them. Hopefully this will be a positive experience for all concerned, and I’ll have the confidence to try this strategy again.

Your turn: have you reached out with positive results that were a pleasant surprise?
V7N logo

Join the V7N Challenge – learn something new every day

How To Make Isa’s Yarn Button

I’ve never done anything like this post before – writing directions on how to make something and taking pictures as I go. Some of the photos are a little bit fuzzy – of course I didn’t know that till I was all done :-(.

Before we start, I want to thank Cathy Powers, the talented woman from my fiber arts guild who taught us how to make these buttons at our February guild meeting. Cathy requested that this button be named Isa’s Button, after her mom, who taught Cathy this button-making method. Thanks, Isa, for a beautiful button!

Ok, gather your supplies. You’ll need a lid from a cottage cheese container (or similar), a pair of scissors, a pen (a fine line Sharpie works great), and a straight edge. A compass can make it a bit easier, but aren’t essential. Later on you’ll need yarn, a yarn needle, and a button.
button supplies

1.) Draw a circle on the cottage cheese container. This will be the template for your button. You can make yours larger or smaller than mine, depending on what size you want your finished yarn button to be and what size yarn you use. My circle is about 2.25″ in diameter.
button circle

2.) Cut out the circle. Find the center of it — this is easier if you used a compass, but do-able if you didn’t. (Let me know if you didn’t use a compass and need help to find the center.)
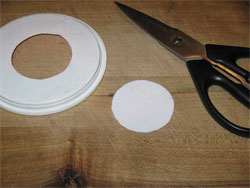
template circle cut

3.) Draw lines on your circle, directly through the center. You’ll want 12 lines. (Note that this isn’t written in stone. If you make a small button, you may want only 8 sections; for a large button, you may want 14 or more.) You’ll see that my lines aren’t entirely even. This isn’t ideal, but it’s not completely critical.
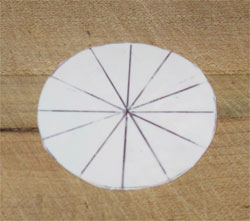
template with lines

4.) Cut a little V out of each section, using the lines as a guide.
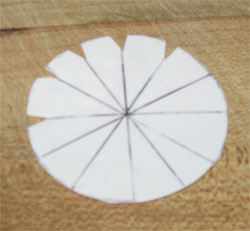
template with lines & slits

5.) Number the sections of your template, as if it were a clock. Carefully poke a hole in the center of the template. You can use the point of your compass or a sharp needle – your yarn needle isn’t sharp enough.
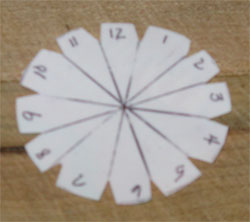
template numbered & slit

6.) Cut about 4 yards of yarn (I’m using and 8/4 cotton for my sample), and thread it through the yarn needle. Now thread it through the template, from the underside up to the side you’ve numbered. Leave a tail of about 4″. You’ll be working with a single strand of yarn from here through step 9.
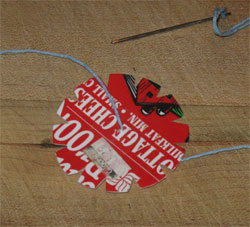
template threaded

7.) Your yarn is coming up through the center. (From here on when I refer to the slits, I’ll use the number to the right of the slit. Refer to the picture to see what I mean.) Now bring your yarn over the top of the template and through slit 12. Bring it behind the template and back to the front through slit 1. Carry it directly across the template to slit 7.
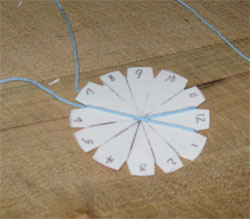
template with threading started

8.) Continue wrapping in this pattern: behind the template and up at 8, across to 2. Behind 2 to 3, up at 3, across to 9. Behind 9 to 10, up at 10, across to 4. Make one complete rotation around your template this way, making sure to cross the center of the template every time you go across the front.
template wrapped once

The back will look like this. (Actually, this is after mine is wrapped twice. I forgot to take a picture of the back earlier on in the process.)
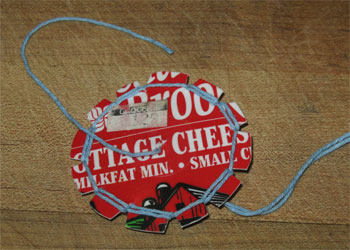
template, back view

9.) Go around again, following the same pattern with your yarn.
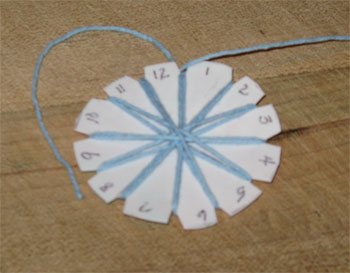
template wrapped twice

Now you have to make a decision. Should you go around a third time or not? The answer really depends on the size of your yarn and the size of your template. I decided to go around mine a third time, resulting in 3 threads in each of the slits of my template. These 3 threads form spokes.
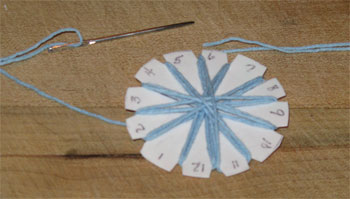
template wrapped three times

10.) Now you’ll start wrapping those yarn spokes. To begin, move your yarn needle to the center of the yarn, so that you will be working with a double strand of yarn from this point forward. If you followed the same pattern of making the spokes as I did, you’ll end up with your yarn coming up through slot 6. So go across the template to spoke 12. (If you didn’t end on 6, simply adjust by going directly across the template to the opposite number.) Go under spoke 12 with your needle and pull your doubled yarn through. Tuck the loose end under the center of your work.
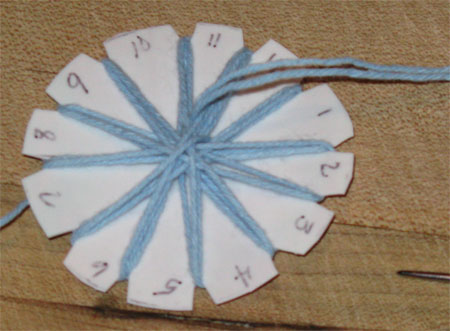
1st spoke wrapped

11.) Now go back under spoke 12 and also under spoke 11. The first pic below shows what your work will look like with 2 wraps done. The second pic below shows what your needle will be doing when it’s going under 2 spokes. Again, I forgot to take a picture of this step earlier. Be sure you’re going under all the threads in each spoke, not just one or two of them.
two spokes wrapped
needle position wrapping

12.) This is rather like an embroidery back stitch. Every time you’ll go back under the last spoke and under the next spoke. Keep doing this until you get all the way around, back to spoke 12. (You’ll have gone under both 1 and 12.)
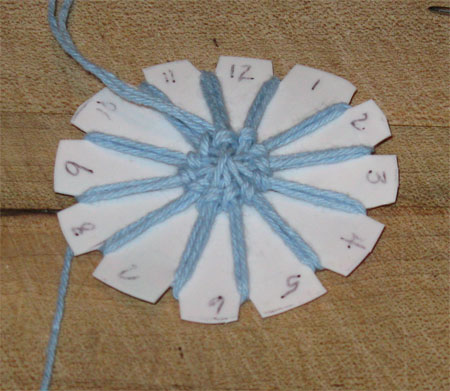
first round wrapped

13.) Go around again.
two rounds wrapped

14.) Keep going around until your template is pretty full. If you’re running out of yarn, don’t panic. Simply push the needle with the yarn on it down through the center hole of your template from front to back. Now thread more yarn onto your needle, and poke it up through the center from the bottom, keeping another tail on the backside. Be sure you’re working with your new thread doubled.
all wraps done

While you’re wrapping, watch out for these errors:
catching the yarn on the edge of the template…
yarn caught on edge

…or having one loop of your yarn too loose.
loose loop

15.) So now your spokes are all wrapped and your template is filled with yarn. It’s time to remove the template. One at a time, gently bend one edge of the template up a little bit and slip the yarn from the back of the template off.
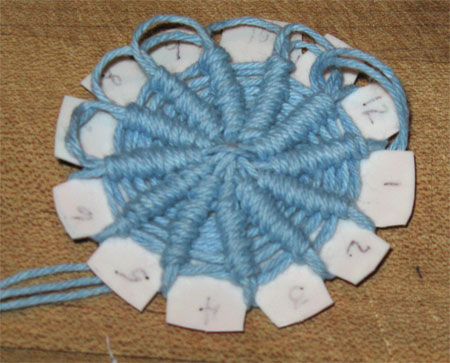
removing the template

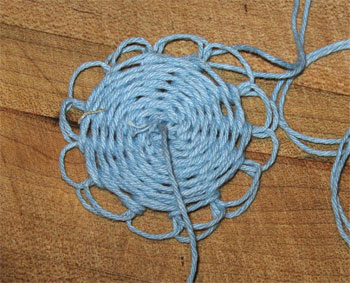
Keep going around the template until all your back loops are loose. Your button will have a daisy-like appearance at this point.
button daisy

16.) Now gently pull the button off the template, pulling your initial 4″ end of thread through the center hole.
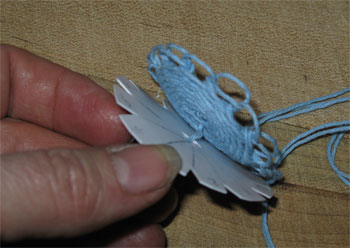
remove the template

Here’s a front and back shot of your button at this point.
button front
button back

17.) Now choose the button you’ll use for your base. It can be metal, plastic or wood. It can be a button with holes or a button with a shank. It can be old and ugly, as long as it’s not dirty or rusty. Your button should be at least half the size of your yarn daisy. Set the button aside for the moment.
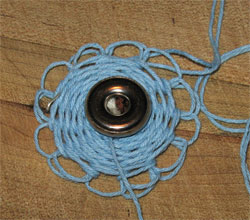
choose your button base

18.) Starting on the outer loop that’s closest to your needle, go down through 1 loop and up through the next. This is like an embroidery running stitch.
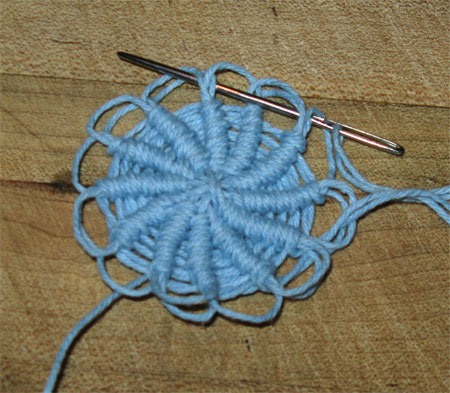
running through loops

19.) Go all the way round with those up and down running stitches till you get back to where you started. Don’t pull anything tight — keep it loose.
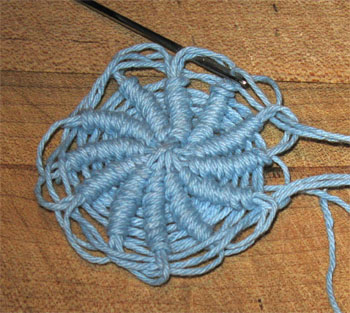
through all loops

20.) Now flip the yarn over, and hold the button in the middle of the back of the yarn daisy. Tuck that beginning 4″ tail under the button.
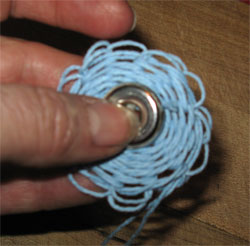
yarn daisy with button

21.) Here’s the exciting part. Gently pull on the yarn you threaded through those daisy loops, and your yarn button will start to take shape, forming over the base button.
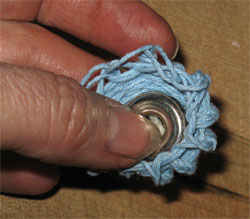
start gathering the button

Keep pulling until the yarn closed around the base button.
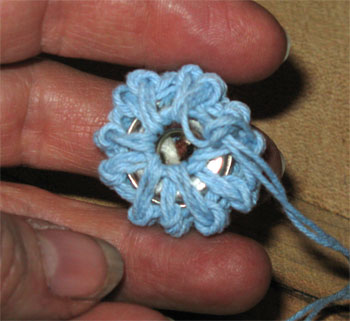
button gathered

Pull more until the yarn is quite snug. Finish the yarn by tying a knot. Leave the end.
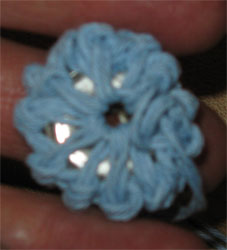
button snugged

Flip it over, make any adjustments you need to center everything, and YOU ARE DONE! You can use the remainder of the yarn to sew the button to your garment.
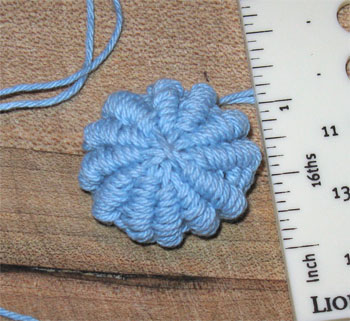
button done
Congratulations on your lovely yarn button!

You can see that using a 2 1/4″ template and a medium weight yarn, I ended up with a button that’s about 1″ in diameter.

Once you’ve got the hang of it, you can add your own touches to your button – changing colors, threading a few little beads in the center, whatever floats your boat.

If my instructions aren’t clear, or if you have any questions, don’t hesitate to ask. After you’ve made a button, I’d love to see a picture of it!

V7N logo

Join the V7N Challenge – learn something new every day