Archives

I’m weaving as fast as I can

Because I’d woven 34 towels, placemats, napkins, and runners since January 1 I was WAY far behind in my count on scarves & shawls. Like 2 dozen behind. And since I have no idea how well these linens will sell, that’s a rather nerve-racking place to be.

magic kingdom close

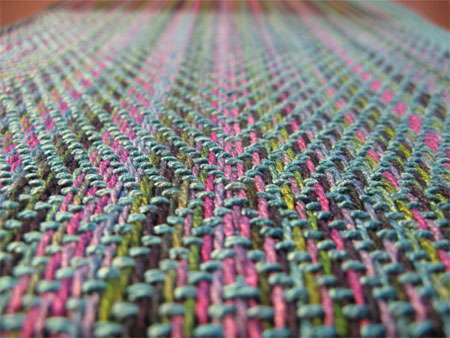
So now I’m weaving as fast as I can. For me that means I’m using some hand painted yarns because the colors do the show in them. I’ve learned that I need to keep my weave patterns simple, so little to no design time. Also, if I used bamboo-cotton, I wouldn’t need to twist the fringe…it’s fine just left plain. I started with some of Tammy‘s bamboo-cotton, in a colorway she calls Magic Kingdom.

I wove two with a solid azure weft and one with a solid forest weft.
handwoven bamboo cotton scarves, Magic Kingdom

When I wove the first azure scarf I thought it was too bright so wove the forest next. I thought it was too dark & went back to the azure. After wet finishing I like them both.

Back to the warping board!

Fancy Border Handwoven Towels

While I was weaving those lovely blue striped & plaid towels I had an idea for one more warp of towels I wanted to try – somewhat fancier towels, in a somewhat smaller size, white with a colored overshot border. More tea towels than dish towels.

For non-weavers, overshot is a traditional type of weaving, with a thicker colored weft making patterns and a thinner, often white, weft holding those pattern threads in place. Coverlets were typically woven in overshot. I’d seen some absolutely stunning weaving with overshot borders and wanted to do some, even though weaving with multiple shuttles isn’t my favorite thing to do.

I decided on a pattern, measured out 362 threads about 9 yards long, set up the loom, and was off. My warp & tabby weft were an 8/2 unmercerized cotton and I used a doubled 5/2 mercerized for the pattern weft. I wove the first end twice, and trust me when I tell you that unweaving overshot is NOT fun. So why did I do it twice? Because it appeared I’d made a weaving error. However it turned out I didn’t. I went very slowly the second time and it was exactly the same. It was apparently all about how the tabby fit – when it was a 1-3 tabby and when it was a 2-4. So I wove the rest of the towel and then did the pattern at the other end. Same thing. I cut them off the loom and wet finished them to see if the look changed. It didn’t. Here’s the finished towel showing both ends.
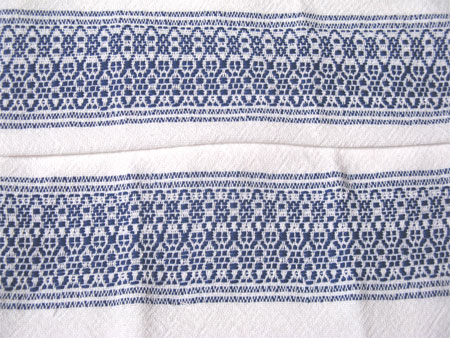
handwoven towels, overshot borders
Being as hung up on symmetry as I am, these towels just didn’t keep me happy. I also didn’t think that the doubled 5/2 weft was still thick enough to work — too much white in the pattern.

So it was back to the computer to redesign. What else could I do with the threading I’d chosen that would make me happy? I decided I’d stick with the doubled 5/2 for the pattern weft but do a regular twill weave so that the pattern would stand out more. The threading lent itself to many treadlings.
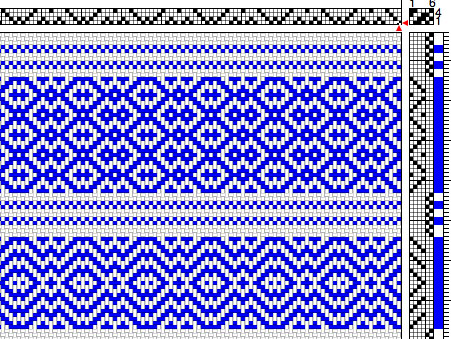
non-overshot towel draft

First I wove three towels with a navy weft. I like all 3 patterns, but figured not everyone wanted blue.
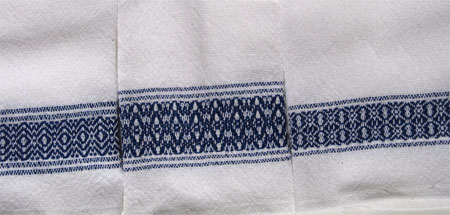
handwoven navy border towels

So next I did two more treadlings with a cranberry weft.
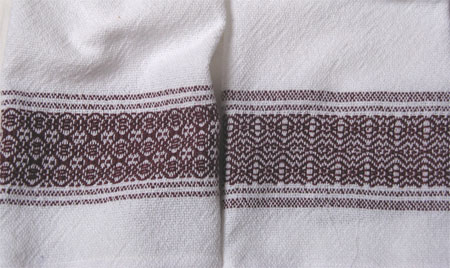
handwoven towels, cranberry border

Then I went with a lilac thick-thin cotton for two towels.
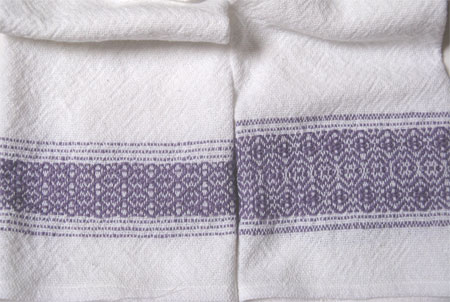
handwoven towels, lilac border

I finished out the warp with an interesting weft that’s a blend of cotton & linen.
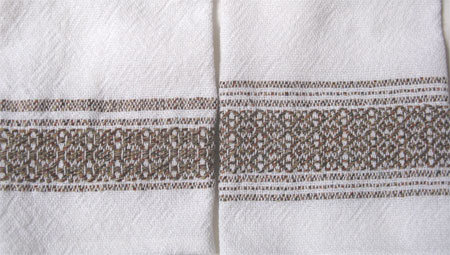
handwoven towels, tanbark border

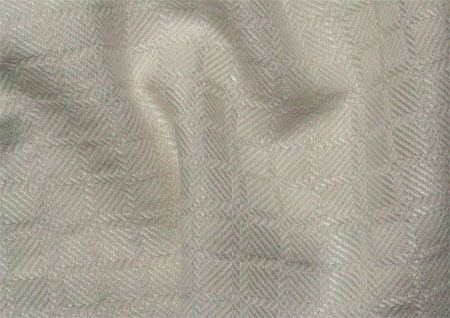
I find it interesting that the plain weave sections of these towels appear to have some type of pattern of their own. I don’t understand why they do, but it didn’t change in the wet finishing process.
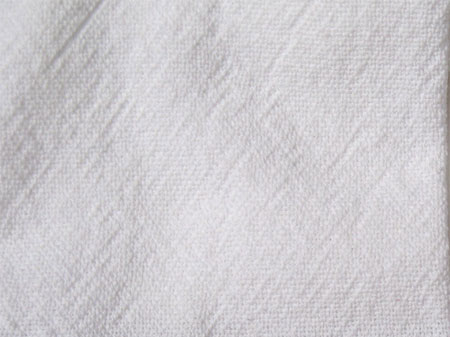
white pattern in towels

The first one in this batch, the overshot towel, will be the one that goes to my blogiversary giveaway winner. There are a few more hours to get your comments in before I pull the winning name tomorrow. Come back here & I’ll update the post with the winner’s name.
*******************************************
On Monday, known to some as Dyngus Day and to others as April Fool’s Day, I cut up paper into little pieces. I wrote each commenter’s name a piece, folded it in half, and dropped it into a brown paper bag. I shook the bag right side up, upside down, and sideways for about two minutes. Then I asked Red to draw out a single piece of paper, but that little dog would have none of it, so I did it myself. And the winner is……..drumroll………..Nancy!

I’m emailing you, Nancy, with the good news. Email me back with your mailing addy & I’ll send you the towel. CONGRATS!

Weaving Classic Towels

Back in January when I was working on that special order for placemats & napkins I just got the table linens bug. In the process of getting those woven I also wove 9 small towels on the sample warp that got rejected for the special order.

Then I wanted to make something bright & cheery, so wove 14 placemats & a runner in rainbows.

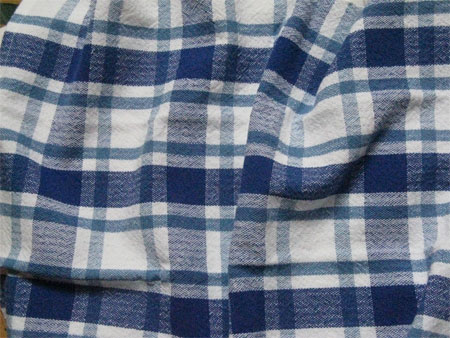
I still wasn’t done. Next I wanted to weave towels. Classic towels. I ordered some white, unmercerized cotton & used some of the blue I had from a few years ago. First I wove 4 plaid towels.
handwoven blue plaid towel

These are my absolute, all-time, for sure, FAVS! I love, love, LOVE these towels. They are really generously sized. I wasn’t thinking totally clearly when I was weaving and should have stopped a whole plaid pattern shorter. Too bad! Whoever buys these towels will be grateful for their size, I’m sure. Unfortunately making them so long means I only got four towels where I should have gotten five.

Although I love these towels (did I mention that already?) I don’t love working with three shuttles for the three warp colors. It really slows down my weaving process. Part of me thinks it’s because I don’t weave with multiple shuttles enough, most of me thinks it’s just because it’s a slower process.

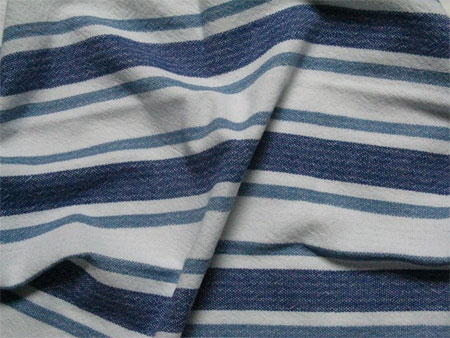
Anyway, for the second half of the warp I used a solid white weft…and made the towels a more ‘normal’ length. These striped towels are swell; if I hadn’t seen the plaid ones I’d think these were the nuts. (I’m sure no one uses that expression anymore!)
handwoven blue striped towel

My walking foot for the sewing machine made hemming these towels a dream. I’m in love with this little attachment.

I still wasn’t done with towels…you’ll see the last batch in the next post. A reminder, only a few days left to get in on my blogiversary giveaway – you’ll get one of my handwoven towels!

A New Twist

A woman I know did me a favor. I tried to return that favor with some weaving but she wouldn’t let me – she insisted on paying me.

There’s more than one way to skin a cat, you know. I just had to get more creative. I decided I’d make her a scarf and mail it to her, just like she mailed her check to me. I wanted to make something really classy and try a new technique.

I started by deciding on the weaving pattern – I would use the classic drall since I like it so much. I wanted a neutral so figured I’d use a combination of a shiny tencel and a matte unmercerized cotton, both in natural – undyed & unbleached.

The scarf came out lovely.
handwoven scarf - rayon & cotton drall
The contrast between the two threads worked just as I hoped it would.

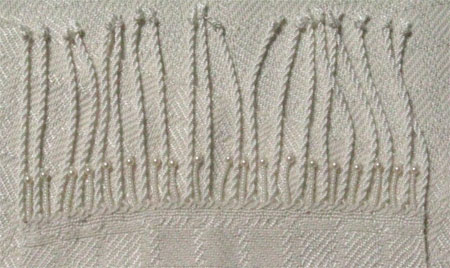
But the job wasn’t done yet. I wanted to take another lesson from Susan Harvey and make a beaded fringe. It took me longer than I thought it would – about 45 minutes per end – but I love the finished product.
handwoven scarf with beaded fringe

In fact, I’m going to hang on to this long enough to submit it as one of my annual work submissions for Roycrofters At Large Artisan status. I’m also going to do more of this on some of my scarves and shawls and see how my customers like them this summer.

An Interesting Find

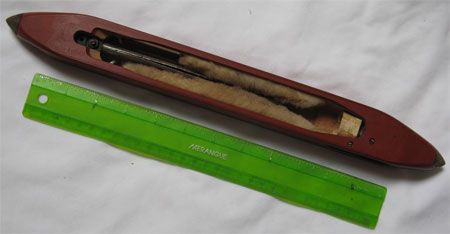
After looking at it multiple times over the past several months, today I bought a shuttle at a little antique store. It’s an end feed shuttle, which I’ve never used before, so I need help learning how to thread it and to identify what its various features might be. I’m guessing it was made for a fly shuttle, which I don’t own.

Here’s the entire shuttle, top shot. As you can see, it’s pretty long. Some of the metal parts (not stainless) are rusty, but I can clean them up.
shuttle top

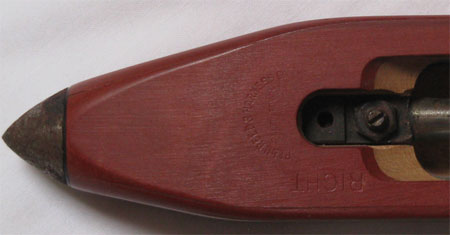
On the top is an arc-shaped stamp showing it was made by the Penn Reed & Harness Co. in Allentown, PA. Coincidentally I bought it in Allentown, NY. 🙂

You can also see that the word RIGHT is stamped on it. I assume that means that side should always be facing one way or the other. Which way would that be? Or is that only relevant if you’re using a fly shuttle?
shuttle top end

Here are shots of the top from each side. What’s that little clamped thread for?
shuttle side top1

Do I need to figure out how to go in and around each of these ‘pegs’ in the second photo?
shuttle side top2

Here’s a shot of the side near the bottom. Is this opening functional or just to reduce weight?
shuttle side bottom

Here’s an opening on the bottom. Again, is this opening functional or just to reduce weight?
shuttle bottom

FYI, the shuttle was in their 1/2 priced section so I only paid $5.00 for it. YAY!

I’ve posted these same photos & questions on Weavolution and am hopeful of getting answers there, but if you know about this and aren’t on Weavolution, please share your knowledge. Plus your comments will get you entered in my blogiversary giveaway.

UPDATE: The knowledgeable weavers over at Weavolution answered most of my questions, and an important one I didn’t even ask. That is given the amount that I weave I shouldn’t weave with this shuttle or I’ll seriously risk carpal tunnel problems. Guess I should have asked all this before I bought a similar shuttle with 12 pirns on ebay. 🙁 Anybody got a fly shuttle and want a few end feed shuttles cheaply? I need to buy another boat shuttle, but I want to feel it first instead of buying from a catalog.

On a completely different note, go here to read about my day in birdland.