
An apron isn’t just something you wear when you cook. In the weaving world, an apron is a piece of sturdy cloth that’s important to the functioning of your loom. A month ago I showed you the worn out, ripped apron on my Macomber. Instead of buying fabric and making new aprons, I took Theresa’s advice and ordered new aprons for both my Mac and my little counterbalance loom. They came in a few days ago, and today I made the time to install them. Sarah, a Macomber saleswoman, was helpful in giving me some phone advice.
Like most tasks, it starts with a bit of demo…removing the old apron.
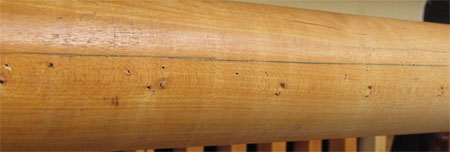
Once I got the old apron off I could see the pencil line that someone at the Macomber factory drew almost 60 years ago for straight apron placement.
In addition to the aprons, Macomber sent me a whole bunch of staples…the kind you hammer in place…to install them with. I’m a bit, um, hammer impaired. I’ve always had a difficult time hammering a nail straight. So with these fat, little staples it was a challenge for sure. This is not what you want to happen.
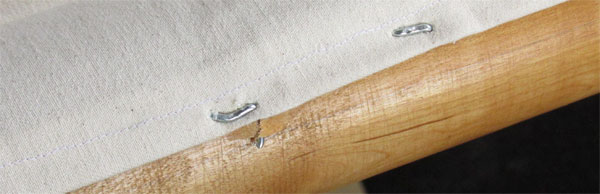
I ruined at least 10 staples on that first apron and beam. And I had 3 more aprons and beams to go. The instructions suggested I remove the beams to make the task easier, but I wasn’t prepared to do that for the back beam…it seemed a bit of a big deal.
Taking off the front beam is really easy so I did that. And installing the apron was MUCH easier. I ruined only 3 staples. I think I ruined a total of 3 staples on both beams of my counterbalance.
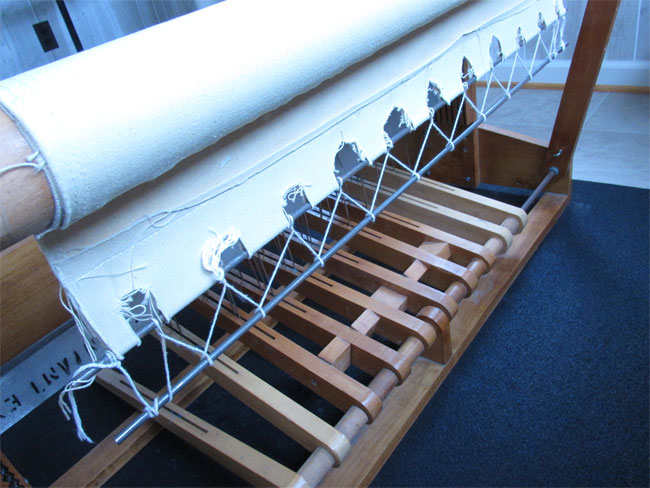
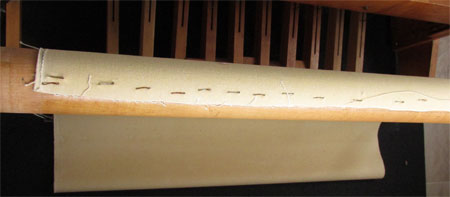
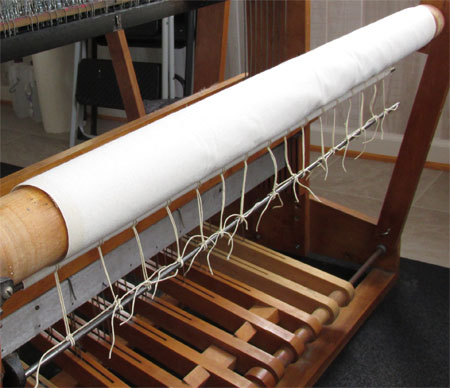
After the apron cloths were in place I inserted the first apron rod in the hem. Then I inserted the pre-cut waxed strings (not sure if they’re cotton or linen) into the pre-made holes in the apron.
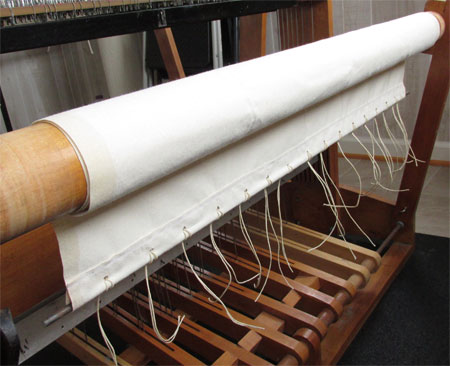
Finally I tied those strings onto the 2nd apron rod. I spent a bunch of time trying to get the tension the same across the width of the rod. I’m used to a continuous string and it’ll take a bit for me to be as comfortable with the individual strings.
After I’ve used the new aprons a few times, making any needed adjustments and/or tightening strings, I’ll trim off the ends of the knots so they’re not clumsy and in my way. But not yet.
I repeated this entire process with the front beam on the Mac and both the beams on the counterbalance.
Looking forward to my first use. Very soon, I think.
Hi, I am in the process of sewing new aprons for my loom. I am wondering how many, and how far apart should the holes be for the strings to go through?? Can I make these like button holes? Thank you, Jane
I don’t know if what I did was ‘correct’ Jane, but I made my holes approximately 2″ apart. They’re decidedly not evenly spaced, although that’s sort of what I was going for. My aprons are canvas, and I didn’t make buttonholes as the doubled fabric of the hems would have been too much for my sewing machine – I just poked my scissors through and haven’t had a problem with them. FYI I went back to a continuous string as that works better for me than the individual strings did.
Can you put an apron a Macomber that has strings. The front take up wheel or beam? is octagonal and not round. I prefer aprons. The strings are old and
need replaced. I had an apron on my Union loom. I like aprons for tension. It is a loom from the 60’s or earlier.
Thanks
I don’t know the answer, Judith. I’d think so, but I don’t have tons of experience. My Macomber had an apron already, it was just very old and were ripping. I’m sure that if you contact Macomber directly they can help you, and can walk you through the process if needed.
[…] in December when I got my new aprons I used the ties that Macomber sent me with them. I wasn’t sure if I liked them, and after […]
Well dang, I’m going to give that a go!
Just use a good sturdy string for those 3 ties, Theresa. Or doubled string. You don’t want those ties to break under strong tension. (I admit, I did have that happen a few times.)
Yes, Theresa, if I need to switch to a continuous string for the second rod I will.
I, too, use a third rod in the same way you do, except that I don’t use a continuous tie across the warp. I tie at the two ends and the center, and that seems to be sufficient…I’ve never had a problem with it.
Yep, getting those heavy staples in can be quite challenging, but I do love their aprons. Seems you could again do the continuous tie if the singles don’t work. I know some folks have a long series of strings on their Macs and no apron. Myself, I use a third bar on the back inserted into the front cross loop and then tie on with a continuous tie across the warp.
I’m betting you have something wonderful planned for the maiden apron warp! 🙂
Have a wonderful holiday.
Great explanation and images about apron installation Peg! Thanks for sharing your experience!y
You’ve been helpful once again, Sarah. I’ve counted on you since I bought my Mac…in pieces!