Archives

Back to Babies

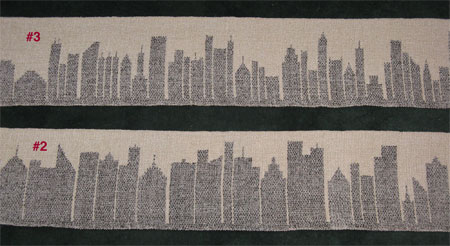
Once I got a good woven skyline for the juries, it was back to the orders I have for custom baby wraps. Next up was 2 friends, J & C, who wanted the same colors for their warp. One would have a black weft, one a navy, so the wraps would look very similar.

After I did all my math, and double-checked it to avoid my earlier debacle, I measured out a warp of 750 ends a bit over 14 1/2 yards long. J has been one of my testing moms and she wanted me to make their wraps even a bit thinner than sample #2, which I sett at 26 ends/inch. I went with 24 EPI for the majority of the wrap and 30 EPI for the selvedges.

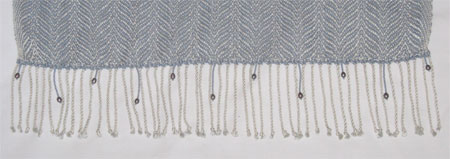
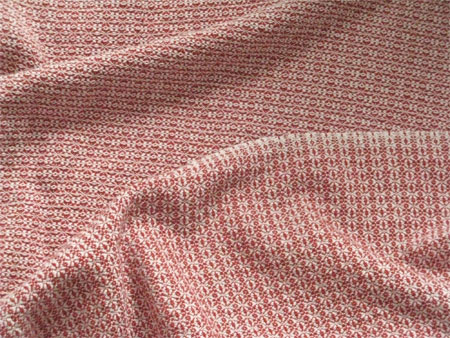
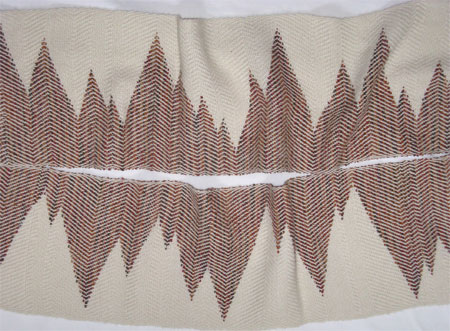
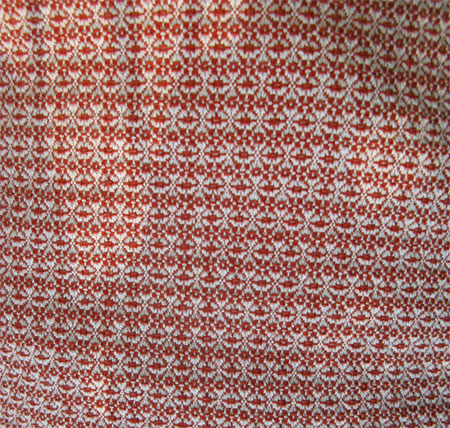
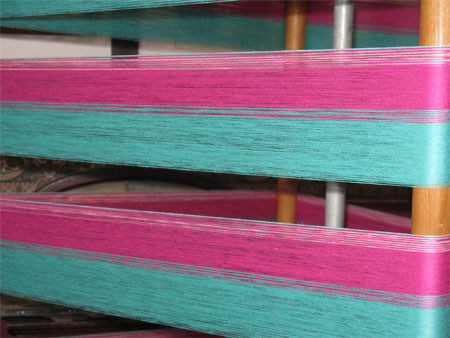
(Aside – this is the only photo that shows true colors, as it’s the only one with natural light. No matter how many photos I took near the loom and how many adjustments I made on my camera and in photoshop, I got bad coloration for the other photos.)

measuring part of Julienne's warp

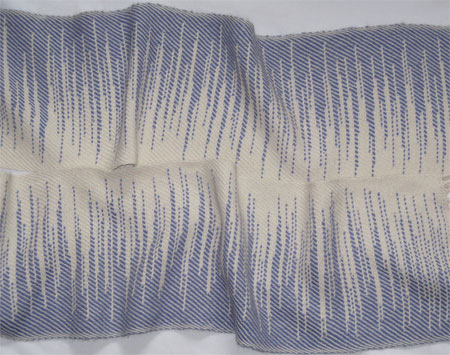
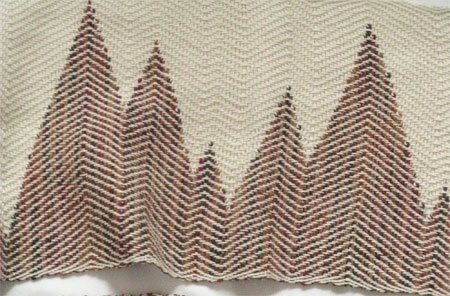
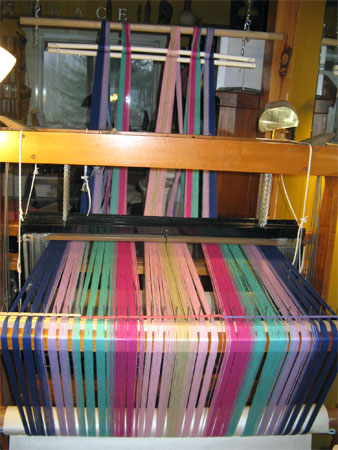
After getting it all measured it was over to the Macomber for beaming. I was cautiously trusting that the change in process I used for my 2nd sample wrap would remain good and that I would be able to beam this warp in a reasonable amount of time. Whew! It went smoothly and I got the warp beamed in about 1 1/4 hours. Here the warp in mid-beaming – you can see all the colors and the layout J & C chose.
beaming J's warp

I threaded heddles and reed, tied up the treadles, tied on the front apron, and set off weaving with the navy. No threading errors – YAY!

weaving J's baby wrap

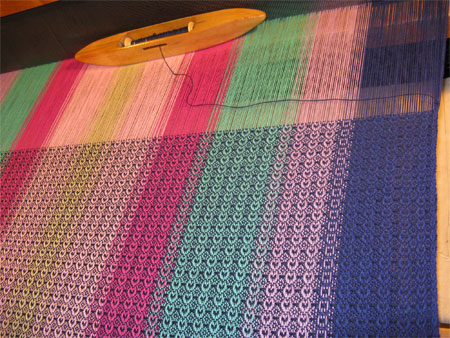
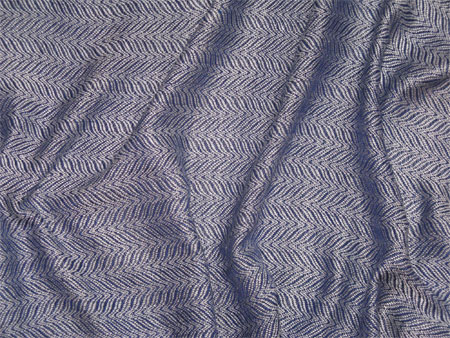
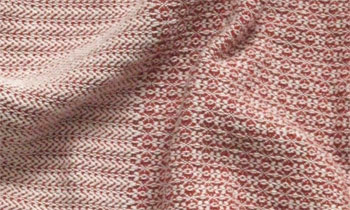
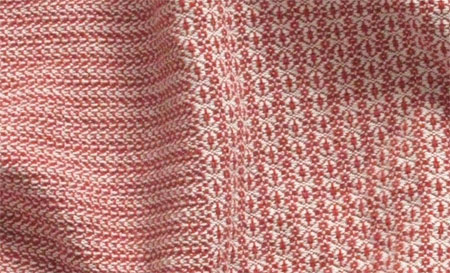
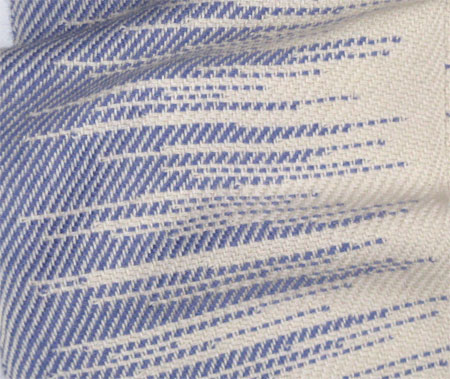
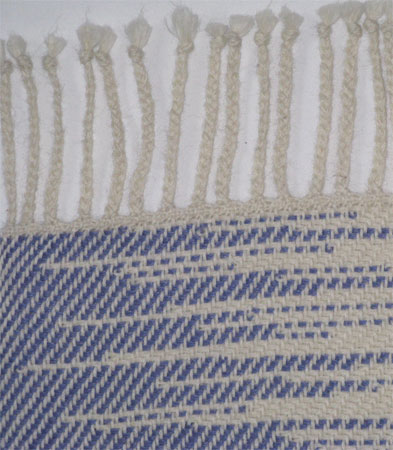
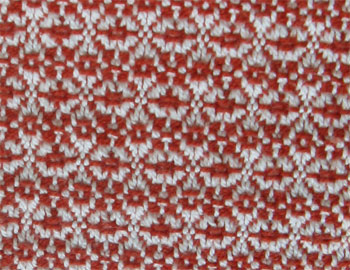
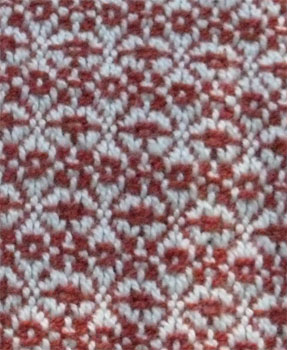
Now, after 2 long days at the loom plus a bit more, I have J’s wrap with the navy weft completely woven. I’ve just begun C’s wrap with the black weft. I have to say, it’s really hard to tell the difference between the two (navy below the light thread, black above) — at least under the compact fluorescent bulbs I use by my loom.
J & C's wraps on the loom

I’ll be working on C’s wrap more this weekend – maybe I’ll get it done on Monday. Then hemming, washing, drying, hard pressing, and labeling. With any luck they’ll be ready for the mail by the end of the week. 🙂

More Woven Skylines

I found enough off-white rayon chenille to warp my loom for 2 more clasped weft skyline scarves. My plan was to weave both as carefully as I could, and trust that one of them would be good enough for the jury.

I wove about 5″ on the first scarf and then wanted to do a peaked roof. After trying, I realized that I was likely to have the same issues as I did last time – an inability to get those roofs completely symmetrical. So I left the loom and sat in my chair for a few minutes to think about what might help me. I decided I’d make some peak templates with paper, some triangles of different sizes and angles. I’d pin them under the warp and use them as guides, just as I’d been taught in the pick up workshop.

Back to the loom with my paper cut outs. Nope. Pinning them under the warp doesn’t work – the rayon chenille is too fuzzy and densely sett for it to work.

Pin the paper on top of the warp…nope. Can’t see what I’m doing. Go back to the chair and think some more.

Aha! A brainstorm. Buy a washable fabric marking pen and draw on the warp! This takes a few days, since Joann Fabrics is about 40 minutes away from me and I don’t want to make a special trip just for the pen. So my loom sits and waits.

Once I get the pen I’m back at the loom. It is the best alternative, but less than perfect. The line it makes is thicker, and because of the chenille, fuzzier than I’d anticipated or wanted. Still, it’s much better than trying to count threads and/or follow a warp line across the weaving. So I finished weaving cityscape scarf #2.

Then I decided to go back to my computer for a few minutes and grab a few black & white graphic images of city skylines. I wanted to get Buffalo, the city where I lived from age 3 to 24, and another city that I thought was reasonable for my weaving purpose. As it happened, I picked Houston. I printed them both on an 8.5″ x 11″ sheet of paper and brought them back to the loom for inspiration.
skyline graphics

I decided that I wasn’t in love with the scale of my buildings in skyline #2. Like the buildings in skyline #1, they were wide and to my mind, not as aesthetically pleasing as they might be. So my buildings for skyline #3 would be narrower, and using Buffalo and Houston as inspirations, they would also have more variability in their height.

two-skyline-scarves

Making the building narrower would also make it easier to deal with the symmetry issue. I could much more easily count and/or follow a warp thread for a narrow building.

As I wove along, I was really happy with the scarf. Even though as I got near the end of the warp I wasn’t going to be able to make it as long as I usually do. I wasn’t at all concerned with that since it would definitely be long enough for the jury.

I finished, cut the scarves off the loom, took them upstairs and ran my lines of machine stitching, came back downstairs, and did the hand hemming while I watched the red carpet for the Screen Actors Guild.

This morning I tossed them in the washer and dryer. After the dryer I was very disheartened to see that one of the ends of scarf #3 was in trouble. I obviously had cut through the machine stitching before I hemmed. DAMN!! My experience told me that hemming rayon chenille after wet finishing was problematic.

Apprehensively I took out the hand hemming, took the scarf back upstairs, ran twolines of machine stitching, came back down, and cut off the bad part. I carefully hand hemmed again, and am happy with the result. YAY!!! This is a good scarf for the jury!

Handwoven Silk Shawls

The cayenne baby wrap finished the warp on the loom, leaving the Macomber empty. As planned, I focused on weaving pieces for my upcoming jurying. I’m getting anxious because time is ticking away and I don’t have the pieces I think will serve me well.

So I spent some time creating a draft for an 8-shaft undulating twill.

undulating twill draft

Then I measured 528 ends of 20/2 undyed silk a bit over 6 yards long and warped up the loom at 24EPI. For weft I wanted to use some 20/2 silk I’d dyed with indigo last year at my guild‘s natural dye workshop. I hand hemmed the beginning edge and set off weaving. I loved the way the weaving looked, and got a bit over a foot woven when I took a whole bunch of measurements and realized that I would not have enough yarn to complete the piece. Damn, damn, double damn! I couldn’t bear to waste the silk, either the undyed or the indigo dyed, so I painstakingly unwove 12+”. What a drag!

Then I tried four different colors of silk and silk-blend yarn I had. I wasn’t excited about any of them. Must be time to walk away from the loom for the night.

Next day after playing around some more I decided to use some custom-dyed 20/2 silk I had in Twilight blue. I knew the colors would have more contrast than I wanted, but I wasn’t getting anywhere, so I went for it. I tried and tried to get the colors accurate, but couldn’t really – it’s much more blue in real life.

handwoven cream & twilight blue silk shawl

I could tell even on the loom that the beat was not perfectly even, despite my best attempts, so I knew this wasn’t going to be a jury piece.

That meant I really needed the second shawl to be beautiful. I decided to use some 6/60 silk-linen yarn, since the color was similar to the natural-dyed indigo. This color is way off, too, showing much grayer than in real life.

handwoven cream & winter blue silk & linen shawl

I was happy with how it looked on the loom and hoped I would feel the same after wet finishing. I did, yay! This shawl will go to the jury.

I like both of the sides, where the cream makes the wavy lines and where the winter blue does. A bit closer to the real color, but still not right.
cream & blue silk, up & down

Then I got stalled on my next skyline and had to walk away from the loom on that, too. So while I was not weaving I decided to bead the ends of the shawl. I used pale blue seed beads and gray freshwater pearls. Here’s the entire width of the shawl.
beaded end of silk shawl

I did notice as I was beading that about 1/4″ of the width is pulled in a bit on the end, and I’m sure the jury will, too, but if that’s the only criticism on the piece, I’ll be okay with it.

Now for a closeup of the beading.

beaded end closeup

Back to the re-do of the skyline!

Twill Clasped Weft

I finally got some decent pictures of that cayenne baby wrap. Natural light is what it’s all about, for sure, especially with some colors and designs.

Here’s the wrap, showing both sides of it.
top & bottom of cayenne baby wrap

Again, I wove a different design on the ends. I’m less enthusiastic about these than I was about the zig zags on the green diamonds, but they’re okay.
end of baby wrap 'wrong' side

end of baby wrap 'right' side

Moving on, I mentioned that I wove two clasped weft scarves with a natural ecru baby alpaca weft. After I got the loom warped and wove a bit to look at things, I decided I liked the look of straight twill with the alpaca instead of tabby like the rayon chenille.

For the first scarf I paired the ecru with a periwinkle alpaca-silk weft, and clasped the weft at random points across the width of the scarf.

ecru periwinkle alpaca clasped weft scarf

Here’s a close up of it.
close up, alpaca & periwinkle clasped weft

I decided to actually braid the fringes of this scarf instead of my usual double twisting.
alpaca scarf fringe

After I’d woven this scarf I decided that I’d do another variation. This time I used a variegated unmercerized cotton. Using a point treadling, I created what I thought of as hills but my friend saw as trees. Either way, I’m happy with this scarf, too.
alpaca & cotton scarf

Here’s a close up of that one.
alpaca & cotton clasped weft close up

I’m off to those 8 harness silk shawls on the Macomber now.

Baby Wrap #4

I’ve gotten enough feedback from my first 2 testing mamas for sample wrap #2 that I was comfortable weaving the second wrap on that warp.

Here’s what the draft looked like in my computer software.
snowflake/flower draft

Although the color is way off, to me, the snowflake image is very clear, although some friends are sure it’s a flower. Whichever your preference, there’s a discrete visual image. Although I didn’t take pictures on the loom, I found the image just as distinct as I wove.

I finished the weaving, hemmed, and threw it in the washer & dryer. Here’s the best photo I could get (natural light not currently available).

cayenne baby wrap

The snowflakes/flowers have basically disappeared! Even in a closeup.
cayenne wrap, closeup

Now, I haven’t done the hard press yet, but I can’t imagine that it will make much of a difference. Those distinct snowflakes/flowers turned into blur of lines, a mush of color. Not what I had in mind at all!

To quote one of my male friends, I guess all I can say is, “Hunh!”

Only when I looked at the preview of this post could I identify at least one potential reason. The draft is very square: the draft image I showed you is 4 snowflakes high and wide. I went back to the photo of the wrap and cropped again to get an image that’s 4 snowflakes high and wide.

cayenne wrap closeup 4x4

As you can see, it’s far from square. Much higher than wide. I thought I had done a good job of calculating how much I needed to pack in that weft to get a square when the tension was released. Obviously not.

I’ll take this as another learning experience and move forward.

Once I can get some decent pix of this and a series of pix of sample wrap #1 & #2, I plan to put them all up for sale on my Etsy page. I’ll let you know when they’re there.

For now, I’ve beamed my Macomber with a silk warp that’s 6 yards long, 520 ends wide so I can weave 2 silk shawls that I hope will be good enough for the juries. Then I’ll return to baby wraps, getting down to business on the custom wrap orders I have.