Archives

From start to not-quite-done

After the Elmwood show, at which I had a great time and swell sales, I went on a dyeing jag. I had intended to show you the process from dyeing to completion, but time’s passing by, so I decided to show you what I’ve accomplished so far. With just the first yarn I dyed. (I dyed yarn for 2 additional projects as well.)

The first thing I dyed was some 8/2 tencel. I wound warp lengths for 3 handpainted bouts of 132 ends each, then I wound skeins for 2 more similar-sized bouts, planning to return to my warp vs. skein concept. Here’s what the finished warp chains and skeins looked like. I’m definitely happy with the dyeing, even though they weren’t the colors I had initially envisioned.

8-2 tencel hand dyed in gemtones

Then I measured out those skeins and beamed the yarn, with some black tencel to divide the sections.

beaming brilliant gemtones

Once beamed I sat down at my computer to determine what weave structure and pattern I wanted to use for these two lengths, both planned to be mobi shawls. I decided on an extended Ms and Ws threading and treadling, and used black tencel as weft for the first piece.

weaving brilliant gemtones with black weft

I wanted to change it up a bit for the second length, and after trying a few blues for weft, settled on a royal purple. I only had 20/2 in this color, so doubled it for the weft.

weaving brilliant gemtones with purple weft

At this point I really like both the black and the purple. We’ll see if I have a favorite when they are all done.

I may have some time tomorrow to sew the straight lines to secure the edges before wet finishing these two pieces. I doubt I’ll get much further than that in the process.

Oh yeah, I also made some yummy pear jam with some free pears, thanks to a generous person in my neighborhood. Never made pear jam before, and it is DELICIOUS! I brought a little half-pint jar to the person with the pear trees.

homemade pear jam

And I gave Jack a haircut with a pair of scissors. Some trimming/cleaning up has happened since this photo, but it’s still definitely done with scissors, not a hair trimmer thingy.

Jack's scissor cut

Last new pieces

This is a test. This is only a test. If this were a real emergency I’d have links to purchasing this wrap immediately. 😉

Seriously, I’d never taken a video of one of my pieces before, and I had no idea how this would work in my blog.

My preview shows me that it works fine, although you can tell I need more practice moving the camera.

Anyway, this is one of two of the last pieces to come off my loom before my show this weekend. All yarn is 8/2 tencel. The warp is a gradient from solid black to solid white. For this mobi wrap, the weft is a very pale silver-gray. The weave structure is a lace pattern I designed.

The second piece is a long vest. Because of the gradient in the warp, this isn’t my favorite piece…I’d prefer that both front pieces were the same. I do think that difference will really appeal to someone, though.

handwoven black & white long vest, front

handwoven black & white long vest, back

Because of the gradient, I had to do a few things differently than my previous long vest. I had to split the width for the front, of course, but couldn’t use the selvedges for the opening. In order to match the back, the selvedges had to be ‘wasted’ by sewing them into the side seams. That meant I had to find another way to finish the front.

After much pondering, I decided on double-fold bias tape. I chose a tape that’s 1/2″ wide, thinking it would look better than the tiny 1/4″ tape. I used a stitch in the ditch technique to avoid as much visible machine work as possible. Of course, despite my extensive pinning and slow stitching, there were some spots where the machine didn’t catch the back tape and I had to do some tiny hand stitches to secure it.

This vest actually required LOTS of hand work. After the shoulder and side seams were machine stitched, I hand hemmed all seam allowances down for a nice smooth finish. Then the stitching around the bias tape. Then the hand hemming. And all this came AFTER I had done the necessary needle weaving after the fabric came off the loom. I spent more time on this piece than I will be able to recoup in sale price. Sigh.

I’m off to pick up the rental van so I can load it up. Wish me luck this weekend!

That was fun!

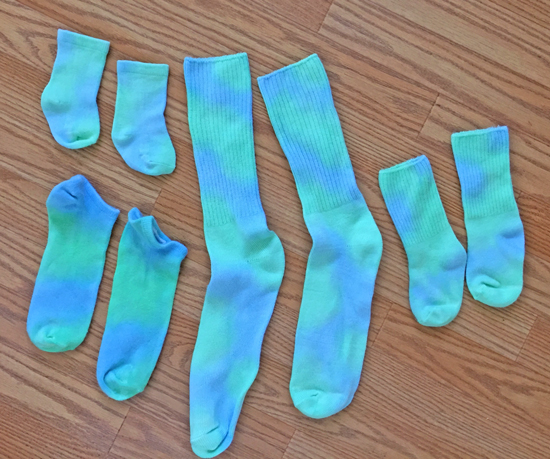
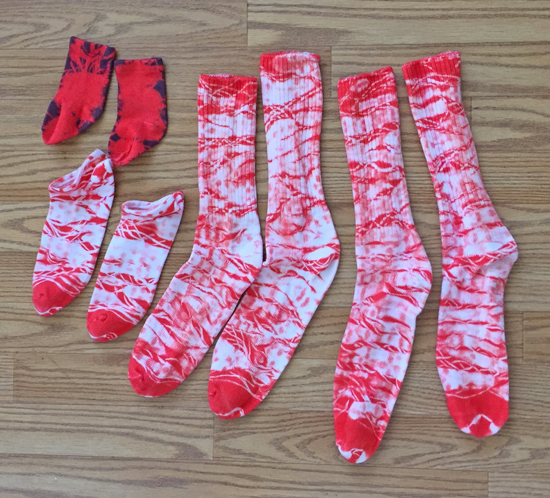
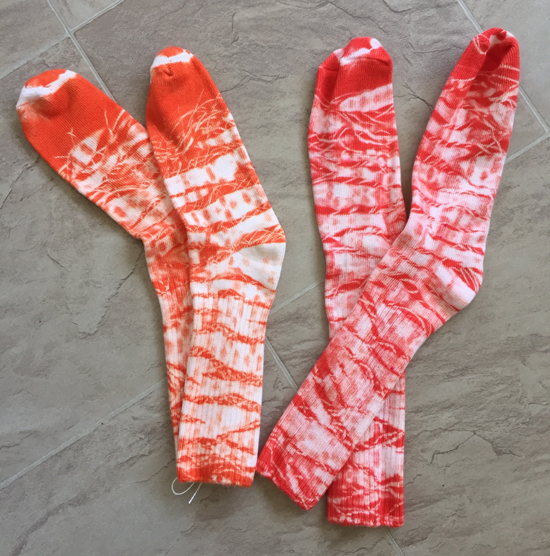
Before I get to the really fun stuff, I’m going to show you what I’ve dyed recently, in the order that I created it.

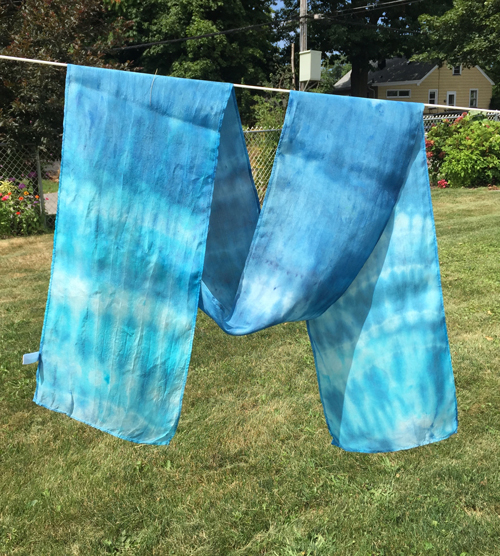
After dyeing all those socks, I wanted to dye some silk scarves I’d purchased specifically for this purpose, for the upcoming Elmwood Avenue Arts Festival. I’d had so much fun and success with the shibori-dyed socks, it only made sense to use the same strategy with the scarves. I chose a combination of turquoise and intense blue dye.

Here’s how they turned out.

silk after failed shibori dye

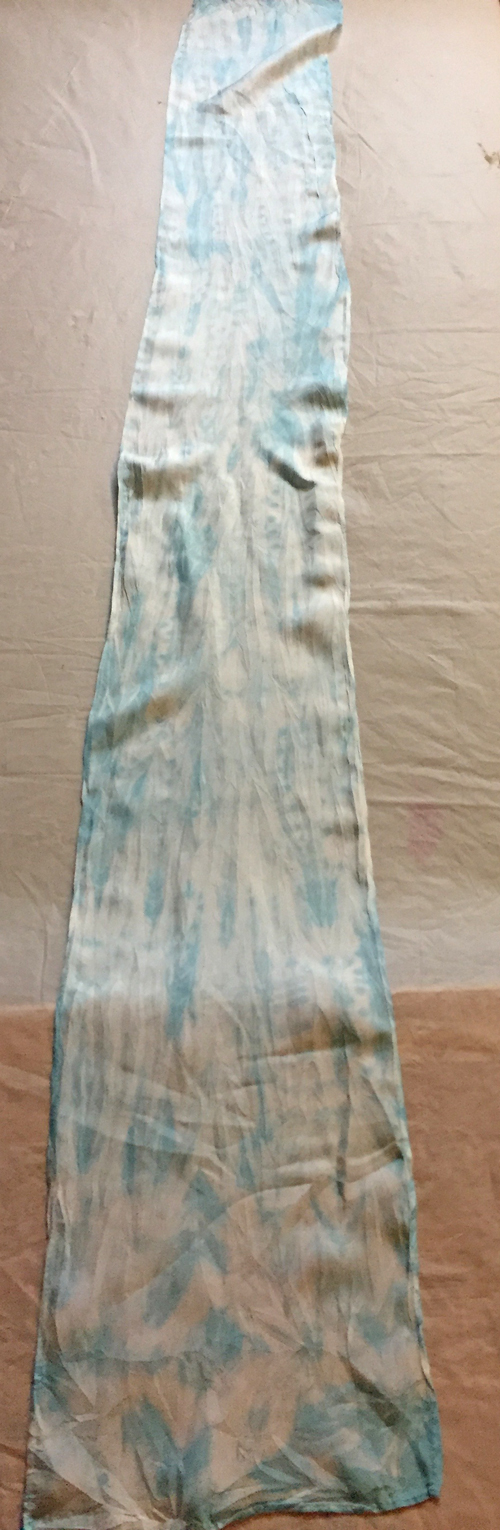
Remarkably pale and boring. I have some thoughts on why this is the case, but not the time to test and see if my thinking is correct. Here’s what I think anyway: when you immersion dye, you use a formula, based on the weight of the dry goods, to determine how much soda ash, salt, and dye powder to add to the dye bath. Because the silk scarves are SOOOO light, I think the formula didn’t work. Or maybe it was something else entirely.

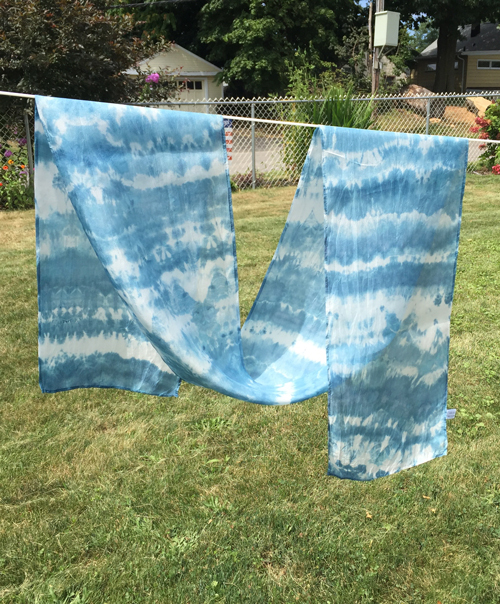
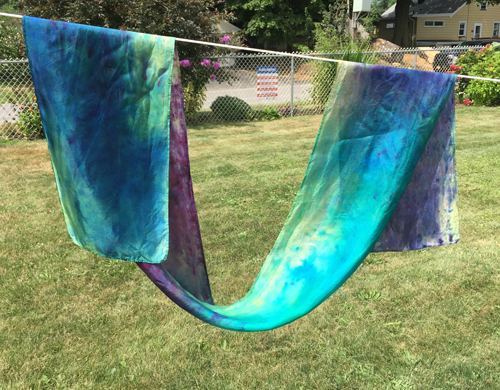
The only one that was successful was different. Instead of wrapping it on a cone, I ‘snake-wrapped’ one scarf, much like the snake-wrapped socks shown here. I took that snake-wrapped scarf out of the dye bath and put it in a container for ice dyeing, sprinkling navy dye over the ice. Here’s that final scarf. Reminiscent of indigo to me.

snake-wrapped then ice dyed silk scarf

Then a friend shared a video with me of a man folding and ice dyeing a wall hanging, putting the dye directly on the cloth and the ice on top of that. Well. This was an exercise in frustration. No possible way I could achieve anything faintly resembling his folding technique. I THINK that was because he was working with a fairly thick fabric, folded double, and I was working with a single layer of fine silk. (Note: for the next 4 scarves I gave them a soda ash bath before proceeding.)

Anyway, although I didn’t take a photo of it, I took the dry scarf and did tiny folds and tied the scarf about every 1.5″. Fold, tie, move down a bit; fold, tie, move down a bit; repeat. I put some turquoise and some intense blue dye directly on the scarf, then the ice on top. Here’s that scarf.

folded and ice dyed silk scarf

Then I thought, heck, I’m going to try another technique – blowing the dry dye powder onto a wet scarf. Bear in mind – THIS IS NOT RECOMMENDED with chemical dyes…you do NOT want to inhale the powder. I was very careful about that, but apparently not about what I was doing with the dye. Used way too much and the scarf is, IMHO, ugly. Maybe someone will like it.

silk scarf with blown on dye

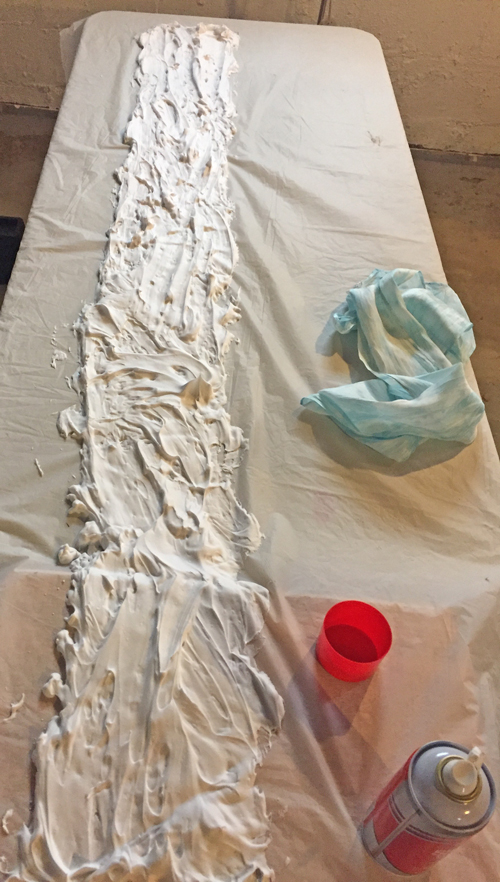
I had 2 more failed shibori scarves left. What the heck, try another new-to-me technique. Went to the dollar store and bought a can of shaving cream. I watched 2 different Youtube videos. The first one has the most info, sharing results from various methods. The second one showed a different way to mix the dyes, and I loved her results. I actually remembered to take process photos of this, so here we go.

First I laid out my plastic tablecloth and roughly marked the area the scarf would take up. Then I sprayed on the shaving cream and used my hand to spread it out, just filling up the space with no intention of making it smooth.

shaving cream spread on table

Then I mixed up 3 colors of dye – turquoise, grape, and lavender, with a tiny bit of urea water as usual. After that I added a bunch of shaving cream to each dye container. I then unceremoniously plopped the dyed shaving cream around on the plain shaving cream.

blobs of dye on shaving cream

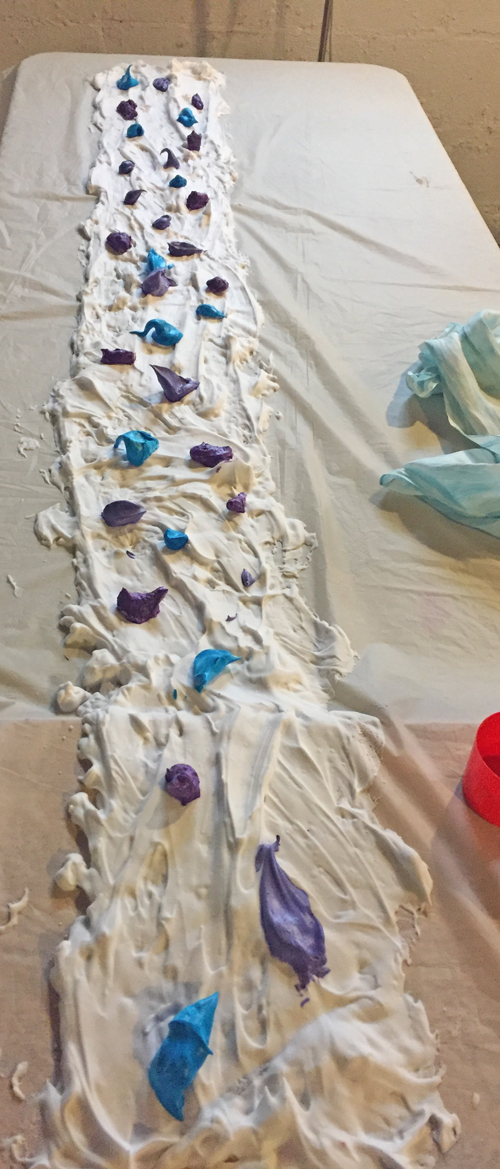
I used the back of a plastic spoon to marble the colors. (Note: I’ll take a bit more time and be more thoughtful with this step in the future.)

marbled shaving cream

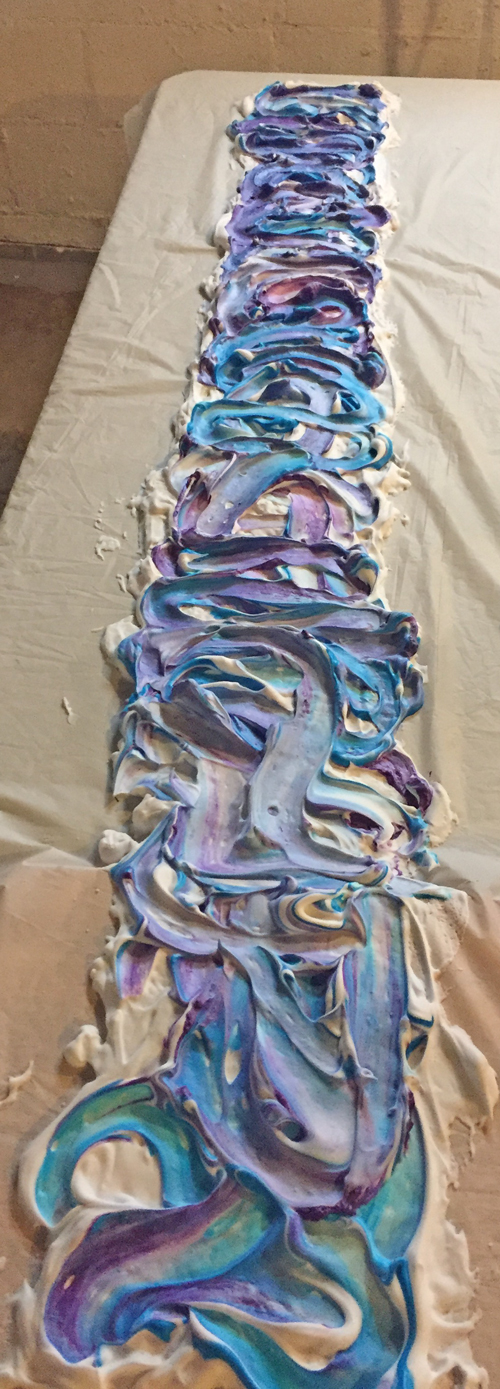
Then I laid the silk scarf on top, gently pressing it onto the shaving cream. It sat there for a few minutes to make sure the dye was absorbed.

silk scarf on top of marbled shaving cream

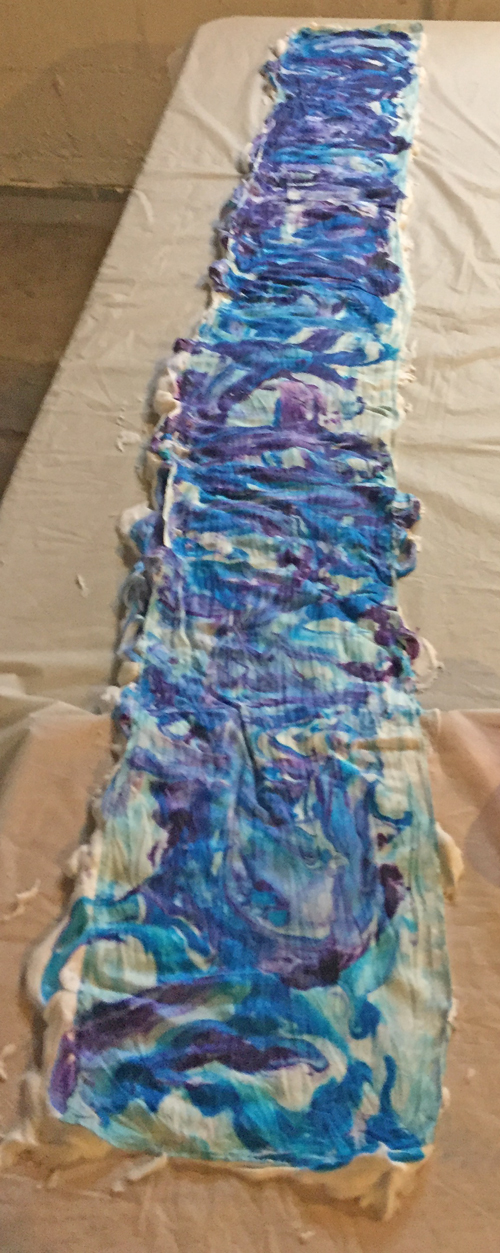
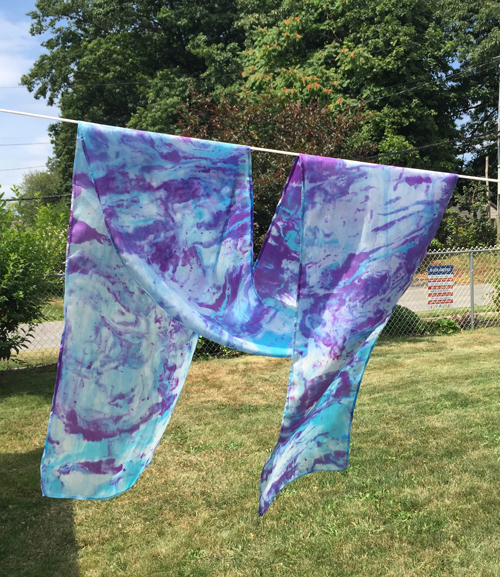
Then I carefully lifted it off and set it on the side of the table. VERY little shaving cream came with it, and since I had one more failed shibori scarf I put that on top of the same shaving cream and repeated the process.

marble dyed scarf 1

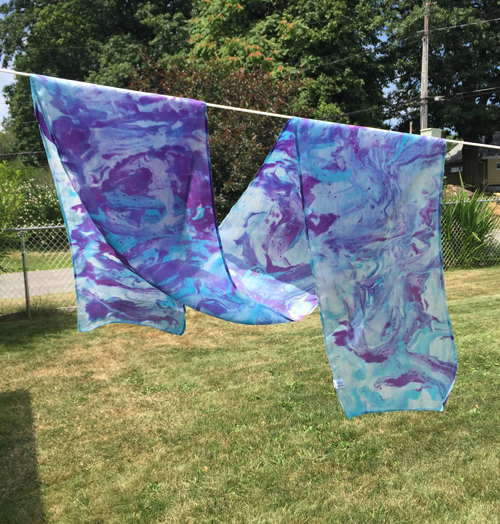
That second scarf is a little lighter, but still just fine.

marble dyed scarf 2

I still have to tag and label these, as well as the scarves I snow dyed in the winter.

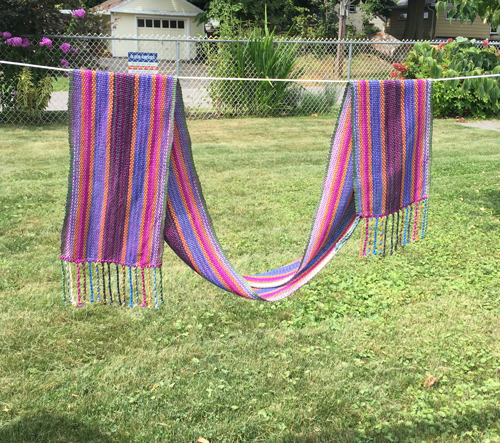
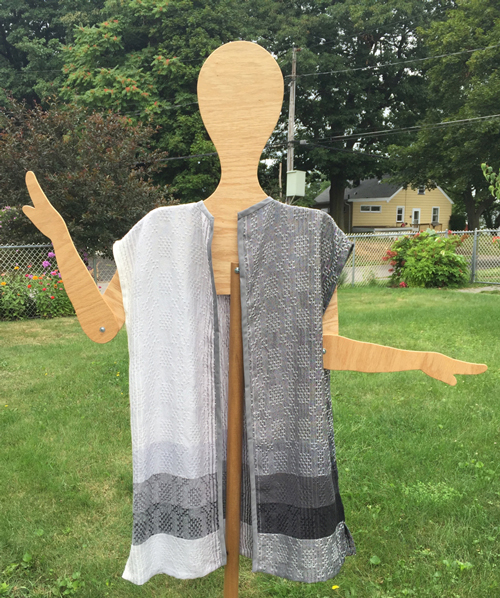
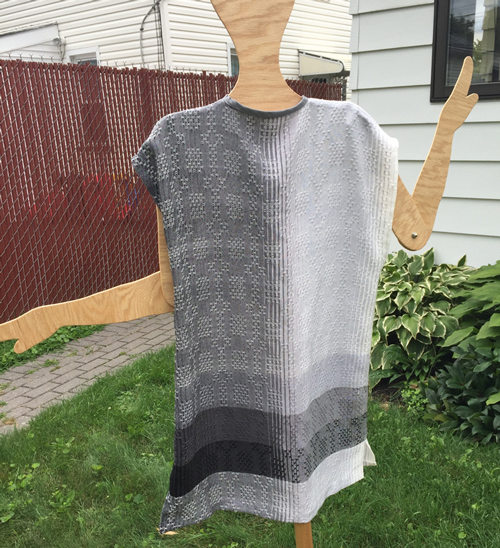
Oh, yeah. Here’s a scarf I wove on the rigid heddle, started at the Chautauqua show and finished when I came home. Warp is a combination of cotton and bamboo, weft is mercerized cotton.

multi-colored cotton and bamboo scarf

Slow progress

Life has been, um, interesting of late. Family has needed my attention, and since I moved to Rochester to be closer to them, I’m happy to be able to offer my assistance.

I have, however, not been able to weave much. Or dye much. Fortunately, that’s all okay. I was well prepared in advance of my July show, hoping to be ready for my late August show in Buffalo as well. And I am.

I just really wanted to make 1-2 more mobis. I got a red gradient tencel warp on the loom. Using the truism that black intensifies color, I wove the first length with a black tencel warp. Meh. That’s my reaction to the piece.

handwoven mobius wrap in reds and black

I definitely wanted to brighten it up for the second piece. I didn’t have enough a decent red in tencel, so went with a mercerized cotton. I also changed the tie up and treadling for this wrap. I really like it. This one is a bit heavier than the black because of the cotton, but that’s okay with me.

handwoven mobius in reds

Some national magazine that I don’t get but occasionally see at a doctor’s office or similar has what I think is a regular feature called something like, ‘who wears it better?’ So here are Dolly (on the left) and Lady Jane (on the right). Who wears it better? In my head it’s not a fair contest since I am so much fonder of the red mobi, but maybe you won’t feel the same.

2 handwoven mobius in reds

FYI – because I know you all want to know every detail of my business (LOL) – Lady Jane won’t be invited to any future outdoor shows. She was a bit of a problem at Chautauqua in July. It didn’t take much of a breeze for her to wobble and threaten to crash to the ground. I could, theoretically, put a bunch of weight on her base, but I won’t; at least not in August. In addition to the breeze issue, she takes up a lot of room in the booth. And since I can bring my shibori-dyed socks and scarves, I’ll have plenty of things to display beyond my handwoven items. On Monday I tagged and labelled all my dyed socks, including those ice-dyed socks I did last winter. Unbelievably I have 39 pairs of socks. 39 pairs! Certainly a sufficiency of socks. I have some display ideas in my head, but won’t know how it’ll actually work till I’m at the Elmwood Avenue Arts Festival on August 24 & 25.

2 more batches of socks

I like the socks I hand painted in soft green and blue, although to my mind they are not as unique or as fun as the shibori socks.

hand painted blue and green socks

For this next batch of socks I wanted red. But I got dark orange. Unlike 99% of my photos of red things, these socks look more red in the photo than they do in real life.

not-red shibori dyed socks

I’ve exchanged emails with the dye company. Understandably, their dyes can be expected to hold their color for 2 years. Mine are 3 years old. And in my experience reds are problematic colors anyway. I’ve ordered new red dyes.

Here’s a pair of the orange I previously dyed and the not-red ones for comparison.

comparison of orange and not-red socks

So here’s a question for my readers: should I –

(1) leave as is with lots of socks very close in color?
(2) overdye the not-red with yellow?
(3) overdye the not-red with the new red?
(4) attempt to create a burgundy with the new dyes and overdye with that?

I’d love your input!