
I have been busy. Here’s what I’ve been up to, in chronological order.
Almost 2 years ago I paid someone to strip wallpaper and paint my kitchen. He did a great job. You can see the before and after pics here. I really like the light green on the top portion of the wall, but that blue on the bottom? When I walked into the room partially painted I was taken aback. I made him show me the paint chip I’d chosen and the paint we ended up with to make sure they matched. I figured I’d get used to it.
But 2 years later? Nope. That blue is still way too blue. I thought there was probably enough of the mint green in the can to paint over the blue and make the walls all one color. Now that there was no pressure to produce weaving, it was time to get to this.
So first I had to move everything – furniture and appliances – into the center of the room.
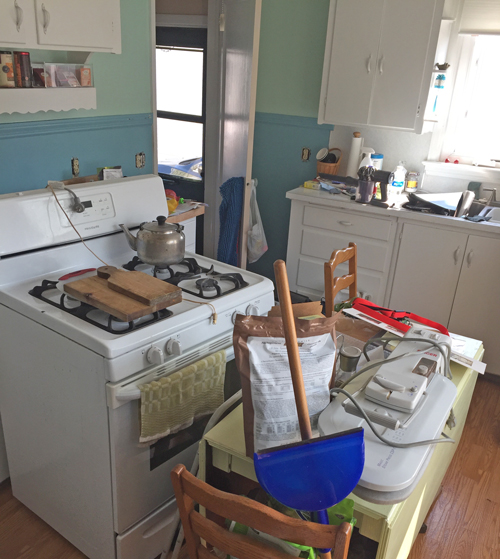
You know how that job you’ve been putting off can often make you wonder what took you so long when you jump in and do it? This wasn’t like that. 🙁 The opposite. Maneuvering around everything, scooting along the floor, getting up and down a lot, this took longer than I’d anticipated. But at the end of the day everything was back where it belonged and the job was done.

I’m much happier. Although now my sort-of-chartreuse table doesn’t look good at all with the green walls. I’m thinking I might paint the table that blue as an accent. But I don’t know if I’ll like that, either. Actually the blue of my chambray shirt looks pretty good with the walls, doesn’t it? Whatever color paint I choose for the table, it’ll have to be clear-coated after painting to stand up to daily use. This isn’t something I’m going to do immediately.
——————————————
Since I was on a roll I decided to move into the living room. The house had mini blinds on all the windows when I got here. Although I didn’t remove them in the kitchen, I put up those cafe curtains I’d woven so never use the mini blinds. I replaced the blinds in my bedroom with cellular shades and hung the curtains I’d woven in there, too.
But five years later the ones in the living room remained. It was time to do something about that. I decided to make some Roman shades. I gave some thought to what color and pattern I might want, and tempered by my kitchen experience decided I’d best not go with my usual too-bright/too-busy thought. Go with something neutral. Although I’d intended to buy drapery fabric, Joann was having a huge sale on their outdoor fabric as it’s the end of the season, so I bought that at 70% off and went to town.
Hmmm. That’s not right. In reality I struggled through following the online directions to turn my mini blinds into Roman shades. The first window probably took me 4 hours. I was DONE for the day at the end of that. The next day I spent probably 5 hours to make the other two shades.
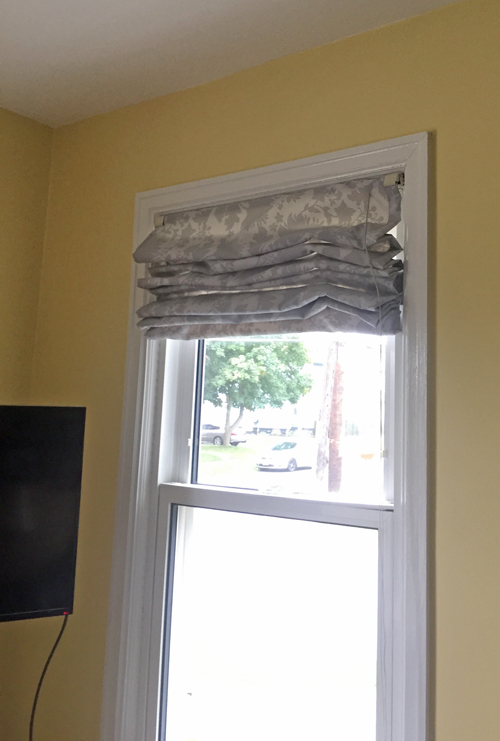
I’m reasonably happy with them. The two side windows, 27″ wide, raise and lower fairly smoothly. The front window, 35″ wide, raises well, but I have to play with it a bunch to get it to lower. I believe it’s a matter of weight. All those vinyl slats that I removed weighed a LOT more than the fabric does, and I think the mechanism needed that weight to work smoothly. I’ve considered trying to figure out how to add some weight to the bottom of the shade, but haven’t done anything about it.
——————————————
As always, I have socks on my needles. It’s what I do in the evening while I’m vegging out in front of the TV. A friend gave me a very lovely gift of a kit that contained undyed sock yarn and the dyes to make them colorful. I finished knitting them a few days ago. All ready for the cooler temps. I opted for a simple lace pattern and like the way that worked up and how it looks. (Sorry for the blurriness.)

——————————————
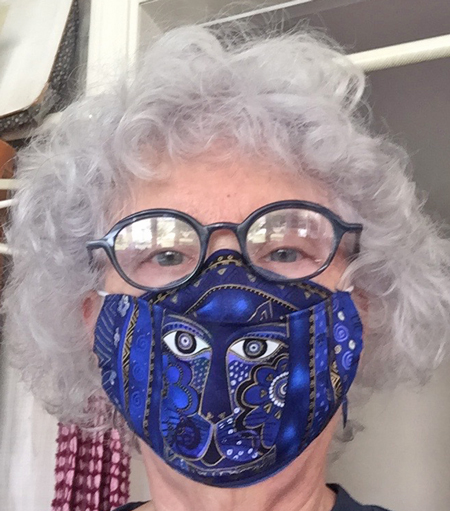
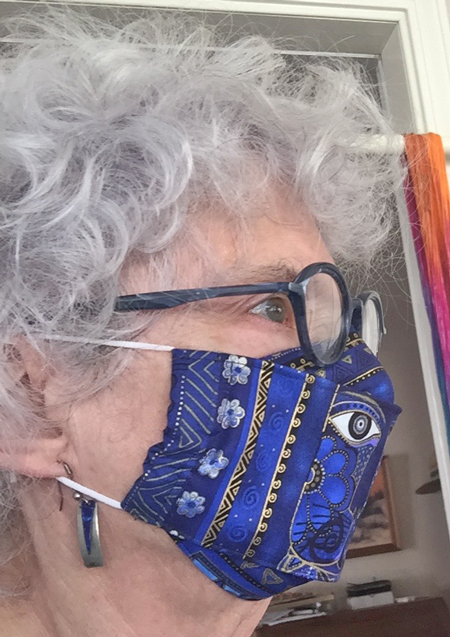
I found an interesting new pattern for face masks. It’s called a 3D mask, and the design does hold it away from your mouth, making it more comfortable. The pattern and directions are free from See Kate Sew. I made myself one in Adult Medium and tested it out at the grocery store. The top part had a real tendency to ride up under my eyes, so that wouldn’t do. I picked up several small pieces of fabric and made myself another in Adult Small. Much better.
I admit I had to laugh when I saw the photo. I like Laurel Burch’s designs, but hadn’t considered that the part of the fabric that I’d chosen would make it look like I had 4 eyes. Or 6 if you count my glasses. 😀
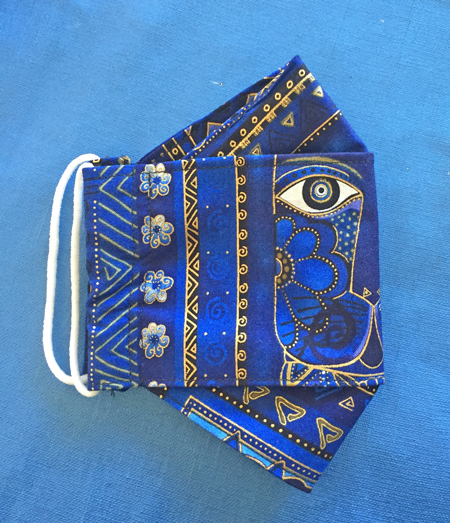
Here’s what it looks like flat.
——————————————
In between all of that I did manage to get the remaining needed fabric woven for my tunic. So that’s up next. Or maybe I’ll paint the bathroom next. And there’s all the fall garden cleanup to do. I am never at a loss for projects. 🙂
WOW!!
When does ENOUGH projects become too many? I don’t think you’ll ever know! You keep moving on from one to the next!
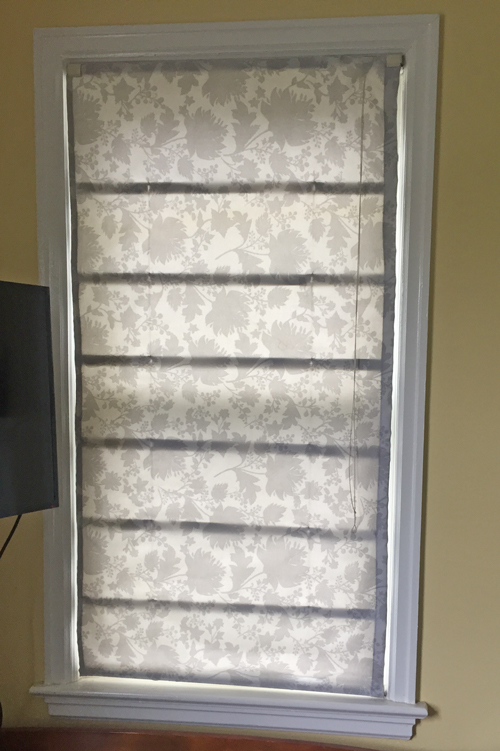
The fabric for the shades was a VERY good choice. I really like the way the light comes through it. You’re right above the green walls. They do look much better with the same color above and below the chair rail.
Is that the maple table? How did you get paint to stick to it?
When is enough too many? When I can’t accomplish them, I guess. Or when they completely overwhelm me. But, as with the kitchen re-paint, if I just wait a few years, they all get done. 😀
I don’t know what kind of wood the table is, but it is NOT the old dining room table. I bought this table very used when I first arrived in Rochester, and the top was in very poor condition or I never would have painted it. How did I get the paint to stick? Sand and prime. Twice. Cure. Paint and cure. Twice. Seal with polyurethane. I only know all that because I went back and read my FOUR blog posts about the project. 🙂
Love your new projects, the green walls look great, roman shades are wonderful, especially using the blinds to make them. Very fun mask.
Thanks, Cindie. I don’t know that I would recommend making the Roman shades from the existing blinds. The primary benefit that I see is that the blind’s raising/lowering mechanism is used. If you make from scratch you have to put a cleat in the window frame to tie the cord to, and I didn’t want to do this. Or to figure out how to hang the whole thing. That being said, it has it’s issues.