Archives

Met the goal

EB's warp, 4 bouts

As planned, I got all four bouts of EB’s warp measured on Thursday, plus spent a few hours with my grandson. We stuck googly eyes on lots of things.
googly CD player

googly fireplace

googly dehumidifier

googly photo

Yesterday I got the warp beamed.
beaming EB's warp

Then I got the heddles and reed threaded. Today is supposed to be so beautiful outside that I may not spend much time at the loom. Especially since the forecast calls for rain for the next several days. I probably need to get some sunshine on my face, and maybe even do an early garden cleanup.

Curtains and more

bird collage

I rarely get on-the-spot-inspired to make a piece of 2-dimensional art. Saturday was different. I walked into the Rochester Central Library to their monthly Artist At Work series. March’s artists were husband and wife Don & Cheryl Olney. I’ve talked with Cheryl at any number of art shows. Her bright, cheerful work in wood and human forms is so engaging that you can’t just walk by – you have to at least stop and smile, if not chat with Cheryl.

Hubby Don is also a woodworker, and together they brought small mat boards and tons of assorted materials and encouraged everyone to create. This was only the 3rd Artist At Work program I’ve been to, but it was far and away the most engaging. Every single person there made something. I think mine is a bird. But you may see something different in it.

I’ve been busy working on my COE materials, too. I did a new color wheel because I wasn’t happy with the first one. I wrote the first draft of 4-1/2 pages of definitions. I planned, threaded, and wove my first sample for them, and I’m not yet positive it’s good enough. I’ll know after the wet finishing. All of this took far more time than I thought it would.

bedroom curtains

Meanwhile, I finished weaving my bedroom curtains. Are they perfect? No. Would I do it differently next time? Yes. Am I satisfied with them? Yes. I might have woven ties for them, but I didn’t think of it. So I made nice, big bows out of tulle. I like them okay. The colors in the above photo are pretty much right on, unlike most of my other photos of the curtains.

curtains closeup

Isn’t that closeup cool? You can see all the thread interlacements. You can also see that this particular ‘square’ isn’t square at all.

Finally, I finished the planning with 3 moms for 4 more custom baby wraps. the first warp to go on the loom is for EB. She’s getting both wraps from this warp. Tomorrow I’ll be winding her warp, and plan to get all 4 bouts measured. Here are her yarns. The warp is brique, saumon, melon, and honey (shown in the middle of the photo). Weft yarns are peche (top) and peaches ‘n cream 10/2 mercerized cotton (bottom). I think they’re yummy! It will be interesting for both mom and me to see the difference in look and feel between 8/2 unmercerized and 10/2 mercerized cotton wefts.

EB's yarns

More tools

my temple

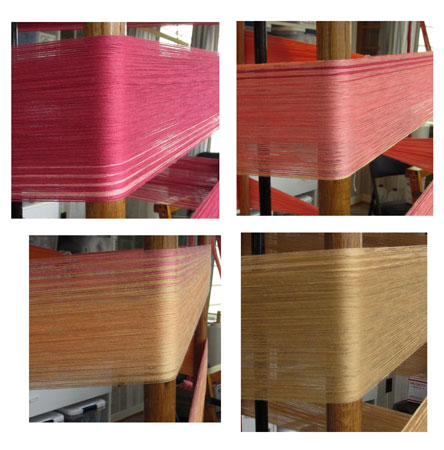
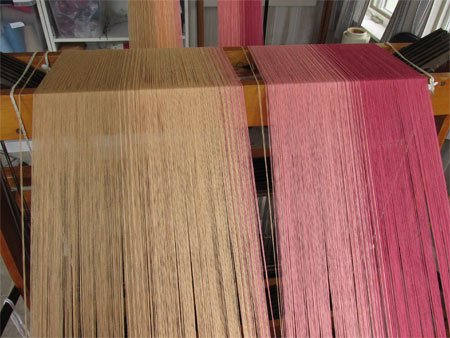
I admit it. I don’t usually use a temple. (It’s a tool designed to pull the selvedges [sides] of the weaving out toward the sides of the loom.) I know plenty of weavers use them every single time. Me? I use one rarely. Mostly when I’m getting too much draw in (when the weft threads pull too much on the end warp threads, making the actual width of the weaving less than the width in the reed/beater bar) and breaking threads near the edges.

I don’t own a ‘real’ temple, one manufactured specifically for this purpose, generally made of wood, and adjustable for different weaving widths. So when I need one I use a quick homemade version using alligator clips, fishing line, and washers. I’ve used those alligator clips on 30/2 silk with no ill effects. Usually I simply lay that fishing line over the side bar of my loom, but for the curtains, since they are almost as wide as my loom, that made the temple pull the fabric down too much as opposed to just out.

So I tied fishing line onto the back beam, then hooked it to eye hooks already in my front beam using paper clips. (I didn’t want to tie it to the front beam since it folds down to the floor when I’m threading and I’d have to cut the fishing line each time.) Initially I used a large paper clip, but as the fishing line stretched I switched to a smaller clip to take up more slack.

Where do the washers come in? I hang them from a paper clip tied to the alligator clip. Usually 3 washers does the trick. But not this time. I needed far more weight. But how much?

temple weights

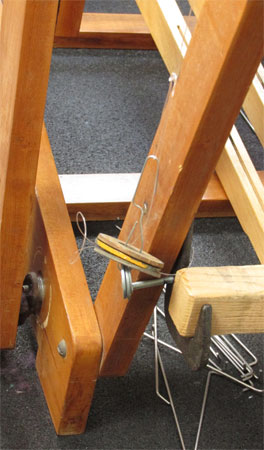
I found the LeClerc Clip Temple, and saw that their weights range from .4 pounds to 1.5 pounds. My 3 washers only weighed about 2 ounces total so I needed to add quite a bit. I’d recently found some really big, heavy washers on my walks (wonder who lost them from what…they weren’t all in the same place or on the same day) so added 3 of them to each side. That seemed to be a good amount.

My temples cost me….ummmm…virtually nothing. I had all the supplies hanging around the house. LeClerc’s Clip Temple? A whopping $83 plus shipping! Now obviously they’re not giving you rusty bits of metal and bent paper clips, but hey. $00 vs. $83? I’ll pick free and a bit of rust any day.

Back in December when I got my new aprons I used the ties that Macomber sent me with them. I wasn’t sure if I liked them, and after living with them for a few warps decided I didn’t. I went to the craft store around the corner from me and bought some waxed cotton string and went with the type of continuous apron strings I’d used before.

alternate apron ties

I do like this configuration better, but I didn’t like working with the waxed string. It’s too ‘sticky’ and doesn’t adjust across the width as I’d like it to. One of these days I’ll remember to buy some strong cotton string at either the hardware or craft store and re-do them.

Back when I lived in the sticks I had hardwood floors. I loved them. I felt badly that both of my looms – the little counterbalance and the Macomber – damaged the finish on those floors. I most decidedly did NOT want that to happen in my lovely new house, so I had to come up with something to put under the looms to protect the floors. Rugs in a weaving studio tend to be a bit of a pain and/or problem because weaving makes a mess…threads and fiber dust.

It was easy enough to figure out that a home gym mat would be good under the counterbalance. The loom is small and lightweight and would fit well on a standard sized mat – $42.

home gym mat to loom mat

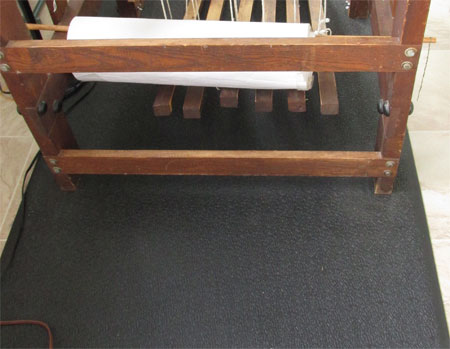
But I the Macomber presented a real challenge. First of all was the weight—that loom is heavy and I believed it would compress the type of mat I got for the counterbalance immediately so that there would not be any real floor protection. Then there was the size. The Mac would need two mats. Two very thick mats. The dollar signs were adding quickly. I don’t remember exactly what I was looking at, but I think it was in the neighborhood of $225. Then one day I was reading Amazon reviews for thick mats and someone wrote a really helpful comment – instead of spending major dollars for this mat, the writer bought a horse mat. WHAT?!

horse mat to loom mat

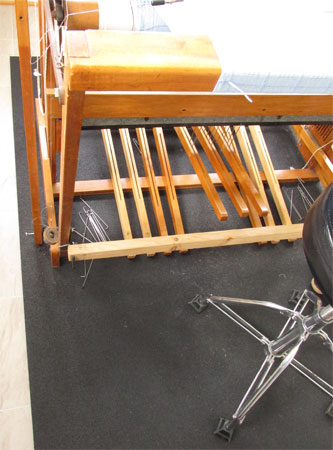
I checked with my local Tractor Supply store. They carried mat designed for horse and cow stalls in a few different weights and widths, and cut them to the length you needed. I spent $52, including tax! This was a scathingly brilliant idea! (Phrase stolen from Hayley Mills’ character in The Trouble with Angels.) Thanks, Amazon reviewer! I’m positive I never would have come up with that.

I’m still hoping more readers tell me about your unconventional tools. If not for weaving, then for your kitchen, home, or car.

Harder than I expected

bedroom curtains

Back when I lived in the sticks I didn’t need or have any curtains on my windows, a feature that disconcerted some visitors but that I really liked. All the light that was outside came right in.

My little house in the city came with blinds on all the windows. Based on what I see in my walks around the neighborhood and the stains on my window frames, I’m guessing that the prior owner had the blinds down most of the time. Not me. My blinds go up to their full heights every morning and go down in the evening when I have to turn the lights on. While the blinds work, the look is harsh for me. So I’ve been planning on weaving curtains.

I thought I’d start in with the bay window in the kitchen, but for a variety of reasons changed my plans and decided to start with the bedroom. And I’m very glad I did.

I love weaving lace. I’ve woven lots of it. I’m usually good at having my beat be consistent. But this time? After I’d woven the first few lace blocks I was struck by how critical it is for the beat to be absolutely consistent this time. If the size of a lace block is a tiny bit different at one end of a scarf than at the other, it wouldn’t be noticed. But in curtains? When two panels will hang next to each other on the window? Especially when an accent color outlines each block? Any differences in the beat of those two panels would be immediately obvious, and would draw my eye, certainly not in a good way.

bedroom curtains 2

First I thought I’d simply pay more attention and get my beat consistent. But that wasn’t working well. Then I figured I’d measure a few squares and build up muscle memory for the beat. Even that wasn’t getting me the results that I wanted. I had to walk away from the loom and do something else for a while to figure out this puzzle, so I did the necessary planning to order the yarn for my next 2 warps of baby wraps.

That’s when I got the idea to build myself a little jig. Cut out of cardstock, I used the widths to make the outside of the square fit perfectly into the plain weave section and the inside square outline the lace section.

jig 1

Then when I turn the jig sideways, and match up the lines, the motif will be perfectly square.

jig 2

I wove that square for several motifs, and then a little light went off in my head. Uh oh. They’re square under the tension of the loom. But when I release that tension the length will ‘shrink’ and they won’t be square anymore. I need to weave just a tad bigger than the jig. That’s where I am now.

So what does all this mean? Since I’m already working on my 2nd panel, it means that the best I can hope for at this point is to have 2 panels on one window that match. The 2 panels on the other window won’t match, since that first panel has rectangles of different sizes as well as squares. The total length will be right, but the periwinkle lines won’t match up right.

Depending on how bad they look, I may end up having to buy some more yarn and weave another panel or two. But I won’t know until I weave these off, wet finish, pin their hems, and see how they look in real life.

In case you’re wondering, this is a modification of the ‘mosquito net’ curtains in Laila Lundell’s Big Book of Swedish Weaving. I’m using 16/2 baby blue with periwinkle 8/2 doubled for the accents. I modified the draft for my 8-shaft Macomber, evening out the number of heddles to the extent possible so I didn’t have move lots from one shaft to another. This pattern requires only 3 treadles, so that’s incredibly easy. It’s all about the beat. If I could do all the weaving in one sitting it would be easier to be consistent, but of course I can’t do that. Not good for my body, plus my life has other obligations. I’ll do the best I can.

Note to self: when doing curtains for kitchen, use all 1 color yarn; then any inconsistencies will be much less obvious.

Do what works

black and black

All blacks are not created equal. Sometimes it’s the dye, sometimes it’s the base fiber, sometimes it’s…I don’t know what. I’m not sure how well it shows in the photo above, but I was finishing CT’s wrap, woven with custom dyed black cotton/hemp blend, and started TS’s wrap, woven with Maurice Brassard’s black cotton. In real life, the MB yarn is brighter and crisper than the the cotton/hemp yarn. In some fabrics I’ve purchased, the black seems to have a green base, and in others a red base. Is that true or just my perception? Beats me.

yarn color wheel

I think I mentioned that I’m considering working on my Certificate of Excellence (COE) with the Handweaver’s Guild of America. One of the exercises is to create a color wheel from yarn. I bought a styrofoam disk, found the center, and bored it out so I could wrap it with the yarn. As usual, the colors in the photo aren’t exactly the same as they are in real life. And the colors in real life aren’t perfect…I did the best I could. I used MB cotton except for the blue-violet section; there was nothing even close for that color. In the cottons, the worst ones are the red-orange and the yellow-orange; both have too much brown in them. I will explain that in my submission, if I go that far.

website, shawls

As a micro-business owner, there is an unending list of things to do. If the weaving were all that there was, I could get a lot more products made, but of course, the point is to sell them. And that requires everything from applying for and doing shows to marketing both locally and on the web. After beating my head against the wall several times with different approaches, I finally realized that I was making the rebuilding of my website harder than it needed to be. The reality is that I do very few sales directly from my website; its primary purpose is to keep me out there, a way for people to find me and to see examples of my work. Once I acknowledged that, it was easy to make the decision to use the same basis for my website as my blog — WordPress — and the same underlying theme. That way I’d have brand consistency, as well as software that was regularly updated and mobile friendly. I still have to build a few pages (Scarves and Other), and get more products on my Handwovens for the Home page, but I’ve made great progress and am satisfied with what I’ve done. Click on the links in the menu bar above and check it out.