Archives

What the heck???

Yesterday I took Jack out for his regular afternoon walk. It’s been very cold, so he usually chooses to walk only as long as absolutely necessary to accomplish his mission. The afternoon walk was once around the block, which was what this walk often is any time of the year. Fine.

We got back home and I sat down to do some computer work. Jack was sitting near me in the room, just like always. He was, I thought, chewing on his bone. Swell.

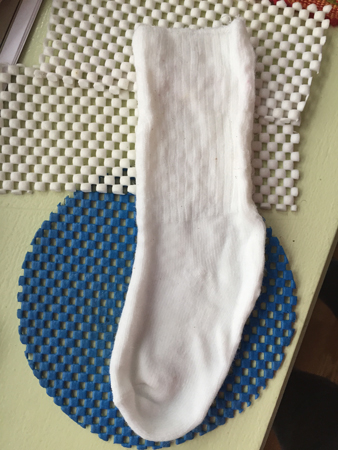
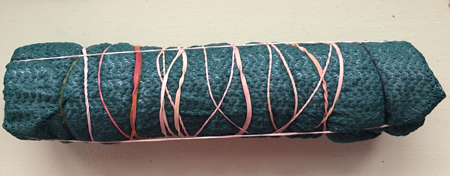
When I was done on the computer, about an hour, I stood up and saw this.

hole in rug

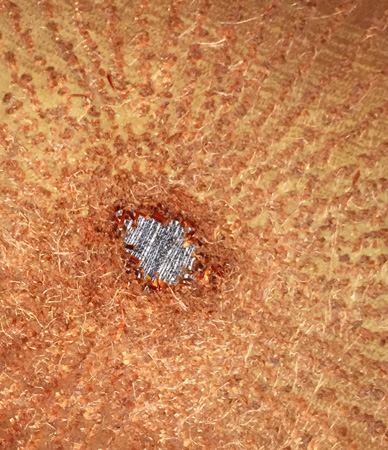
WHAT THE HECK?!?! Jack hadn’t been chewing on his bone, but pulling things out of the rug!

rug parts

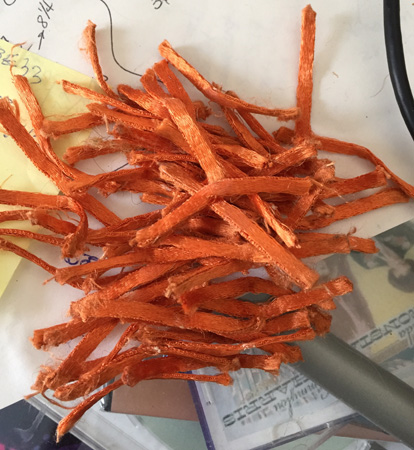
In 2 years he has pulled out a total of maybe 2 dozen, and I always thought they were done in error when he was grabbing for a toy. But this?!?! This is BAD!

To make it as bad as possible, this spot is dead center in the middle of the rug. It’s not like I can put a chair over it or something. I have no clue if I can put those parts back into the rug; I will try, but I’m betting it will either be near impossible or will look like hell when I’m done, and that I’ll be looking for a new rug. I’ve thought about weaving one, but wasn’t really ready to do that. Especially since this rug is a 5′ x 8′. Quite a large rug for handwoven indeed. Your suggestions will be appreciated.

In another what-the-heck is a new problem with my Adobe Photoshop Elements Editor. I have used this program for years, ever since I’ve had a blog, for sure. It’s how I edit my photos and size them for the web. When I got my new laptop, I’m thinking about 18 months ago, I had to change the version of the software and get used to it, but it works very similarly, so fine.

Except starting a few days ago, not fine. I open an image. Crop and adjust as needed. Go to Save for Web and resize. Hit Save. I consistently get an error message: “Could not complete this operation. The specified volume could not be found.” It matters not what file location I choose.

I’ve figured out a work around, but come on – what the heck happened?!?! My work around is more steps: Go to Image Resize. In a few clicks I’ve gotten it to the size I want. Then go to Save as and rename the file so I now it’s the modified one. Then click Save, and it easily goes to exactly the same location as it couldn’t find a minute ago. Again – what the heck? I can’t find anything in Preferences that would seem to have any impact. Again, your suggestions will be welcomed.

Ok, so here we are on December 31. A few days ago I had a minor freak out when I realized that I had only 4 days left in the month and had completed NOT A SINGLE THING for my inventory. YIKES!

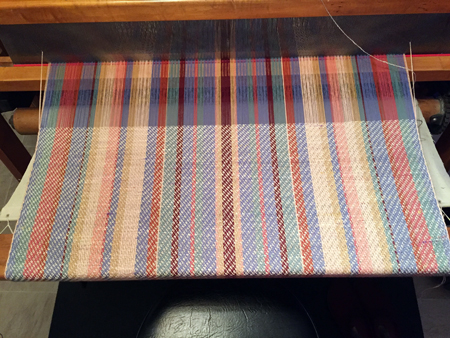
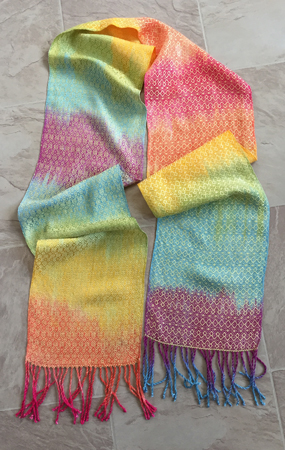
So I put the black and white 8/2 tencel scarf warp on my counterbalance loom. I figured I could weave it off relatively quickly. And I did. I’m not in love with the huck weave structure I chose, but it’s okay.

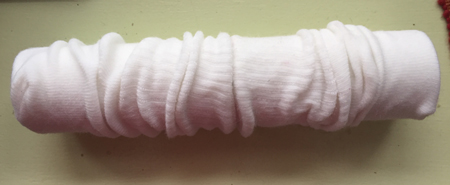
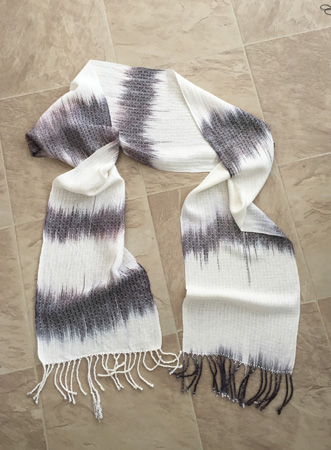
This was an experiment, to see what I might like best for weft for the shawl warp I’d painted at the same time. First I did a gradient weft: 16.5″ of a solid color, my standard 64-thread gradient to the next solid color, repeat. I had 4 solids I used: black, dark gray, silver gray, and white. It’s okay, but not my favorite. I do like those spots of black on one end of the fringe – reminds me of porcupine quills.

black & white gradient scarf

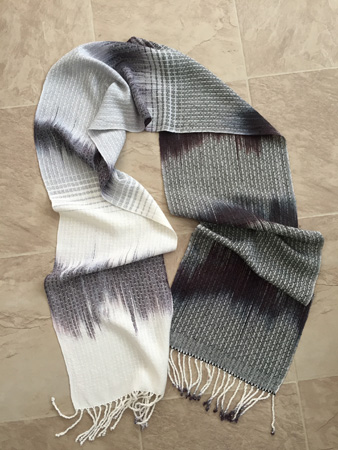
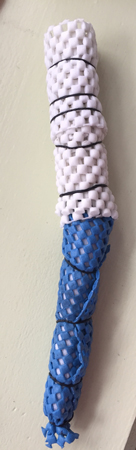
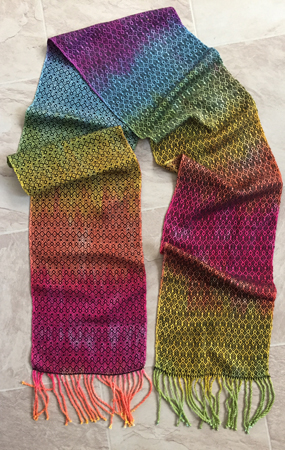
Next I used solid white for the weft. I like this one better. You can see that one of the fringes in the middle of the white end sort of came undone in the wet finishing. No idea why, but I’ll have to fix that.

black & white scarf

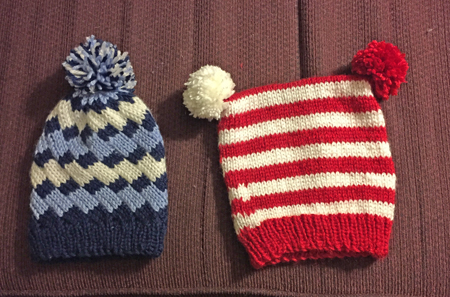
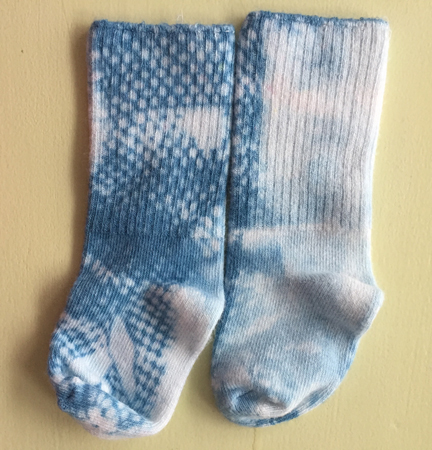
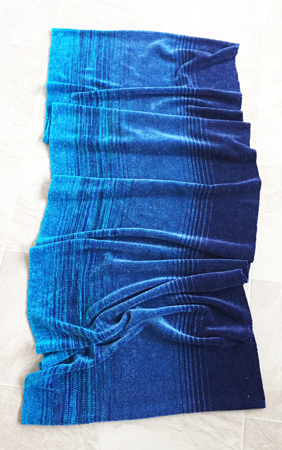
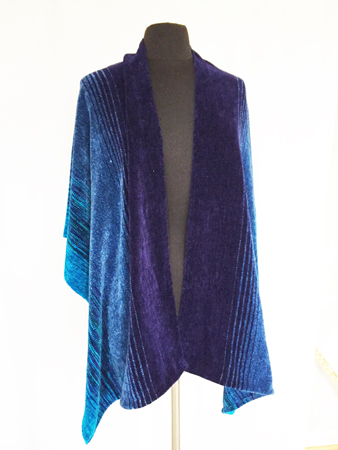
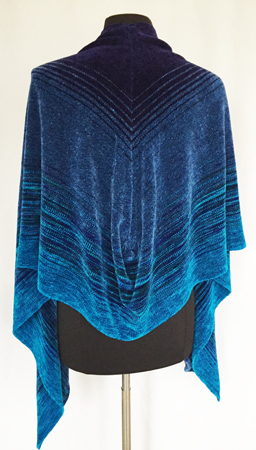
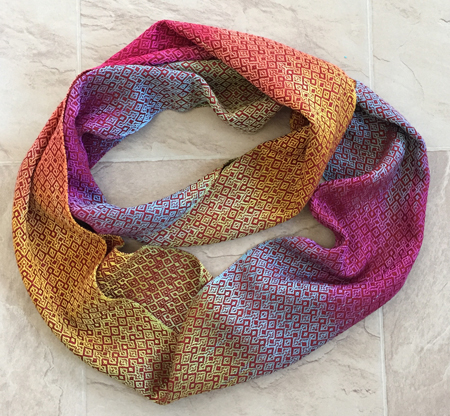
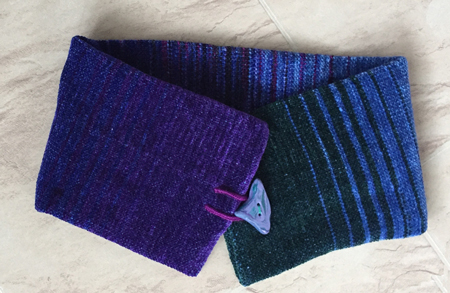
I had enough warp left for one more scarf. What color would I choose? As I thought about it, I had a light bulb moment. My cowls have been selling pretty well, so instead of making one more long, fringed scarf, I’d weave two short cowls – it’ll be summer time and people like short cowls in the summer.

So I wove one with the dark gray weft and one with the silver weft. This got me 4 finished pieces instead of 3. 🙂

black & white dark gray cowl

black & white silver cowl

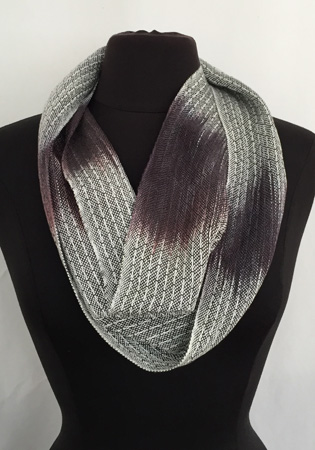
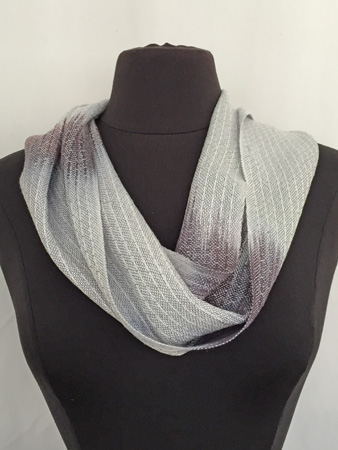
I don’t think either of these photos show the cowls to their best advantage, but frankly didn’t want to go through the challenge of the Adobe process again with the other shots I’d taken.

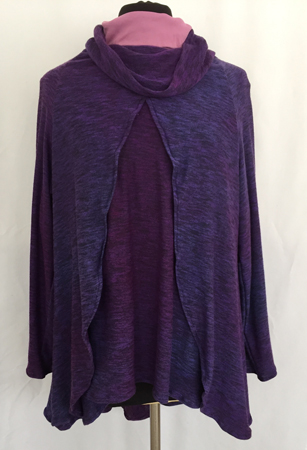
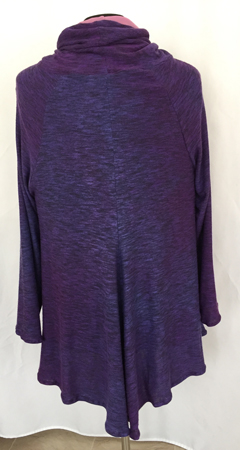
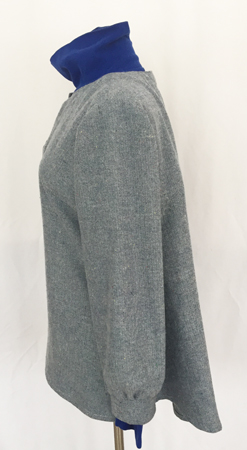
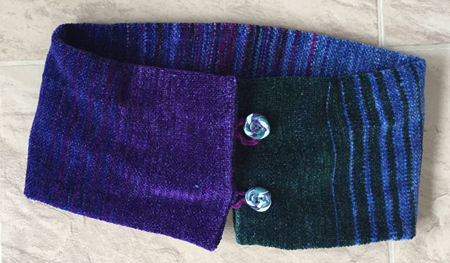
Then I realized I’d finished weaving another scarf on my rigid heddle loom a few weeks ago but never did the finishing. This is the counterpart to the one shown here, this time with a dark purple chenille weft.

rayon boucle and chenille scarf

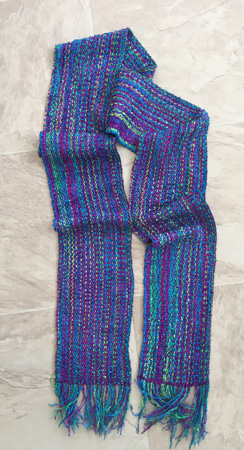
This rayon boucle warp doesn’t look good when double twisted, so I tried to put some beads on it to dress up an otherwise plain fringe. Geez, it was one problem after another, until I finally gave up, cut the fringe short-ish and called it good. So I ended December with 5 pieces. But absolutely nothing is on the loom now to start January. I saw a scarf woven from this to-die-for draft on Facebook and grabbed the draft from Handweaving.net – this is why I stay a member!

Tara Oftenorth weaving draft

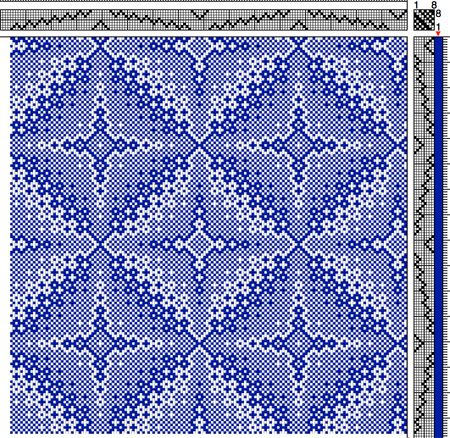
Thank you to Tara Oftenorth for creating this modification. I think I’ll warp my Macomber for this next.

UPDATES:
Jack had dental surgery last month – 14 teeth removed! Yikes! I suddenly realized that since his mouth has healed he has been doing a lot of chewing, much more than previously. Those teeth must have hurt, poor baby. So yesterday I went to Petco and bought 3 different kinds of chew toys. He loves them all. Hopefully this will protect future problems.

I googled the problem with Photoshop Elements, and was far from the only person with this issue. I followed directions for fixing it, and it worked like a charm.

Another pattern, another tunic

On the 23rd I had all my presents made and decided to make the muslin for that other tunic pattern. Although it was a raglan sleeve, not set-in sleeve like the first one, I thought about the modifications I had to make for that first pattern and applied them to this sleeve. The muslin fit fine, and the pattern was a Butterick Very Easy (B6135), so I decided to go ahead and make it.

dyed tunic front

I mentioned in my last post that I’d purchased the fabric for this pattern when I bought the pattern. What I didn’t mention was that the color of the fabric didn’t thrill me. So I decided to immersion dye it. I used a 5-gallon bucket to dye it blue, then rinsed, washed, and dried it. The dyeing was blotchy. Sigh.

So I decided to overdye it in purple. I made certain to stir it plenty, and even transferred the fabric to another vat and back a few times, making sure to keep the fabric from bunching each time. Again, rinsed, washed, and dried it. Again it was blotchy. Again I sighed.

As a result I wasn’t sure how the fabric would look made up into the pattern. The blotchiness could be fine or awful.

It took just a few hours to cut and sew the pattern. My overall response? The dye job was okay – not great, but okay. I really like the cut and fit of the pattern. And when I was wearing it the next day when my daughter stopped by, without a word from me she asked me if I’d made the top, and said that both the pattern and the dye job were very flattering. Since she almost never comments on my clothes, this was significant.

But I don’t know if I’ll use it again.

dyed tunic back

Why? The pattern says everywhere that it is designed for moderate stretch fabrics only. And I’m not a big fan of stretch fabrics, especially if I can’t find them without a significant portion of polyester, which is all I could find at Joann’s. Also, while my simple machine will sew on stretch fabrics, I don’t like what it does to the machine hemmed edges, and there are LOTS of them on this pattern…way more than I’d want to hem by hand. I don’t know if patterns designed for stretches can be made from fabrics without stretch. I try to do some research on that question.

Dyeing, knitting, weaving

Like most people’s lives in December, mine has been busy. Here are a few highlights.

I helped out at the Weaving Center, providing an extra pair of hands for a talented felter and teacher who taught 8 teenagers to felt a little bag. So creative!

8 felted bags

I knit 2 hats for my grandson. He requested the one on the right, identical to one I’d made for his little brother last year. I made the one on the left in his school colors, which he’s definitely into. I don’t know if that one will fit or if I’ll need to remake it in a larger size. I found the pattern on the internet, but didn’t mark it and can’t find it now.

2 knit hats

I decided at the last minute to dye some socks for my 2 grandnephews. I had 3 pair that I thought would fit them, so used 1 method I knew would work and tried 2 others. First up is the known method – tying in marbles with little rubber bands.

socks dyed with marbles

Then the pair that didn’t work as well – but I know how to make it work next time.

preparing to wrap socks

Preparing to wrap the socks

socks wrapped in rubber

Socks wrapped in rubber

One side of these socks look cool, but the ‘inside’ didn’t get any dye. Next time the rubber should be clamped onto both sides of the socks.

socks after rubber wrap

The 3rd pair was also successful. First I mildly scrunched them on a length of PVC pipe. I knew from experience that too much scrunching on the PVC would leave too much white on the socks.

socks scrunched on PVC

After the mild scrunching I wrapped them in rubberized shelf liner, then tied it on with some rubber bands.

socks on PVC, wrapped in rubber

I like the results of this experiment.

socks after PVC and rubber wrap

Those socks got mailed out yesterday.

Now I’m working on a modified circle shawl. I used an online random stripe generator, going through at least a dozen variations produced, and warped with 8 colors of 8/2 unmercerized cotton. I’m using an interesting flecked wool for the weft. We’ll see how it all works.

weaving stripes

I also hand painted a bunch of 8/2 tencel, preparing for a series I’ve mentally planned in black and white. This dyeing has also been a learning experience…the black hasn’t always behaved well, even though I actually did dye samples (regular readers will know I almost never sample).

dyeing black and white

I’ve also added more time learning dances with the ROC City Line Dance Express group. Those women are GOOD! And make me feel good, even though it takes me LOTS of practice with YouTube videos to learn the steps.

For the next few days I’ll be cleaning, wrapping gifts, and otherwise preparing for the holiday. I may be able to fit in some more time at the loom on that striped warp…or maybe not.

Successful sewing

Back in November I took a workshop at the Weaving and Fiber Arts Center. Called The Fit is Fine, this 4-hour workshop, taught by Val DeVries, was all about how to fit a standard pattern to fit your body. Since I’d previously had such disastrous results when working with my handwoven fabric, I was really in need of direction.

working at Fit is Fine workshop

Although the 4 hours was not enough to get to the point of making a muslin, it was totally sufficient for getting the information I needed to complete the process at home. I had my pattern, I had my measurements, I had the muslin.

my muslin pattern

Muslin #1 had issues – I’d added width to the pattern from the waist down, and it was too much. Easy enough to revert to the actual pattern. But, given the fact that I’m usually cold, this tunic had to fit over a turtleneck. The armholes were far too short for that. Emailing back and forth with Val told me that I needed to buy and use a French curve to make the needed modification.

It took a few more modifications – to the bodice and the sleeve – to get it right. Finally I was ready to cut out my fabric. This is a commercial mid-weight flannel blend of mostly cotton with some polyester (I couldn’t get 100% cotton at Joann’s; note that I was sorely disappointed with the fabric choices, even at the largest store in Rochester.)

tunic fabric, closeup

Two days of careful cutting and sewing later, the tunic is done and fits well!!

tunic front

I’ve taken to loving to wear leggings, and this top covers my butt well in addition to hiding my gut.

tunic back

I like the hemline drop from the front to the back.

tunic side

I’m pretty sure I’ll use this pattern again, although I will make a few more minor modifications to it for the next one.

When I bought this pattern and fabric, I also bought another pattern and fabric. I’m now confident I can modify that pattern appropriately. I admit that the lengthy process of making a muslin is rather a PITA, but it’s worth it since I can now make clothes that fit me! YAY!!!

An even dozen

I was pretty certain I wouldn’t hit my goal of 6-7 finished pieces for November, and I ended up with an even dozen. Here’s how.

In an earlier post I showed you the 2 cream shawls I wove from cotton and vintage synthetic, and 2 piano scarves still on the loom. That’s 4. As soon as those piano scarves were off I got started on two blue rayon chenille shawls. (I know I said twice already this season that I was done with rayon chenille, but apparently I wasn’t really.)

Here’s the first one, in the old/un-seamed version.

Midnight Peacock shawl, flat

I wove many more inches for the second shawl on the warp so I could seam it. Here are front and back views.

Midnight Peacock shawl, seamed, front

Midnight Peacock shawl, seamed, back

So now I’m up to 6, right?

Then I jumped on the chance to demonstrate weaving at the Copper Shop on the Roycroft Campus on Small Business Saturday, hoping to increase my sales in that store. Started there on my rigid heddle loom, I finished the first scarf on that warp when I got home.
It has a hand painted rayon boucle warp and a rayon chenille weft. Previously I’ve only used rayon chenille as both warp and weft, so wanted to see how this would wet finish before I wove the second scarf on the warp. This is number 7.

Holiday Lights scarf 1

I moved quickly and beamed a tencel warp I’d hand painted in rainbow colors back in October. I wove two regular scarves and one long cowl, each with a different weft color, all using the same treadling pattern ‘cuz I really liked it.

First is a yellow weft, that looked like a rainbow in sunshine.

handpainted yellow rainbow scarf

Remembering the rule that black intensifies, next I used a black weft to make the colors pop. Personally my least favorite, but it’s okay.

handpainted rainbow, black weft

For the long cowl I used a burgundy weft. I can’t decide if I prefer this or the yellow. I can tell you that I probably won’t use that many colors in a single warp again. It’s just too much.

handpainted burgundy rainbow cowl

That’s 10 finished pieces.

The last two were started when I wove them several months year ago. But I never finished them because I couldn’t come up with a finish that made me happy. Back in October when I was making all those buttons some friends suggested that I use buttons to finish the pieces. That made sense so I made buttons specifically for this purpose. Then I spent many evenings trying to make button loops that I liked. And then I made more buttons. And more loops. And tried interfacing of various weights inside. Finally I was happy with the results, which were rayon chenille collars, as they were too short to be called cowls.

rayon chenille collar, 2 buttons

rayon chenille collar, 1 button

That’s 12. Whew!

I sold both of the collars, the burgundy cowl, the Midnight Peacock seamed shawl, the boucle and chenille scarf, and several other pieces at the show last weekend. Now I need to get back to work on some Christmas presents, as well as returning to and/or starting some projects of my own.