|
|
Way back in the dark ages, 1965 to be exact, Herman’s Hermits released a hit with the memorable lyrics of this blog title. It strikes me as just right for this post.
After much consideration, I decided that my to-be-grandson needed one of my handwoven hearts baby blankets. To make his even more special, I embroidered his initials in one corner of the binding.
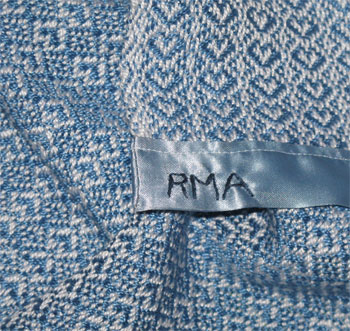
Now I just need to go modify my website to make the blue blanket no longer available.
I also made two hats.
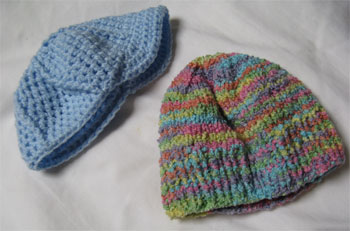
On the left is an adorable little crocheted baseball cap that one of my volunteers showed me. You can get the pattern free at crochetville. I must say, I think my crochet gauge is a bit off; I really think the cap my volunteer made was a bit bigger than mine is. If I were going to make it again, I’d add at least one more round before I did the brim.
On the right is a regular old knitted cap, in a tiny size, made with the same yarn I used for those baby socks back in February. I’m sure I got this pattern free online, too, I just don’t remember which one I used.
I think both the caps are sweet. They remind me just how tiny babies really are. These hats will likely fit him for about 10 minutes before he’s too big for them.
I got to pass these on to my daughter at her baby shower, which we held at Hurd Orchards. Such a gorgeous location, such great food, such pleasant people.
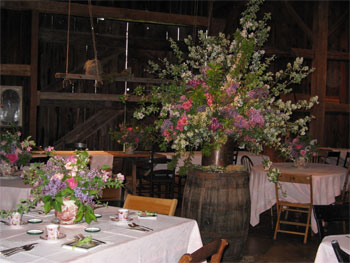
She got lots of other swell gifts, too, some of which I’d never heard of before. Times sure have changed since I had my babies! 🙂
Your turn: Have you shopped for baby things lately? Found anything surprising?
Hurd Orchards is a lovely, little farm & market where you can pick your own fruit, each a terrific luncheon made onsite with locally grown foods, or take a class in flower crafting. They carry a few of my handwoven table linens in their gift shop, along with some woven by the women in Berea, Kentucky, and many woven in other countries. I hadn’t sent them anything since Thanksgiving time, and will be up there Sunday, so really needed to get some things woven to bring up with me.
I don’t know why I had such a difficult time planning the colors for these runners, but I did. And then I kept winding on the wrong color from what I had planned when I was measuring the warp, so I had to think — unwind or re-plan. I did some of both.
Then, after I got it all wound on the back beam, heddles threaded, and most of the reed threaded, I realized I had made yet another mistake. Part of my head knew I was going to sett this 5/2 pearl cotton at 18 ends/inch, but when I was doing all the math, the other part of my head planned for 16 ends/inch. So here I was a the loom with the question- would I leave the reed threaded at 18 EPI and make the runners wider than planned, or re-thread the reed to 18 EPI and pull some of the threads out? I decided on the latter. I kept the cross, and when I finished with the warp, I chained the extra threads and saved them for later use — bookmarks? Mug rugs? Other runners? Only time will tell. I thoughtfully did mark them with fiber size and chain length, so that won’t be a later question.
As tends to be my style, I wanted to make each of the table runners in this warp of four a bit different. I wove the first placemat with a solid blue weft using plain weave.
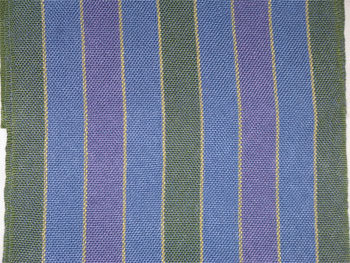
I liked it. The second one used the same blue weft, but this time in a twill.
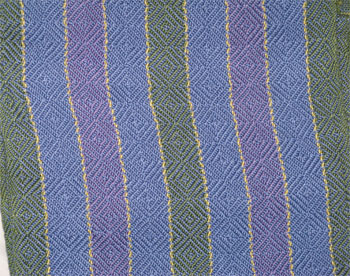
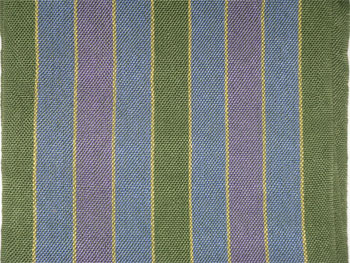
Although I liked the pattern, to be honest, I found the plain weave more appealing as a table runner. So I wove the third one in a solid green, again plain weave.
Finally I felt ready to tackle the plaid. I am not at all confident when it comes to weaving plaids. I can make the pattern be correctly sized and follow my color order without too much difficulty. My problem is all those color changes. To be more precise, it’s all the ends those color changes entail. And tail is the word. Sure I weave the ends in, but I’m never really happy with the results. Particularly in this case, since the yellow was only 2 threads wide, if I doubled up the ends to weave them in appropriately, the end would be 4 threads wide. And even if I alternated color changes on the right and left selvedges, I feared my edges would rather quickly filled up, leaving me with the dreaded weaving ‘smile’ and unable to get a straight fell line. But I did it anyway.
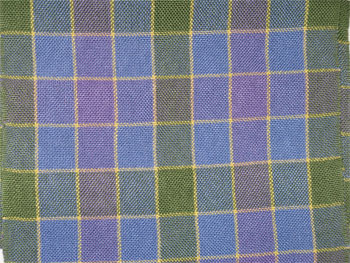
If only I wasn’t only marginally happy with all the ends, this one might be my favorite of the four.
Here they are all together.

Like my other handwoven table linens, these won’t go on my website. If Hurds doesn’t want them, I’ll have to decide if I’ll put them up on Etsy or simply bring them to shows with me.
Your turn, weavers: how do you handle the ends in a plaid? Please share your tips with me!

I promised to show you the four handwoven baby blankets when I finally had the binding on them.
The pink hearts have a pale pink binding, the blue hearts a pale blue binding, and the cranberry & aqua have white binding. I did get these up on my website, as this is the time of the year that I tend to get more orders for or sales of my handwoven baby blankets. (I do realize that the blue & aqua look pretty similar in the photo, but they’re not so much in real life. The aqua has much more green in it.)
In addition to the four heart blankies, I also wove three cotton flannel baby blankets in a variegated yarn. These were really popular last time I had them. The cotton flannel is so very soft, and the colors are just right for baby.
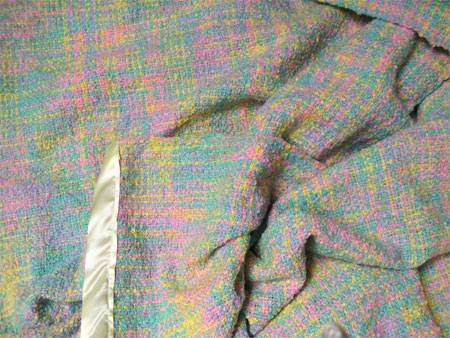
I wove these blankets in doubleweave, since I wanted them to be wider than either of my looms would accommodate. I’ve done this before on my sweet, little counterbalance loom without difficulty. But I’d just finished the heart blankets, which required all 8 harnesses of my Macomber, and so decided to do the doubleweave on the Mac, too, even though I only needed 4 harnesses. I knew I’d get a better shed, and it would just make my job easier.
I admit it, I’m getting used to the Mac. I still love my counterbalance, and hope that it remains my favorite; only time will tell, I guess.
Back to the topic I wanted to talk about – binding these baby blankets. I admit it: I hate sewing on the binding. Previously, I’ve sewed it on and then taken it all off and re-done it. I’ve lived with binding that looked less-than-professional, reducing the overall look of my carefully woven blanket. At my show last weekend, I even tried to get one of the other women there, whose product is handsewn purses and bags, to do the binding for me. She wasn’t having any of that. So I wasn’t looking forward to the task of binding 7 blankets. YUCK!
I did one each of the hearts and the cotton flannel prior to the show. I hated it as much as I’d anticipated. And I still had 5 more blankets to go.
Then I got a brainstorm: I can’t be the only one who has difficulty with this slippery fabric. I looked online, and found lots of places where people asked the question of how to do this without pulling your hair out. Several of the sites didn’t offer me any helpful insights, but a few did. I’m going to pass on to you the information I found useful.
First and foremost, blanket binding has an top and a bottom. For me, with the narrow binding (1″) that I’m using for my baby blankets, the top of the binding is a scant 1/16″ narrower than the bottom. So little difference I’d never noticed it before. Trust me when I tell you this was the most important hint I got! Putting that ever-so-slightly-narrower edge on the top of the blanket as I pinned & sewed completely eliminated the likelihood of missing the edge of the bottom portion of the binding. I can’t believe that it made so much of a difference, but it did.
Second, don’t worry about ‘filling up’ that binding. If you leave a little bit of space at the top of the binding, it’s okay, and gives you a little room to fool around with as you machine stitch.
Third, pull the binding really tight as you pin. (Or baste, if you’re a baster. I’m not.) That way it’ll be tight when you sew and not bunch up.
Not from hints online, I also did three other things.
- I used a layer of tissue paper underneath the binding as I sewed – between the feed dogs and the presser foot. This helped ensure that I wouldn’t have slippage there, and the tissue rips off cleanly when you’re done sewing.
- I used a sort of long stitch length – a bit higher than the middle of my stitch length options on my machine. I also sewed sort of slowly, not at my usual get-‘er-done speed.
- I pulled the blanket-and-binding combination rather tightly both in front of and behind the presser foot. My goal was to maintain the same tension as I did with my pinning.
The result? The binding on those 5 blankets went on like a dream! Not a snag, not a bunch, not a curse word while sewing on 10 ends. Yippee! I’ve apparently found the magic combination of techniques to make this once-horrible task not bad at all. I’m really pleased with the results. If I was a bit more obsessive than I am, I’d rip the binding off those first two blankets and redo them. (You can see how much smoother the binding is on the heart blankets than on that cotton flannel.) But I won’t. I may be crazy, but not that crazy.
Your turn: have you used online tips to make your life easier?
Last weekend I did a small, local show with some friends and fellow creative types. Partly because of my obsessive nature, partly because of my desire to show others the weaving process, I almost always bring my little rigid heddle loom (RH) to shows. This was no exception.
Much as I like weaving on it, and love how lightweight, portable, and easy-to-use it is, my RH does have some limitations. I have 2 heddles for it, a 6 dent and a 12 dent. That means I can have either 6 threads per inch or 12 threads per inch. But most of the fibers I work with are sett at more like 18 threads per inch. So I’m always wondering what I’ll warp the loom with when I’m preparing for a show.
Even though it’s May, I decided I’d use some of the beautiful mohair I have. Although it’s a fine yarn, it’s sett at only 6 threads per inch; anything more would be REALLY a challenge to work with, because all those hairs catch on each other. On my RH loom, I open a shed, separate the threads by hand, throw the shuttle, beat lightly. Open the next shed, separate the threads by hand, throw the shuttle, beat lightly. I do believe that if I was working with it on my floor loom there are some tricks I could use to minimize or avoid hand separation, but I haven’t tried it.
One of the real benefits of weaving with mohair on the RH at a show is that I’m totally unconcerned with how tedious and time consuming the process is. The slowness would make me a bit nuts at home, but at a show, I’m just fine with it. And visitors are amazed at how much work it is, which is also just fine with me.
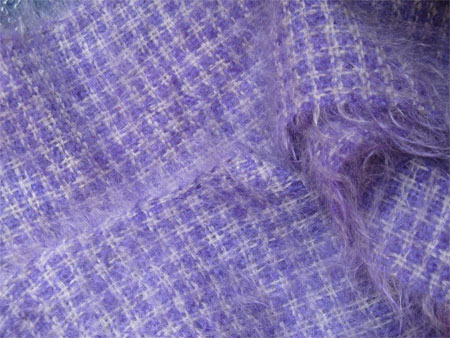
Anyway, I set up the loom to make just one scarf, in a houndstooth check in purple and silver. I wove it on Friday & Saturday at the show, finishing the last few inches at home on Sunday. Then the challenging (to me) process of wet finishing it. The scarf gets tossed in the washing machine and agitates for just the right amount of time.
But what IS that amount of time? How should it look when it’s done? Those are all unknowns, at least to me. It’s sort of like when my grandmother told me to add enough flour to the dough to make the bread feel right. Huh?
The scarf comes out of the washer, and while it’s still wet it’s brushed with some vigor with a dog brush to bring up the hairs. Again scary; although a little less so this time than it was my first time.
The end result? I LOVE this scarf! I think it’s absolutely gorgeous, and I’m sorry it’s May so I won’t be able to wear it while I’m trying to sell it.
Are you ready to see it? You are? Okay!
Your turn: how did you spend Mother’s Day weekend?
It never ceases to amaze me how much time I can spend doing work on my business that isn’t weaving. Â It’s pretty much always work that I think is important or I wouldn’t do it, but geez – I should be producing more finished products!
Since my last post I have updated several pages on my website. Â I spent far and away the most time on my home page. Â And most of that on the visual – I haven’t really begun to update the content. Â I do know that it’s the content that drives search engines, and that it’s critical that I pay serious attention to it. Â And I will. Â I just had to get the visuals completely re-done first. Â My old home page embarrassed me.
Here’s how it used to look.
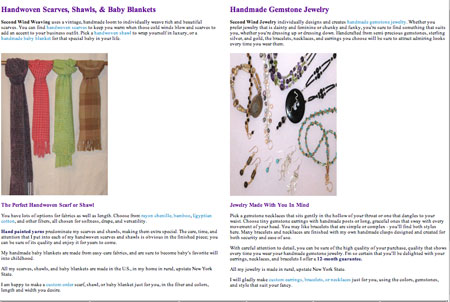
Actually, the jewelry picture wasn’t all weirdly out of shape like it is here, but you get the idea. The scarf picture was far from flattering of my weaving, and weaving and jewelry had equal weight on the home page.
Here’s the new home page.
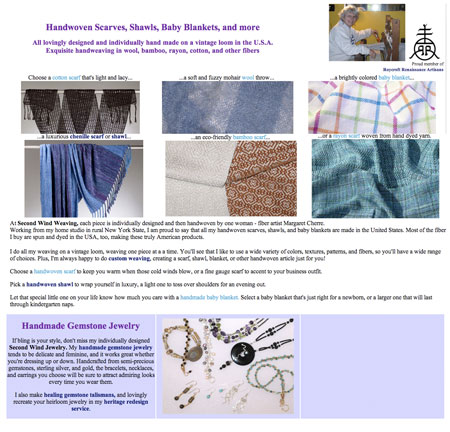
It’s now very clear that weaving takes precedence over jewelry. The photos of the scarves are flattering, and show varied styles and fabrics.
I’d really hate to admit how much time I spent on the design of the new page. I had a draft that I actually went live with and sought some feedback. I liked the suggestions I received, and spent way too much time, again, incorporating them into the design. Being mostly self-taught on using Dreamweaver, there’s absolutely no doubt that I do everything the hardest way possible. Plus, my obsessiveness runs full steam when I’m doing design work. I spend ungodly amounts of time on things that no one else will ever even notice.
Anyway, I’m happy with the new home page design, and will get back to updating the content SOON. (If I tell myself enough times, and with enough force, I will make it happen.)
Today the binding came in for all the baby blankets I recently finished weaving. I’d love to tell you I’ll get them done in the next few days, but unfortunately, that won’t be possible. My first show of the season is Friday & Saturday, & I’ll be lucky to get one of each style bound before then. Although I make very little jewelry these days, I know my local customers will want to see new earrings, and I HAVE to get them made. So in reality, I won’t get to the majority of the binding until Sunday. Sigh.
I also spent a bunch of time on the email marketing for this upcoming show. Thanks to the responses to my survey, I had a really good idea about what I needed to do, it was the how that took time.
Your turn: where are your time sinks?
|
|