|
|
When I was weaving those eggshell cashmere silk lace scarves, I noted a problem that I thought might have been caused by an old reed, and decided to order a new stainless steel reed. That reed still hasn’t arrived, but I haven’t stopped weaving to wait for it.
After the eggshell scarf problems I decided to use my (rather disliked) 6 dent reed while I awaited the new 12 dent SS reed (likely a few weeks). A customer had ordered a black lace cashmere & silk, and I didn’t want to make her wait that long.
So I put in the 6 dent, warped and threaded my wonderful, little counterbalance loom, and set off.
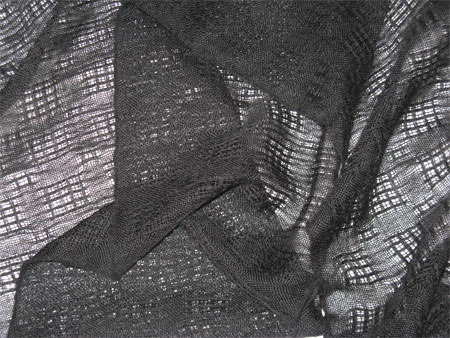
It all went great. I had a total of 3 broken warp threads for the entire 9 yard warp – not uncommon with fibers this fine. This confirmed for me that my old reed really was a problem.
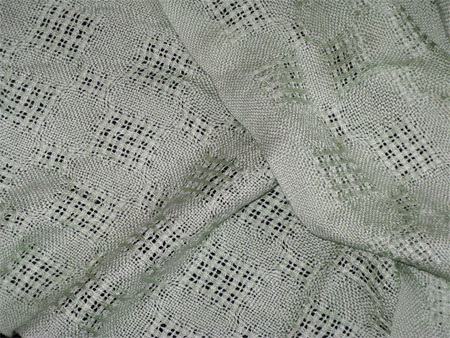
After the black, I wove three 100% silk scarves in a lovely pale mint green. This was an 8/60 silk — I sure do wish I had a MUCH better handle on what these numbers mean. What I THOUGHT, incorrectly, was that I’d multiply the 60 x 1000 and divide that by 8 to get the yards per pound (ypp). Hah! That math would give me 7,500 ypp; in fact, it’s about 2,400 ypp. As is some 12/60 silk & linen blend I bought. WHAT??!! How can this be? Maybe I should just give up trying to understand that and be sure I get the ypp from the yarn seller.
Anyway, the mint silk has a beautiful sheen to it. It’s thicker than the cashmere silk, and way more expensive. So I didn’t want to screw it up. I set it at 16.5 ends per inch (epi), (2-3-3 on my 6 dent reed) as opposed to the 18 epi I normally use for the cashmere silk. It’s nice, but a bit stiffer than I’d like. Next time I’m going to try it looser – maybe 14 epi.
On a completely different note, here’s an odd tidbit. Flies that die upside down on your stove retain their iridescent blue color for days. This one died right by my burner a few days ago.
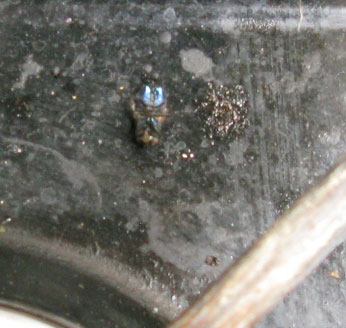
I didn’t see it at first, and then when I did, I was amazed that the color was still there. He’s been there long enough now that I don’t need to wait any longer to clean him up. Goodbye, fly.
Your turn: do you understand yarn counts and yardage?
Last year I joined a napkin exchange as an impetus to try some new weaving techniques. Since I don’t use cloth napkins — or at least I didn’t until I got a whole bunch of handwoven ones 🙂 — this year I decided to join a towel exchange. I wasn’t particularly wanting to try new weaving techniques, but did want to weave with some unmercerized cotton to see how it behaved differently from the mercerized I’ve worked with.
I decided on 3 colors, played with my brand new Mac version of Fiberworks (YAY!), figured out a draft, and ordered the cotton.
A generous member of my fiber arts guild loaned me her warping mill so I could try it out for this long and wide warp.
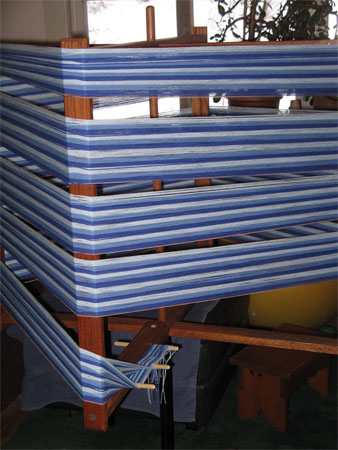
No doubt the warping mill is much quicker than my warping board, but I’m not in love with it. I’m guessing that some of that is because I’ve only used one once so would need to develop familiarity, and some is due to the specifics of this handmade mill. In any case, I’m not ready to run out and get one.
I would a warp of 547 ends for 10 towels, set up my 8 harness Macomber loom (it took 4 hours!!! since the unmercerized isn’t the easiest fiber — but not as difficult as rayon chenille in the width and length would have been) and went on my merry way.
I used a 3/1-1/3 twill, getting the maximum amount of color interplay between the 3 shades of blue.
Here’s the first towel on the loom.
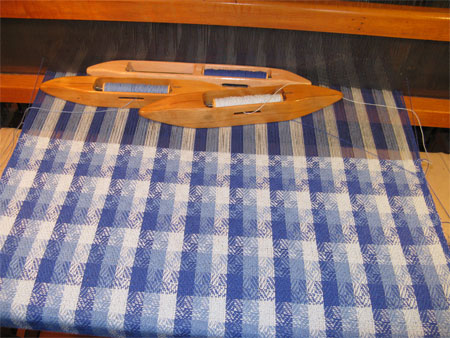
I do like the way the colors are interacting; I don’t like working with three shuttles. It’s SO much slower than working with one, or even two colors. For the first towel I started two colors on one side, one on the other in an effort to minimize any mess of carrying threads up one side.
This was so tedious, for the next one I decided I’d start them all on the same side and minimize the time spent wrapping the threads around at the selvedge. I didn’t much care for that, either.
For the third and fourth towels I used the same pattern, but cut the threads after each color. This seemed more pleasurable, but it still wasn’t my favorite thing to do.
So for towel #5 I picked out another unmercerized cotton I had and used it for the entire weft.
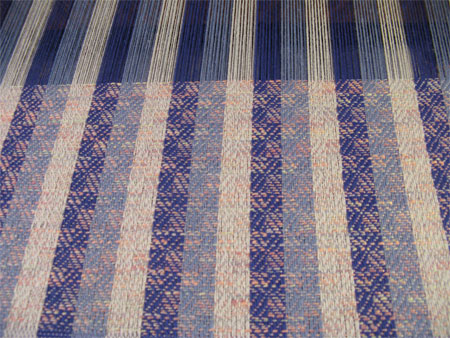
This is a variegated cotton slub with a tiny bit of nylon in it for a bit of shine. I enjoyed working with only one weft, but the pattern didn’t really show up well. So I figured what the heck, for towel #6 I’d try this weft in a plain weave.
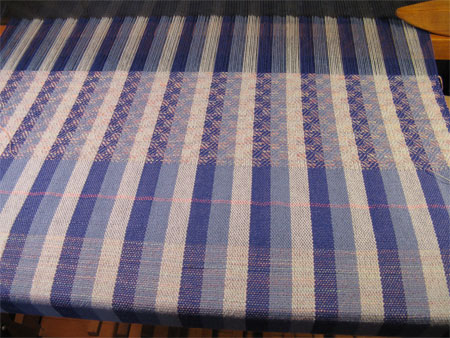
Now the color really doesn’t show, but it sure is quick & easy to weave!
So for the rest of the towels, I went back to using all three colors. But a bit differently. For towels #7 & 8 I went through the treadling pattern three times instead of once, so I change colors only 1/3 as often. I like this, too.
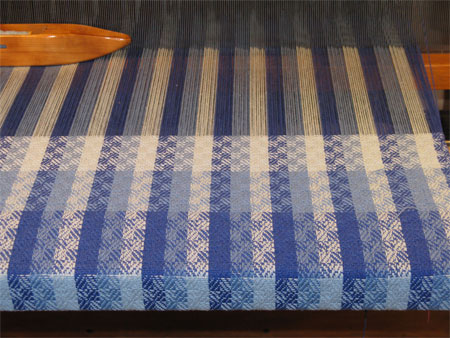
For towel #9 I modified the treadling pattern for wider blocks of each twill. I’m not as fond of it.
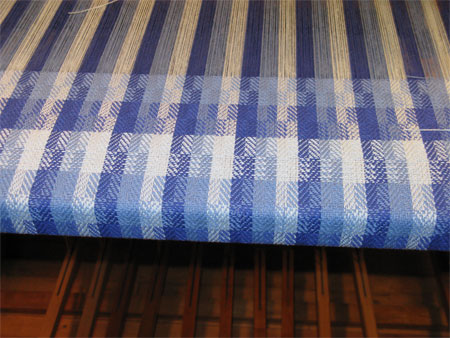
So for the very last towel I went back to plain weave. I thought it might look interesting in someone’s kitchen if I wove half of it with the darkest weft and half with the lightest.
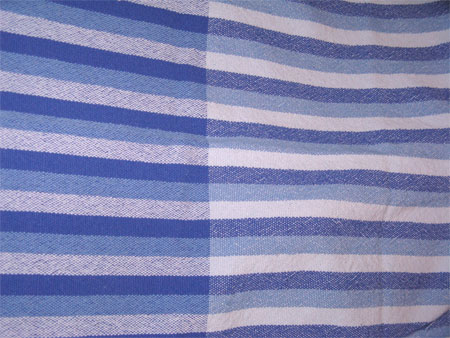
All went well (in relative terms; I’m having Macomber issues, but that’s a topic for another post) until I cut them off the loom and took them up to the sewing machine to run a line of machine stitching along the to-be-cut edges prior to hand hemming.
Uh oh! Clearly I skipped two critical steps: (1) checking for floats with the computer program and (2) sampling. As I’ve said previously, I hate sampling. I usually avoid drafting problems by remembering to check for floats on the computer. How could I have forgotten it now?!
As a result, I have some long floats on the back. Some up to 9 threads. Yikes! Well, what’s done is done. Throw these babies into the washer on hot water, then the dryer, and see what happens. Luckily I wasn’t planning to sell any of the towels — 6 for the towel exchange and 4 for gifts — but still, who wants her less-than-great work out there in public? No one.
After the towels come out of the dryer the shrinkage is enough that although I’m not happy with the floats, I’m no longer as embarrassed by them that I’m not willing to use them as planned. I’m in the hemming phase now; three are done, seven to go.
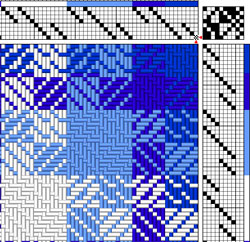
Here’s my draft. WARNING — DO NOT USE IT AS IS!!! The simple removal of harness 4 on treadle 4 and harness 5 on treadle 5 will solve the problem, although it will change the looks a bit.
Your turn: what have you been up to lately?
When I started my business by making jewelry, it was important to me that I repurpose materials as much as possible. Old beads and buttons became parts of my new creations, sometimes in the background, sometimes as the focus. I also made my packaging from wallpaper books that were no longer being used, and wrapped the jewelry in previously-used-and-then-ironed tissue paper.
When I made the switch to weaving, there was no way that wallpaper books would make my packaging anymore. What would I use? I tried a variety of options that weren’t successful, eventually settling on making bags from old pillowcases I rescued from thrift shops. Although I’ve also used curtains, napkins, and sheets, pillowcases require the least amount of sewing, and therefore time. I get three bags out of each pillowcase, so it’s cost effective, too.
Time saving it’s not.
I was down to one lonely bag, and needed more just to mail the orders that I have. I had to get up from my loom and sew. I decided I’d make all the pillowcases I have into bags – once I’m in the mode, I might as well continue. It was also a good opportunity to record my time and thus know how long it takes to make the bags.
Cutting was really efficient – just over 1/2 hour to cut out all the bags. I didn’t count how many at that point, I just cut. Here’s a short stack waiting for the sewing.
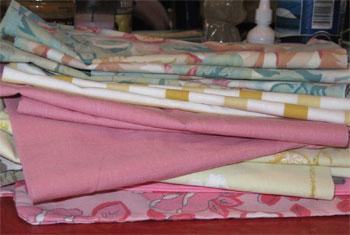
I brought my mother’s old Riccar down to the kitchen to do the sewing. Some bags need a side & bottom seam sewn, some need a casing and a side seam.
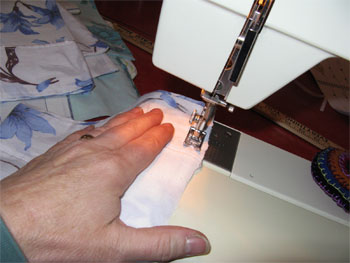
The sewing goes smoothly, but before I know it three hours have passed. Here they are all sewn, waiting for their threads to be cut and turned right side out.
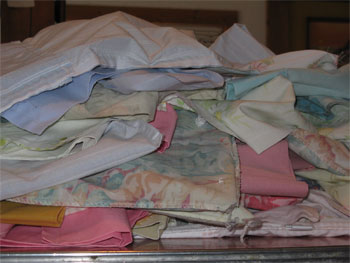
Next I needed to go to the computer and print the tags, cut them, and punch two holes in each one. Since I didn’t know how many bags I had, I made about 100 tags, figuring I’d use them all up eventually. That step took another hour.
Finally, I sit on my couch to string & tag each bag. I decided this was a good time to watch a movie. While I can listen to lots of movies while I weave, I can’t watch much: I need to watch what I’m doing at the loom. Cutting & threading a ribbon, stringing a tag, and tying a knot didn’t require lots of careful attention. This was one of my first chances to watch Avatar, a movie that has to be watched, not listened to.
I was really surprised that it took me another three hours to string all of the bags. Trust me, I couldn’t have been much more efficient if there was no television on; I’m pretty disciplined when it comes to this kind of thing. After they were done, I finally counted them when I was stacking them all up.
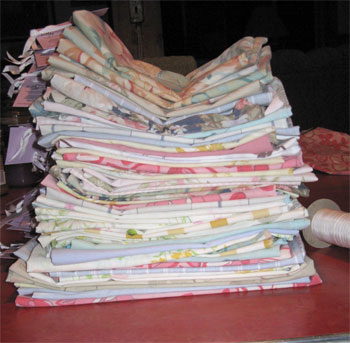
76 bags total, 7.5 hours. When I consider that means that each bag took me only about 6 minutes, I think it’s really amazingly quick. When I think about the fact that I have to devote two more days to this activity in the next few months to have enough to get me through the year, it seems pretty time intensive. Like so much in life, perspective is everything.
More than the time involved, I’m concerned about my pillowcase supply. Lots of thrift shops don’t sell pillowcases separately. Those that do don’t have an endless supply – I can usually only pick up a few at a time. I don’t want to buy sheet sets, not only because they require more time in cutting & sewing, but also because there’s likely to be more waste. There will be stains or rips I can’t see till I’m working on them.
So, if you have old pillowcases that are in good condition that you don’t like anymore, send them to me. I’ll mail you back something I’ve woven – maybe a bookmark, maybe a mug rug, maybe something else. I’m open to pillowcases in all colors, both prints and solids, lights and darks. The higher cotton content the better, but beggars can’t be choosers.
This isn’t our first winter storm, but it is the first one in some weeks, and the first one to lay down enough snow that I had to have my driveway plowed. That’s almost unheard of down here in the snowy southern tier of western New York – plowing often starts in mid-December. Like much winter weather, it was visually beautiful, and it wasn’t so cold out yesterday that it was uncomfortable taking a nice, long walk with the dog.
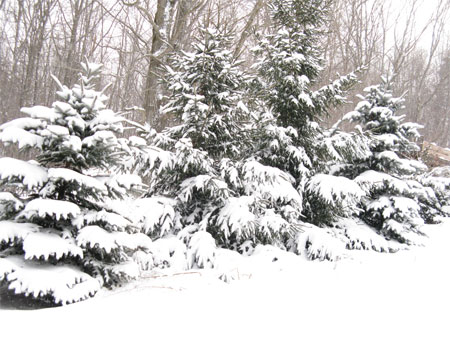
The spruce in my driveway were laden with beautiful, white snow.
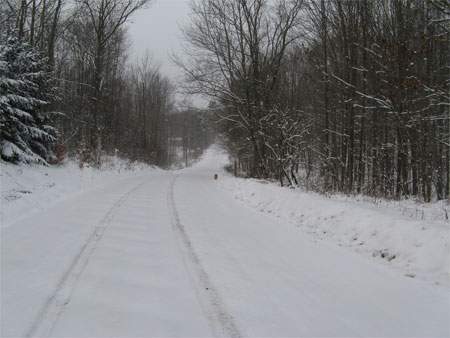
The temperatures were mild, and Red was happy to be far ahead of me. (He’s that little dot on the right shoulder of the road.) We’re both glad we live on a dirt road that sees little traffic.
The creek was running nicely, making its lovely, meandering path downhill.
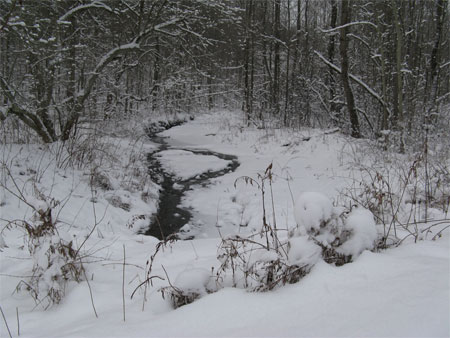
When we got back home, we had to make our way through the unplowed snow, past my little car that was awaiting our plow guy to get up to the garage.
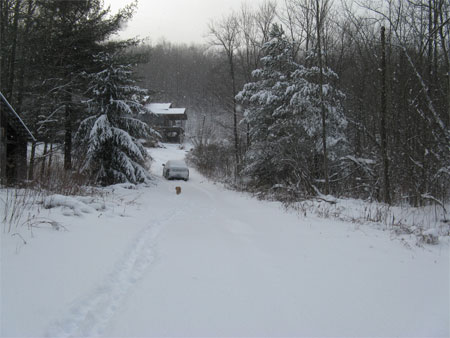
We loved it all.
Meanwhile, back in the house I was completing two handwoven shawls. I had an order for a rainbow rayon chenille shawl, and wanted to make an extra to have one for sale at shows. Rainbow shawls are a bit more of a challenge than some others, because the colors are not all the same; some are a bit thicker, some thinner, some stretchier, some more rigid. Keeping an even tension on the warp is both critical and sometimes difficult. But the end results are SO worth it! I like this second one better than the first. I used only 6 threads of black between colors instead of 8 threads on the first one. Also, I had only 14 color bands instead of 16 on the first. All together, that means more colorful. The rainbow shawl makes me happy, bringing brightness to every space it’s in, and every person who sees it.
I’d like to have my rainbow shawl be one of the slides for this year’s show jurying, so I really need a great photo. I tried draping it on Dolly, but didn’t like that result. (This is one of at least 7 draping attempts I tried on her.)
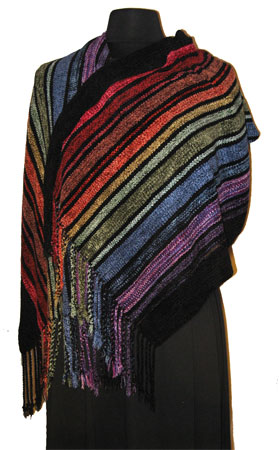
Then I tried laying it flat so I could show how nicely it moved. (This is how I shoot most of my pieces.) Maybe an acceptable picture for my website, but not at all workable for a show jury.

Think, think. Where can you put it with decent light so you won’t get a bunch of flash bounce? Where you can have or create a nice, clean white background? I’m at a loss.
Suddenly I think of my shower. I hang a white sheet for the backdrop, and try draping the shawl over one of my lovely rod people. Much better.

One more brainstorm – bring in one of my display rods, and drape the shawl over that in the shower.

I think this one may be it. I’d love your input…if you were on a show jury, which of these photos would you want to see? Or do you have suggestions for more improvement?
After I made hats and hats and more hats for people for Christmas, in my unceasing egocentricity I said to myself, “Hey, I didn’t get a new hat!” So I decided to knit myself one.
I didn’t really want a hat, I wanted a cowl/hood — something that would keep my chest warm both outdoors and in my cold office in the morning, and that I could pull up over my head when the wind was blowing or the thermometer was well below freezing. I went to the Alfred Knitting Studio to return the extra baby lama yarn from Amanda’s hat and bought some wool-angora blend yarn that was on sale. Yum – that would be cozy!
Then I went on an online quest for the perfect pattern. It hadn’t been hard to find free patterns for the seven hats I made for others, so I thought I would have similar success for mine.
Hah! Let’s start with the fact that I didn’t know what to call my desired accessory. Searching for a cowl/hood/warm head/neck thing doesn’t cut it in google. I spent time at my favorite sites, and many more, and saw lots of interesting patterns. The ones I liked visually were only cowls, sometimes called smoke rings, and weren’t large enough to pull up over the head. The ones that pulled up over the head weren’t my cup of tea aesthetically.
So I’d have to modify a pattern. I don’t knit enough to have a good handle on that. But hey, what the heck, it’s only yarn. And time. I deserved it, didn’t I?
I printed off some patterns with feather and fan type stitches and did something I almost never do…I actually knitted up a few swatches to see if that was what I wanted. I figured out how to read a knitting graph (vs. a pattern), and was pretty proud of that, but realized that although the pattern was attractive, it was designed for looks, not warmth. Scratch that one.
How about a cable? I liked doing cables I tried a few modified cables with some interesting stitches in between them, and ultimately nixed them, too.
Then I stumbled on a terrific video of a woman demonstrating the honeycomb brioche stitch. That seemed easy enough, and I loved the way it looked. I tried it out, and I was hooked.
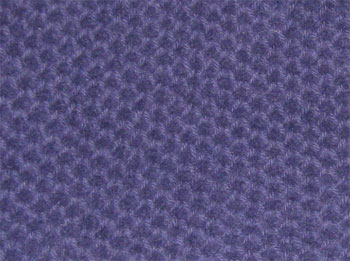
I started out with several rows of ribbing near the face, then went into the honeycomb brioche. It wasn’t difficult translating the flat demo to knitting in the round. All was going well till I realized I need to do some increasing in order to make the cowl drape nicely around my neck. How to increase in this pattern? I went back online to see if I could find directions to do that.
Hmmm. I could find a pattern that told me how to decrease (for a hat), but not one that told me how to increase. And the hat pattern made it so complex to do the stitch that the video had made so easy that I couldn’t make any sense of it that might help me increase. So I simply gave it my best shot. After all, this was for me, not a gift or anything I’d sell, and I sure didn’t care if it wasn’t perfect. The increases went fine enough for me, and I finished the piece with a few rows of garter stitch.
I do like the way it pools around my neck.

I’m less thrilled with how it works when I pull it up. It’s simultaneously too loose around my face and too big on the sides of my head.
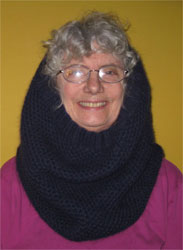
If I’d started knitting at the bottom, I’d unravel the last several inches and do some decreases. But I started at the top.
So I thought about it, and decided that I’d wear it this winter and see what I thought. I’d consider making or buying just the right stick/pin to tighten it around my neck if I needed to. Then, if it wasn’t meeting my needs, I could always unravel it and re-knit next winter.
Here’s how big the whole thing is laying flat, with a ruler for scale.
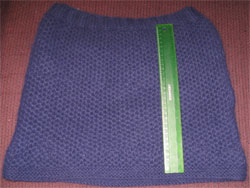
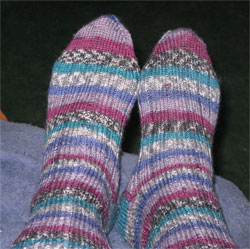
After the cowl-hood-head/neckwear, I decided it was time to finish the socks I’d started last winter. I had a sock and a half knitted – it wouldn’t take long to finish.
I did finish, and ended up giving them to Margaret. They were a tad short for me, and I knew that as a result I’d wear out either toes or heels too quickly. They weren’t so short I couldn’t put them on for a photo shoot.
I started knitting another pair for me. Maybe I’ll get them finished next winter. 🙂
Your turn: what should I call that thing that keeps my neck & head warm?
|
|