Archives

Making a New One

A new mistake, that is. While I’m pretty good at not repeating my mistakes, I seem to be excellent at finding new ones to make.

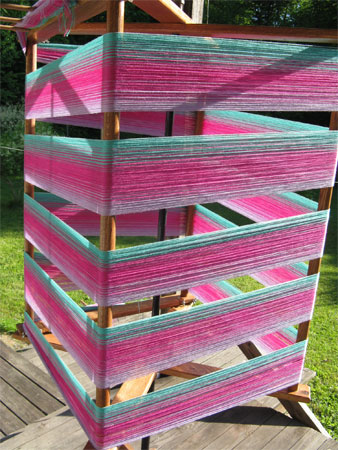
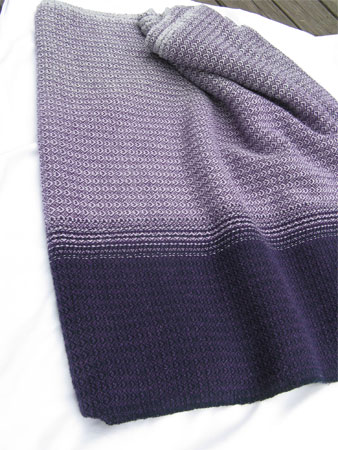
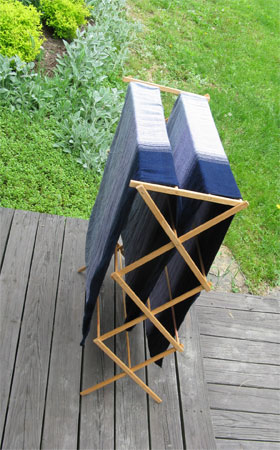
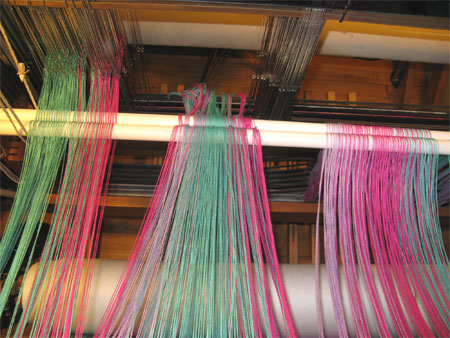
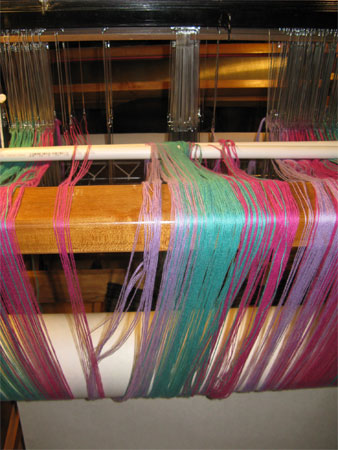
I wound the two remaining bouts for KC & CW’s baby wraps, spread it in the raddle, and beamed it. I started threading the heddles. All was going well. For about 1/3 of the width.

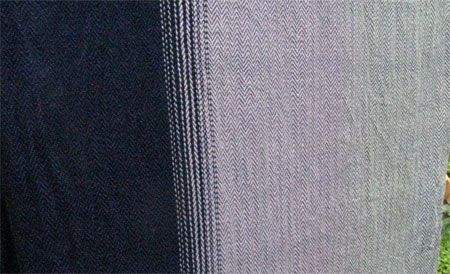
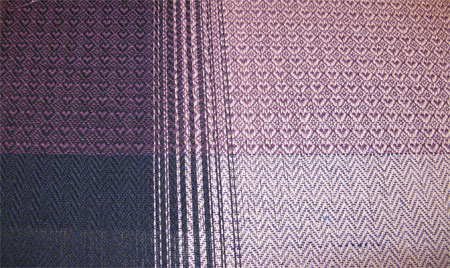
Then, uh-oh. What’s wrong? Where’s the gradient? I KNOW I did a gradient between each of the solid color areas. Where’s IS it?

Oh, CRAP! I beamed one of those bouts ‘backwards.’ What was on the left should be on the right and vice versa. Since both edges of the bout were fuschia, it was an easy – and awful – mistake to make.

mistake realized

What will I do now? Walk away from the loom for a bit while I ponder the situation. Here’s what I saw as options:

  • Unwind the entire warp, flip the problem section, and re-beam. Unrealistic – at least not alone and without sufficient physical space. It would likely cause more problems than I already had.
  • Measure out that bout again. Trash the offending section and re-beam on a supplementary warp beam. Since my Macomber doesn’t have a double back beam, this, too, was unrealistic. I know it CAN be done with a makeshift supplementary beam, but I’ve not done it successfully.
  • Measure out the edges of that bout again and hang the re-measured threads individually from the back beam. Again, not realistic. Too many threads. I’d surely end up with lots of ends that were too lose and others that were too tight. And all tangled at the back.
  • Insert a new set of lease sticks in the offending section, flip that section, and keep on threading. I liked that option. But the only way I could figure out how to insert a new set of lease sticks was to thread the whole section – 180 threads – then insert the sticks, unthread the heddles, and re-thread. That didn’t seem like a good use of time.
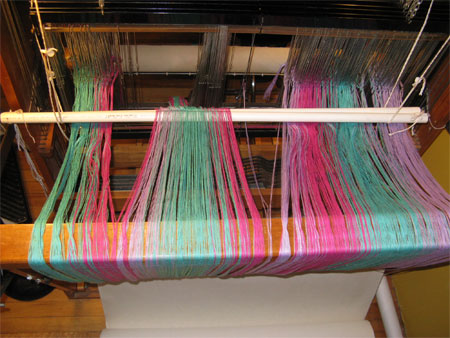
  • Thread the rest of the warp from left to right – something I’d never done. Then remove the lease sticks from all but the offending section so I can flip it. That’s what I decided to do.

threading from both ends

I have to say, threading from left to right was very ‘unnatural’ to me, and I was not at all efficient at it. But it got done.

removing lease sticks from the correct parts

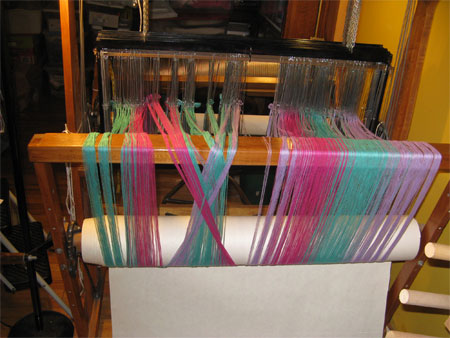
So I slipped the lease sticks from the already-threaded sections of the loom, removed the raddle, and flipped the lease sticks.

flipping the sticks

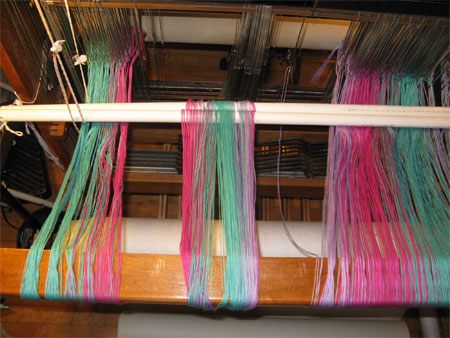
Gee, look at the huge X of crossed threads at the back of the loom. Bigger in real life than it was going to be in my mind’s eye.
a big X

Hmmmmm. Well, the center of the bout – the solid turquoise section – was fine. That part didn’t need to be flipped. And the fewer ends that were crossed the less problem I’d be likely to have later on. So flip it back.

flip it back

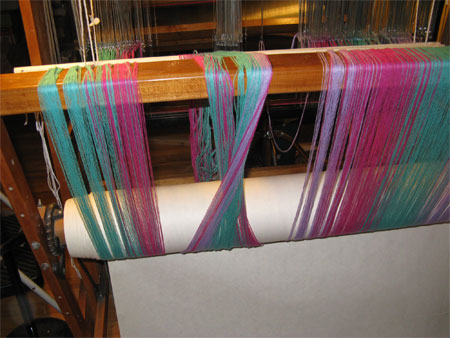
Now back to the front of the loom to thread those heddles. It still looks like quite the mess at the back of the loom.

all threaded

Here’s what I’m thinking…I’ll thread the reed. Then I’ll tie on to the front apron, being extra careful with my tension in that problem section. I expect I will have some problems down the road, but fortunately these wraps are average length, not the really long ones, and I always plan for plenty of extra warp length. So if I have to cut off after the first wrap and re-tie to the front apron, I can do that.

I hope that my plan works. If not……well, I’ll cross that bridge when I come to it.

Warping Outside

The yarn for the next batch of four custom handwoven baby wraps finally arrived. After getting a bunch of errands and other tasks done this morning, I finally got back to babies this afternoon.

It was the first time I’ve been able to work outside in a L…O…N…G time. I moved my warping mill out on to the porch and got started measuring the warp for KC & CW’s baby wraps. Let’s start with the inspiration for this wrap.

KC sand painting

This sand painting is particularly important to KC, and she wanted her custom wrap to reflect its beauty. Although her warp only has 3 colors in it, they switch places often, just like the sand painting, with a gradation every time.

Here’s the first bout – lilac to turquoise.

KC & CW, bout 1

The second bout — maybe because it’s summer and I was working outside — reminds me of watermelon. Actually, it only does that in the photo – not in real life.

watermelon bout

It’s turquoise to fuchsia to lilac.

Tomorrow I’ll wind the other two bouts, and maybe even get the warp beamed. We’ll see how it goes, ‘cuz my son and his friend will be here for a while.

8 Shaft Silk

Although I don’t weave them all that often for my scarves & shawls, I do love a complex twill weaving pattern. I modified the gebrochene pattern I wove last year.

modified gebrochene draft

Except last year I wove it in 20/2 silk; this year I’m using 30/2 silk. My post from last year incorrectly said the 20/2 was about 8,000 yards per pound (ypp)- it’s really about 4,500 ypp. The 30/2 silk I’m using this year is 7,500 ypp.

I got the silk beamed, heddles & reed threaded, tied on to the front apron. I wove and hemmed the front edge – only 1 reed-threading error, so not bad to fix. Then I wove the first pattern with my weft – POO!! About 1/2 the warp was threaded wrong! I had to unweave the 4″ and start again.

Rethreading was worse than threading. Why? My loom wasn’t all ‘unfolded’ the way it is when I’m threading. Unless I unthreaded the correct half of the reed, I had to work around it. Next time I’ll unthread the reed – I’m sure it’d be both quicker and easier than what I did.

Anyway, finally got it all back, threaded correctly, and started weaving again. Here it is after weaving a few patterns motifs. As always, I’m not happy with the color.

modified gebrochene-ruby

Now let me talk about the weft for a minute. A few years ago I bought some tram silk. I tried weaving with it…not overly successfully. Not an experience I was eager to repeat. Sandra Rude posted about working with tram last month, and I was encouraged to try again, this time using it only as weft.

I knew for my gebrochene to look right, I had to use a weft that’s roughly the same size as the warp. But I don’t own a McMorran balance – a tool that determines the ypp of yarns. I remembered seeing directions for making one online somewhere, and googled a bit till I found these instructions. I made one with a bamboo skewer and some yarn and it worked like a charm.

I found out that my ruby tram silk is roughly 30,000 ypp. It takes 4 feet of this to balance 1 foot of 30/2 silk. How would I cope with this? I don’t spin, and had asked one of my guild-mates to spin some up for me, but he said it wasn’t worth it. I tried getting it machine spun at the Fiber Factory, but it was too fine for their equipment.

Still, Sandra inspired me.

So, using a modifier a friend made me, I wound some of the silk onto 4 of the cardboard cones from the 8/2 babywrap cotton. Then I stood all 4 cones up and wound a bobbin from them, careful to wind slowly and with even tension of all 4 threads. It isn’t ideal – a twist in it would be better – but it works. And I just love the sheen of the tram.

Here you can see both the top and bottom of the pattern.

modified gebrochene up & down

I’m going to use another of the trams for the second scarf on this warp. When I have time, I’d like to weave some shawls out of this pattern. But maybe in 20/2. But then I can’t use my tram. Decisions, decisions.

Hard work & creativity

I promised I’d take photos of KM & TA’s wraps outside in the natural light when they were done. Yesterday was overcast – the perfect day for photos.

Here’s TA’s.

TA's wrap, outside

I took a picture of KM’s while I was drying it, but forgot to get one after it was dry & pressed.

I used my trusty old folding drying rack, and was amazed at how quickly the wrap dried.

KM's wrap on the rack

This is how I’d suggest KM dry it when she gets it home, too.

Here’s a closer shot.
KM's on the rack

Unfortunately this doesn’t give you any idea how soft & supple this wrap is. TA’s wrap, with a cotolin weft, weighs 230 grams/meter. KM’s wrap, with a 20/2 silk weft, weighs 188 grams/meter – 20% lighter. When folded up as I usually do for shipping, KM’s needed 4 folds to be as thick as TA’s was in 3 folds. Neither of those measures really does what a picture would have, and even the best photo can’t compare to actually feeling it. KM should have it in her hands by Monday so she can do just that.

While I’m waiting for one of my next moms to confirm her weft color so I can order the yarn for four wraps, I’ve been doing other creative things.

30/2 silk scarf warp

After all the colors you’ve seen on my warping mill, this undyed silk can look pretty boring. But it won’t be once it’s woven up in my modified gebrochene pattern. This is a 30/2 silk, 7,500 yards per pound. I bought it in skeins so had to wind it into balls in order to measure my warp. Not bad with a swift and a ball winder.

Then I got to the warping mill, and that’s where the problems started. The twist in the yarn caused little knots to want to form as it was coming out of the center of the ball. Then I had things come out funky requiring me to spend a few hours, literally, winding balls by hand as I painstakingly worked through the tangles. Trust me, if it wasn’t silk, I sure wouldn’t have taken the time.

Then the one skein wasn’t quite enough. I needed to wind another. Did I really have the patience to go through all that again? I did not. But I had a brainstorm. I moved my bobbin winder near the swift, used a modifier my handyman made for me, and wound that skein onto four cardboard tubes (the ones that all the cotton for the baby wraps come on). It worked like a charm…both the winding of the cones and the time at the warping mill working with them. YAY!

I also used a little more ‘creativity’ in a rather odd fashion. My Fiber Arts Guild has had several new members in the last few months, and none of us have name tags of any type, making it hard for some of us (including me) to remember names and get to know people. So we were challenged at the May meeting to make name tag and bring it to the June meeting. That’s tomorrow.

I had the final idea about how to do it last night, and implemented it today.

my name tag

I’m so glad my name isn’t Anastasia! Even my ‘real’ name – Margaret – would have been way too long to do this way.

Did you notice that I got my last name in there, too – at least phonetically. Can you see the stem and leaves on that red cherry?

I sewed those buttons on a used pocket folder I had in the house. Folded into three, it’ll stand on the table in front of me. I just wrote my name on the back with a sharpie so people who are sitting near me can see my name, too. Sewing through the part where the pocket was — two layers of the heavy stock – was not fun or easy. I was glad when I got it done. I’m betting I get some chuckles tomorrow.

Sooooo Different

KM's warp to TA's warp

TA & KM are sharing a custom baby warp, both handwoven, but that’s where the similarities end. Completely different tie up and weaving pattern, color, and yarn. KM has a twilight silk weft in a simple zigzag pattern, TA has a deep purple cotolin weft in my standard hearts pattern. So the way these wraps feel and their total weight is like night and day.

I really wish I could have gotten a photo that showed you the color with something resembling accuracy. No such luck. But at least you can see how different the two custom baby wraps look.

Today I finished weaving TA’s. I got both wraps machine hemmed. Next I have to examine the wraps for any weaving errors and/or loose threads and needle weave them in. That will take some time with these two. I had a bunch of knots in the silk that I had to work around, and tons of broken ends in the floating selvedge of the hearts. I was breaking that end about every 5″ – ARGH!!! Then I finally got the brainstorm to double the selvedge – not another broken end.

After the needle weaving, there’s washing, drying, pressing, and labeling. And hopefully getting a decent photo of both them in natural light. Can’t wait!