
Warning – long post. Read at your own risk. 😉
Apparently lot has happened in the last week. As soon as I got that black & white shawl warp on the Macomber and saw that there was a loom problem, I dyed a tencel warp for a run of 3 scarves. I wanted the blue-violet and periwinkle I’d used before, so pulled out my formulas and set to work. The colors going on the tencel looked just as they should…that is, just like I thought they had last time. But as the dyes batched, soaked, rinsed, and dried, my brain was confused. Where was the blue violet? And where the periwinkle?
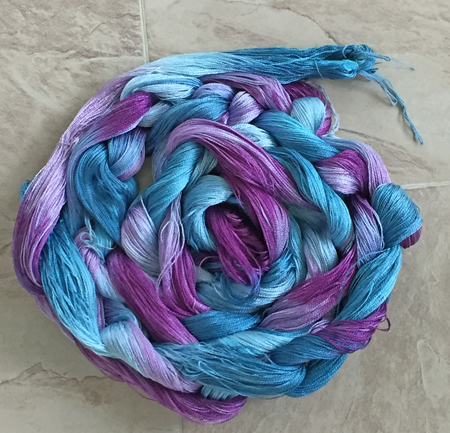
That is red-violet and turquoise/teal. So I went back to my sample that I’d dyed using this formula. Yep, they were the same colors as what I had here. While those colors are very nice, there is no blue-violet and no periwinkle. Perhaps those were the colors I was going for when I created the formula, but they’re not the colors I got. Yet I never re-named my notes or my samples. DOH! Still I think the warp is beautiful, so it’s all okay.
While I was waiting for the Macomber parts to be ordered and shipped, as planned I got a towel warp on the counterbalance loom. I opted for a red-based bumberet. In the must-use-stash mode, I chose color combos outside my general comfort zone. Here it is on the loom, with the first towel I wove, using a red weft.
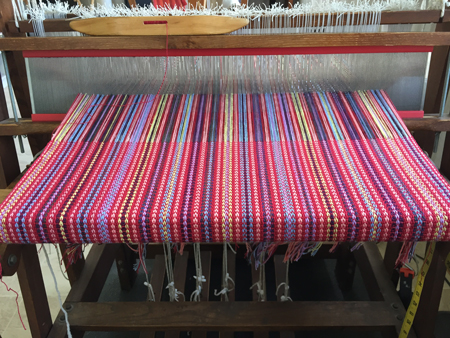
That was too much bright red for me. I used a white weft next and really liked the way it muted the colors, so wove 2 towels of that. Then I wanted to use that peach/coral color that was also prevalent, but didn’t have enough left for even one towel, so matched it the best I could. Next I used one of the dark blues in the towel, then a cranberry. Here’s the batch of them.

Interestingly, now I like the red. Not as well as the lighter colored wefts, but definitely better than the darker colored ones. The cranberry one is too short to be a towel – not enough warp on the loom – so I’ll hang onto that for generic kitchen use.
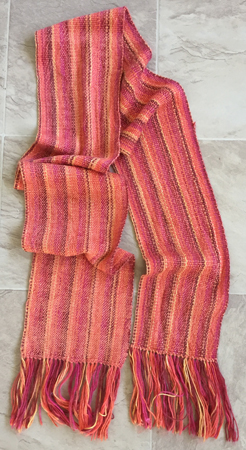
In between weaving the towels I also finished weaving the warp that I’d put on my rigid heddle loom for demonstrations at the July show. Since I generally weave with relatively fine yarns, I have a challenge finding yarns in my stash that work well on the rigid heddle loom. So this time I thought I’d try a thick-ish variegated sock yarn in the knitting stash.
Looked nice, but O.M.G., what a pain to weave! The yarn was loosely spun, and the movement of the heddle kept abrading it. After a few broken warp threads I got wise and used the heddle only to raise and lower the warp threads, packing the weft in with a weaving sword that I’d fashioned a few years ago out of a paint stick.
Fancy, eh? But it was with me at the show, and it worked. Not a great demonstration of what the loom could really do, but this was another live and learn situation.
First I used an orange rayon chenille weft for a long scarf.
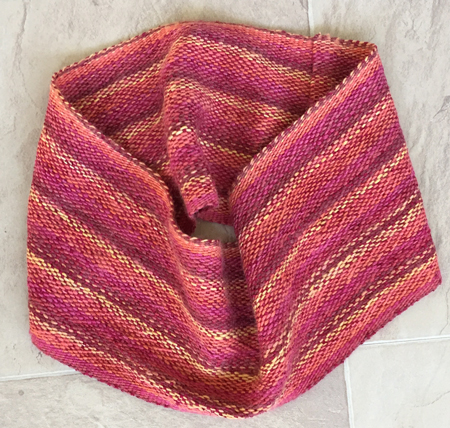
Then a red rayon chenille weft for a cowl.
Moving on…you know that saying that no good deed goes unpunished? This next segment is like that. I suggested an ice-dying activity for a winter evening meeting for my Guild. Would I teach it? Um…sure. However, since I’d never actually done it, I’d need to practice and work out some kinks.
First I dyed two little Tshirts for my youngest grandson. This was a test of whether it was better to use the dyes in powder form or after they’d been mixed with liquid. I was hoping the liquid would be just as effective, since I didn’t want to have to deal with the powders with a group of people, as they’d all have to wear masks.
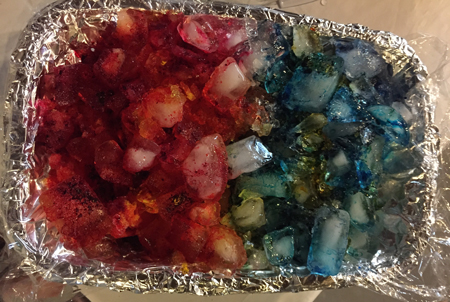
Here are the Ts after I’d sprinkled on the dyes. Red & orange were sprinkled on dry, blue & green after mixing with liquid.
The next morning, after the ice had all melted, they looked like this.
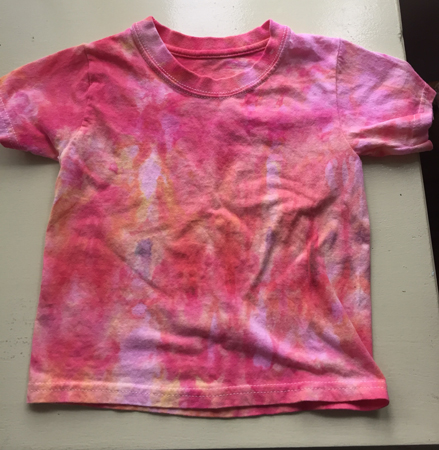
After that I rinsed till clear, then washed and dried with other laundry and a color catcher. The reds are quite nice, I think.
The blues & greens, not so much.
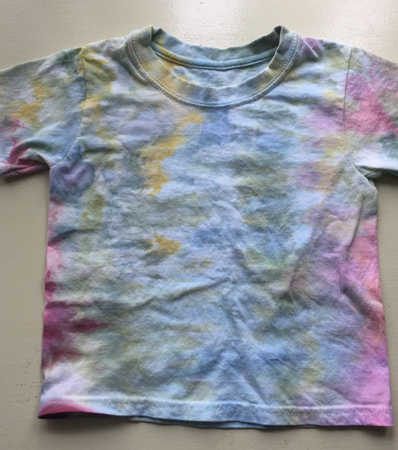
Ok, so we’ll use powered dyes. (Or maybe I mixed them with a bit too much liquid…that’s for the next experiment.)
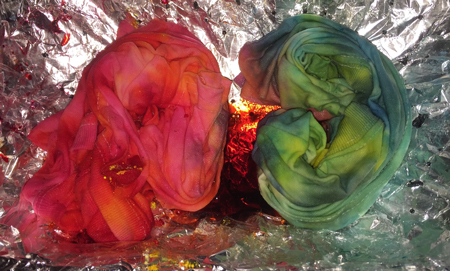
Then I realized that I’d planned on using little silk scarves I’d purchased for this process. But uh oh, silk needs to be steamed for the colors to set. No way will everyone who takes home a scarf covered with ice and dye at the end of an evening meeting have a dye-dedicated steamer at home. So next up was a test to see if other heating methods worked as well. Three little scarves are under this ice and dye.
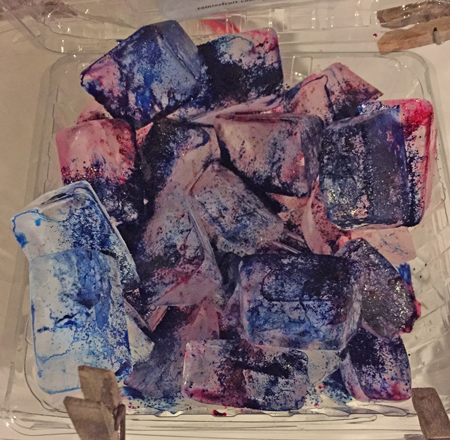
After the ice melted, I steamed one and let the other two dry on the line in the basement. Then I tossed one in my dryer for about 20 minutes, and pressed the other with my iron set on silk. After that I rinsed all three scarves – it didn’t appear that any color ran at all.
An apparently successful experiment. Here are all 3 scarves after pressing.
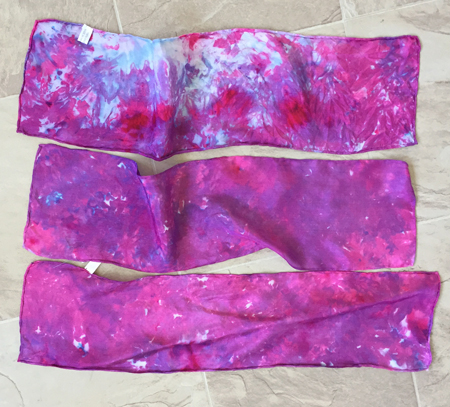
Personally, I prefer the top one, with the most variation in color, but that’s a function of how it was in the container when I put the dye on, nothing to do with the method used to set the color.
Next experiment, which I’ll be doing with a few friends, is to try koolaid and other food dyes, and also to use both some cottons and some silks. That won’t happen till September, so the learning will continue. Glad the evening meeting isn’t until winter!
Yes, I do a lot of ice dyeing – I’ve never steam set my silk scarves and I’ve dyed tons of them. I soak them in soda ash to start. Then scrunch them on a wire rack over a bucket or in my case those little oblong plastic pans from hospital stays (I’ve collected those from family members). I pile the ice on, sprinkle the dye powder, 2-3 colors, and let them sit overnight for the ice to totally melt. I’ve found the powder method is much better than the already mixed dye solution. Then wash out the next day and hang to dry, which takes around a minute. I use quite a bit of ice – I like the effect from cubes rather than chips. Of course, this all poses an issue if people want to take their scarf home the same day unless they were able to set it in a plastic/mesh basket in a bucket to start with so they could transport it home. I need to do more but I haven’t yet unpacked the dye supplies after our move.
Thanks so much for the tips, Cindie! I’m glad to know that the powder works better than the liquid – no point doing more of that experiment, then. I think I’ll like the look of cubes better, too, plus there’s the added benefit of not having to crush lots of ice! Also glad to know heat treating isn’t necessary!
Have you used snow? I’m thinking the effect may be more like crushed ice, unless you have big chunks of snow. Is that true?
How fun! I love the red towel myself and I’m with you, the top ice dyed scarf is my favorite due to patterning. Cindie (Eweniquely Ewe) does a lot of ice dying on silk. Maybe she”ll weigh in with some tips. Dying is the one rabbit hole in the fiber world that doesn’t interest me even after trying it when I was doing much more quilting and wanting some custom dyed fabrics.
Thanks, Theresa. Dyeing for you, spinning for me. Just not my thing.