
Warning: this is a long post with lots of process photos. Proceed at your own risk.
Before I wove those great color block towels I had purchased 2 large cones of Georgia-grown and processed cotton. I hadn’t realized just how large they would be till they arrived. Here they are with two of my ‘regular’ cones of cotton, each around 1/2 pound, for comparison.

I bought the cotton for 2 reasons: I loved the fact that it was grown and processed right here in the United States, and I wanted to do some more hand painting with a fiber that would be more affordable to potential customers than the silk.
First up was trying a new-to-me technique – dyeing the warp for a cotton shawl in the same colors, but with sections offset partly or in whole. Of course I had to be begin by measuring out the sections of warp, scouring it, and soaking it in the dye activator before I could start dyeing.
Let me say right off that the bed risers did, in fact, raise my table to the perfect height for me to work on. HOWEVER, I have learned my lesson with this job. I will NEVER AGAIN do my dyeing outside for this type of dye job. (It was relatively simple when I was dyeing one warp at a time for the scarves.) It takes only the faintest breeze to make handling plastic wrap insanely challenging, and it felt like I needed to use miles of the stuff for this job. For each time I covered the length of the table, which I think was six times, I needed four widths of the plastic wrap. So lay down a length of wrap the 6′ of the table, attempt to hold it in place while I laid the next length next to it, and so on. Needless to say, by the time I’d gotten to the 4th length nothing was straight and even any more. I was frustrated for sure. Wishing I had octopus arms and hands with lots of fine-motor control and patience.
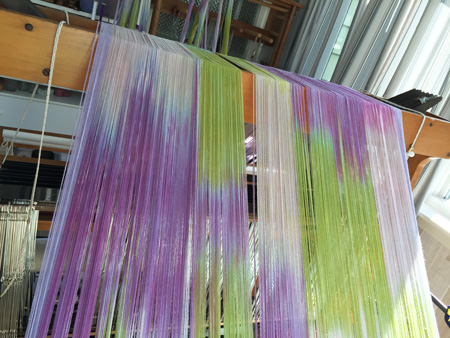
Here’s the first length of the 6′ table when things were relatively in control. Seven sections of cotton – needed for the width of the shawl – laid out and painted.

After each 6′ length was painted I had to roll it up the length of the table, again cover the table with the plastic wrap (grrr), then lift the already-painted roll up over the newly-covered table for the next 6′. So in addition to the wind, as you can imagine it became increasingly difficult to lift the already-painted roll up over the newly-covered table as it became heavier and heavier. Again wished I had octopus arms and hands, this time strong ones.
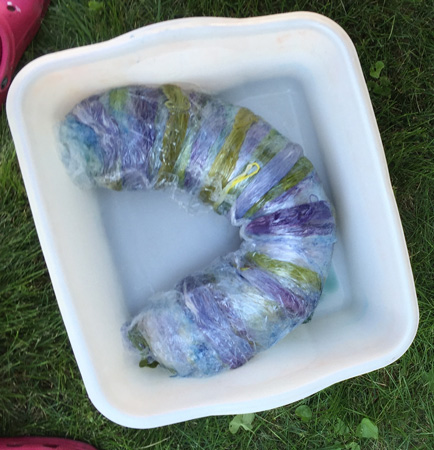
After I had it all painted and rolled up, I set the whole thing in a tub to batch – or set in warmth to get that dye to bond with the cotton fibers. Since I could certainly not fit this into my steamer, I decided to leave the tub in my garage, with the door closed to really build up the heat, for two days. I thought it looked like a caterpillar, one that might even be recognizable.
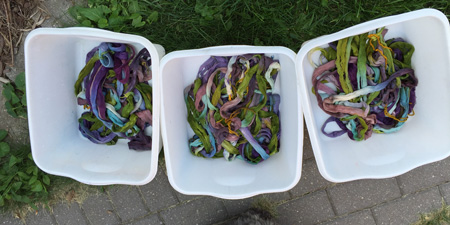
After two hot days I carefully unwound the big roll, dividing it into three tubs to keep the lengths from getting irretrievably twisted.
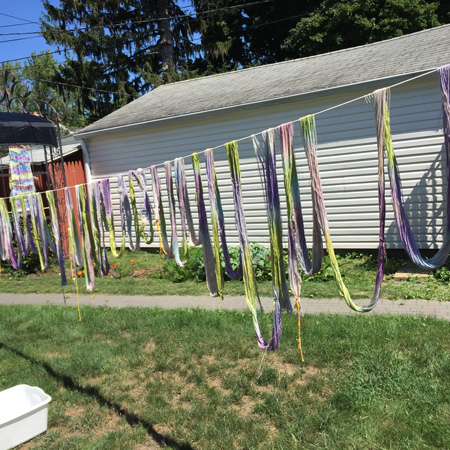
Then I draped it across my clothesline to dry. It took almost 40′ to spread it all out.
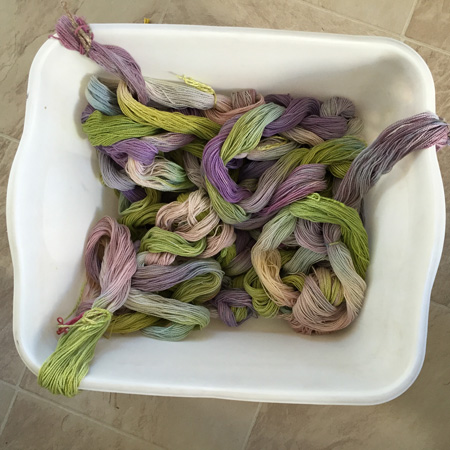
Here’s a tub full of the dried yarn. You can see how much lighter it is dried than it was wet. I still have to get used to this in choosing my dye colors.
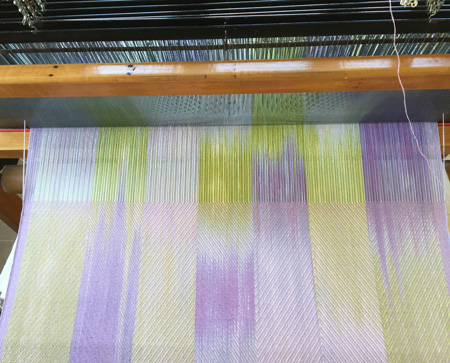
Finally I could start getting this warp on my loom so I could get some real idea of how it looked. I decided to do about 1/2″ on each selvedge with some solid color cotton I had so I didn’t have to worry about selvedge breakage like I did for those towels.
Once on the loom I auditioned several wefts. It seemed like I had plenty of choices.

I decided on a lavender cotton for the first shawl. I am loving the way the colors gently bled along the length of the cotton for such nice transitions.
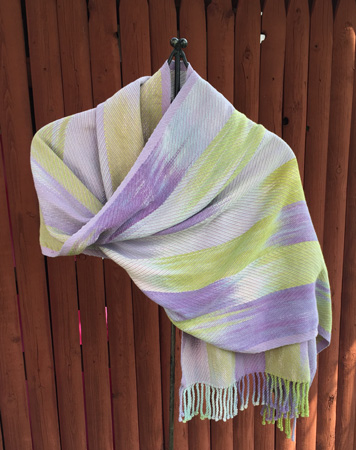
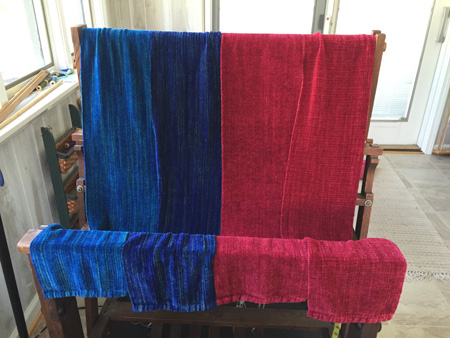
Enough of the process. I wove all three shawls, fringed, washed, and dried. I still have to do the hard press, but the conditions were right to get some photos so that had to wait. First up is the shawl with lavender weft.
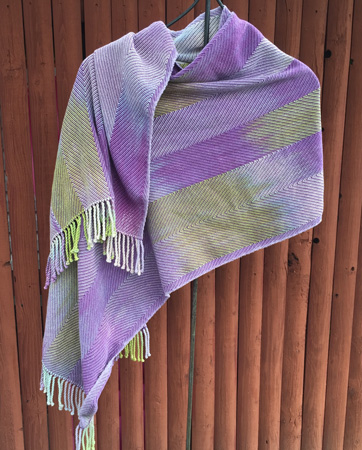
Woven next was a shawl with a dark purple weft.
And finally I used that lovely undyed cotton for weft.

My daughter says the shawls, especially the dark one, remind her of a long-standing Rochester event, the Lilac Festival. I think I’ll use that for their name.
Just quickly, while I was waiting for the dye to batch and then set, I wove four rayon chenille scarves. That was before I knew that it would be warm the weekend of the Clothesline Festival.
So I’ve ended up with 9 new shawls and 15 new scarves. Not bad. We’ll see how the show goes.
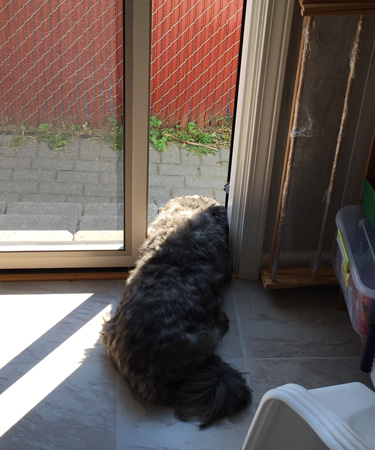
Parting shot: one of Jack’s favorite positions when the temperatures are in the 70s.
[…] intended to use the same technique for for both of these dye projects that I had when I dyed that cotton, but when I started with the silk, I was having quite a bit of difficulty moving the warp up to get […]
This is so beautiful! How do you get your warp made, laid out, painted, wrapped and soaked etc without causing tension issues later on? Are your choke ties uncommonly tight? And if so, how do you avoid the white striping that would occur with tight choke ties resisting the dye?
Robyn – Thanks for the compliments. I learned to make my choke ties for dyeing really loose, and did so here, too. Each of my bouts was fairly narrow – only 2-3″ wide (based on the yarn & sett I planned to use). That helped with tension issues, I think. I soaked all bouts at the same time in the same temperature water, which probably helped, too. Then, since I dyed them all at the same time (see photo 2), and batched as one, I think that helped, too. I didn’t really have significant tension issues in beaming and none in weaving, although I should note here that I ALWAYS beam under tension using my version of a warping valet, which makes a big difference. Let me know if you have other specific questions.
Peg I do steam in them, no worries. I never use them again as they only cost about $1 australian each and I usually cut just the width I want. Do try them some time.
Norma