As planned, for the past two weeks I’ve focused most of my time on creating new Victorian Christmas ornaments. I made four new ones, which doesn’t seem like many till you realize that each one is individually designed, meaning that many hours go into working out the number of beads in each section, the order of beads, the colors & sizes, etc., etc., etc.
I’ll show them to you in their order of creation.
First is a simple netting pattern of silver & gold beads.
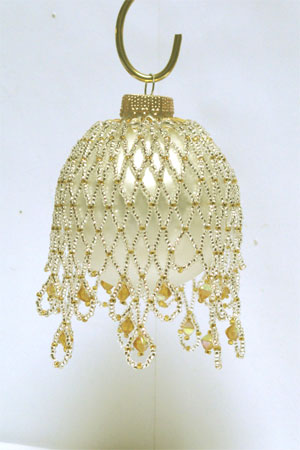
I had started this ornament as a demonstration at a show back in May & hadn’t touched it since then, so first I had to figure out where I was. Immediately I found a few beading errors I’d made in May, so I had to take a bunch out to fix those mistakes. I’ve done a bunch of netting, so once I got those errors fixed, I was off and running.
Hah! I got about 3/4 of the ornament done, only to try it on the glass ball one more time and decide that it was too full. I had planned for 8 of the longest drops and that would be just too many. The beads wouldn’t hang right and look good. So I had to take EVERYTHING apart and start again from the very beginning to reconfigure it for 7 of the longest drops.
Hours wasted.
One of the things I really like about my Victorian ornaments is how different they can look when you put the cover on a different glass globe. From a matte silver ball to a shiny gold ball, the look is probably more different in real life than in the photo. And if you use a dark red ball, for instance — completely new look.
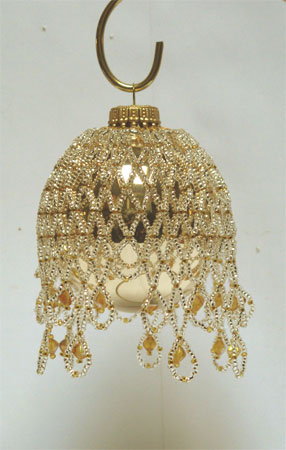
Next I went to a variation on another style I’ve done before.
This one actually went without a hitch. I like the ‘variegated’ strands mixed in with the solid gold strands of the drapes, and the contrast of the roundness of the overall ornament with the squareness of those bottom dangles.
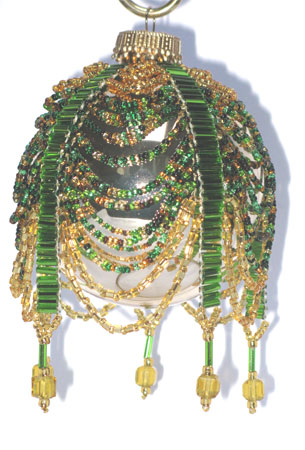
Ok, so that went so well, I have my patience back to try a new pattern. A combination of ladders (like the green bugle beads on the second ornament) and netting (like the first), plus a bunch of stars to dangle from the bottom.
First I started with the netting and tried to add the ladders. Not the way to go. Then I created the ladders and tried to connect them to my previously-created netting. Nada. So simply put that netting aside and start again with the ladders. (Can you see the hours building up again?) When all was said & done, I’m happy with the design.
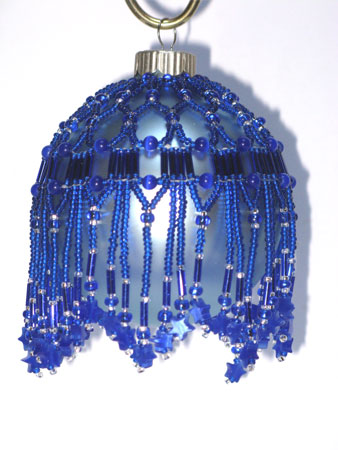
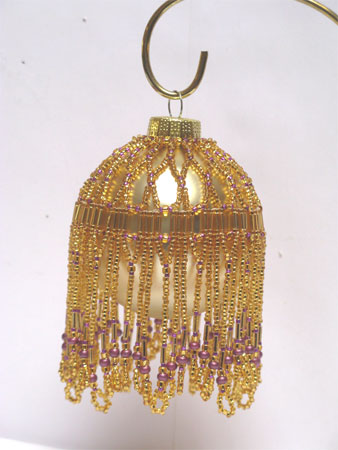
So because I was happy with the general design, I decided to try a modification that would make it even more rich, more over-the-top. That, after all, was my goal for these four ornaments, and I achieved it to differing degrees with the first three. This last one would be the most lavish. I decided on mostly gold with purple accents.
I really like the length of the dangles, and the loop on the bottom. I’m quite happy with this ornament.
My plan is to have two completely different types of demos for this weekend’s Well Crafted Weekend at the Roycroft in East Aurora — weaving with fiber and bead weaving.
I’ve got my rigid heddle loom all set up still from Letchworth, so no time involved in that end. The reason for creating these Victorian Christmas ornaments was to have something fancy to show what I can do — most of my existing ornaments are what I consider to be simple.
So to have an ornament that I can work on while people watch, I had to have it started. There’s no way I can start with people watching – it would be WAY too boring to watch me thread beads, try them on the glass ball, then take them out. Repeatedly.
No problem. Do some netting (easiest to do while distracted).
I chose some purple metallic beads with off-white pearl accents. Figured based on the silver & gold experience that I’d start by planning for seven of the longest drops, not eight – don’t make that mistake again! I wanted the drops to be longer than on the silver & gold, so simply add enough more segments to do that.
Yeah. I took those three rows in and out four times!
The first time I’d used actual small pearls for the intersections, but I thought they looked to big compared to the purple seed beads.
The second time I decided that I hated the larger pearls I’d incorporated into the bottom loops.
Third time I decided that it would all look better with only 5 beads between each of the intersections instead of the 6 I’d used.
See why I couldn’t do this part with people watching? And why it takes so many hours to make a single ornament? I have easily four hours into this one just to get the first three rows in. Now that I have that design work done I know I can finish it relatively quickly — at least I could if I wasn’t doing it as a demonstration — but relatively quickly probably means another 3 hours plus.
I didn’t take pictures of what I have done so far — I’ll show you when it’s actually done. May be months from now!
Your turn: do you spend lots of time putting things together and then taking them apart?


how can I get some of your pattern Ideas. datilling@icloud.com
There are some pattern books I started with, then I just made up my own designs from there.
How can I get the patterns.
Ingrid
Ingrid – Some patterns I adapted from patterns I bought in books, others I made up as I went along. If you google beaded ornament patterns you can find a few online. Or find one or more of the books by Laura Jansen; the one I have is titled The Beadecked Ornament, but I believe she has at least 3 different titles. Have fun!