Archives

I’ll never tell

I’m making Christmas presents (several things, all rather last minute, at least for me), so can’t show or tell any of them, but I’ll let you play a guessing game. Name of the game is: What on Earth is She Doing?

These are all the steps I can give you until after Christmas, but here goes.

Step one – a cone of ugly pink-ish taupe yarn.
pink-ish taupe yarn on cone

Step two – wind into skeins and dye with deep colors.
hand painted skeins, wet

Step three – hope those skeins turn out as intended when dry.

hand painted skeins, dry

Step four – wind the skeins into cakes. I can’t believe how ugly these cakes of yarn are. I wouldn’t have bought them, or even taken them for free if someone was giving them away.

hand painted yarn wound into cakes

What on earth could she possibly be doing? Feel free to answer in your own head. If you post a comment with your guess, I won’t be able to tell you if you’re close or not, so as to keep my secret safe.

And I can’t even show you process photos of the other things I’m making.

My first snowblowing, plus dye results

A few weeks ago we had a wet, heavy snow here in Rochester (NY). Lots of it. 15″ reported at the airport. I shoveled for more than 3 hours, and it wasn’t easy. Or fun. I talked to a few people about changing my mind and considering buying a snowblower. A friend suggested I consider a cordless electric machine – no gas engine to maintain and easy on the environment.

snowblower covered in snow

I did some online research, and ended up at my local Ace hardware. I bought an Ego that uses 2 batteries, and then waited for the snow. Today we had a wonderful (read awful) mix of freezing rain, sleet and snow. It was time to break out the snowblower for its maiden voyage.

I live on a corner, so have lots of sidewalk. Plus my garage is detached so I have paths in my yard to get from the house to the garage. Plus the driveway and a brick walkway by the front steps.

Although I have a learning curve – what do I clear first, and where do I blow the snow efficiently – my first experience was very positive. 45 minutes and all the wet, heavy snow was removed. This included shoveling my steps and those few areas the snowblower couldn’t get into. I have no doubt that I this was no more than 1/3 of the time I would have spent shoveling, maybe only 1/4 of the time. SOOOO worth the investment to save my back! The video is only some of what I cleared.

I also dyed the green tea/modal yarn from Finger Lakes Yarn. I went for the Bijou Bounty in purples, and had some success achieving my desired colors. Warp for 3 scarves, and potential wefts for 2 of them.

hand painted green tea modal yarn - Bijou Bounty

Only time will tell if I use either or both of those solid weft yarns. I’ll audition them on the loom and see what I think.

Below I was trying to see which of these golds would work better for thin warp stripes. I went with the rayon (on right) even though it’s a bit heavier, thinking the silk (on left) was just a bit too yellow.

bijou bounty yarn with golds

The warp is beamed and threaded, so it’s time to wind those dyed skeins into balls so I can try them out.

Give me your input on color

I have some wonderful yarn from Finger Lakes Yarn I’ll be dyeing very soon. I think I’ll attempt to dye in the colorway of one of the attached images. Wanna give me your input?

Susan Pogue dyed these, and took the great photo. Thanks, Susan!

Molly McLaughlin workshop

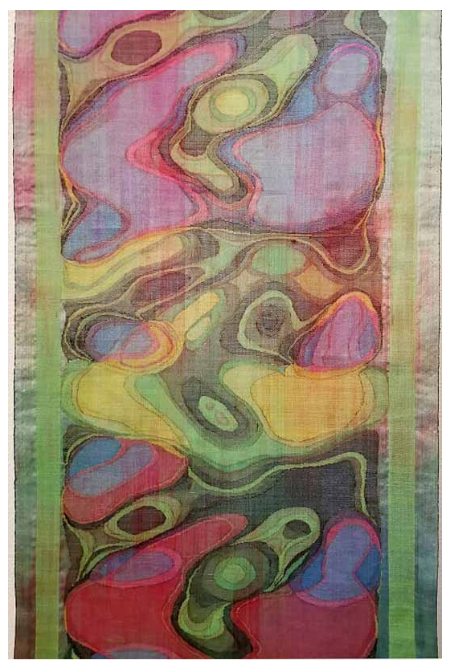
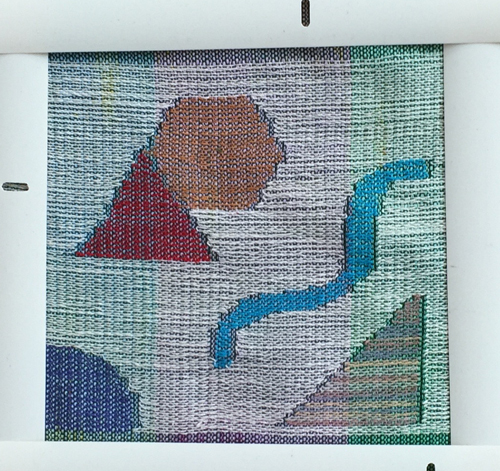
As planned, last week I took a 2-1/2 day workshop with Molly McLaughlin. Titled Painting with Fiber, this is obviously an area in which Molly is a total master. Again, here’s an image of one of her gallery pieces.

Molly McLaughlin's woven piece

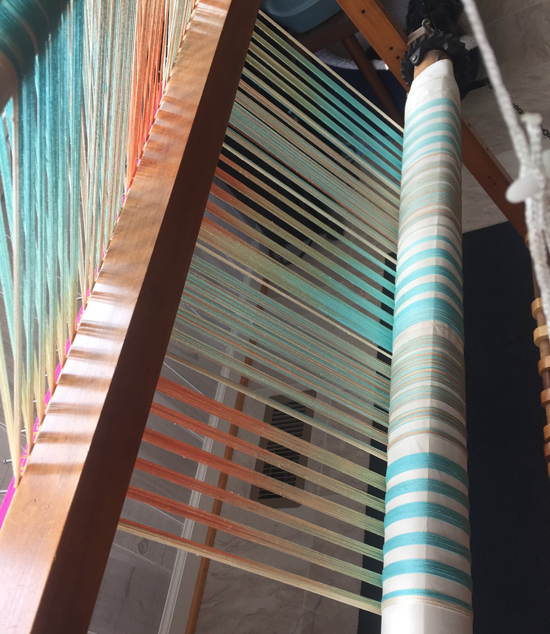
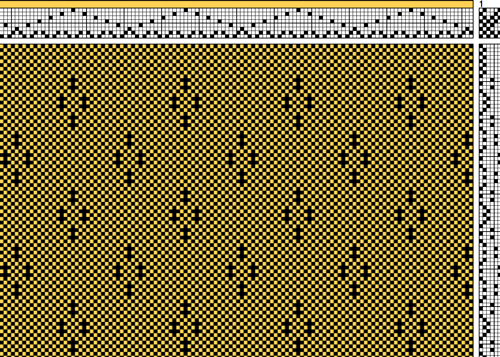
In my earlier post about this workshop, you saw my Missouri loom set up with the handpainted warp Molly had sent. After a lecture and explanation of both process and color values, Molly sent us to our looms to weave some simple shapes using Theo Moorman inlay techniques.

Well. My squares were pretty good, and my triangles weren’t too bad. The circle? Um, NOT.

Molly McLaughlin workshop shapes

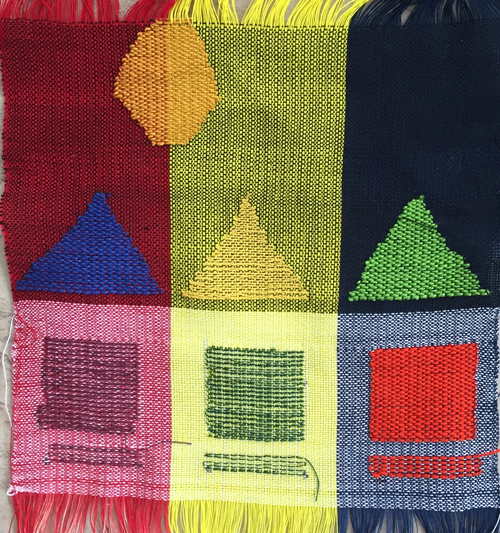
The warp is 20/2 cotton. The ground weft was 20/2 cotton throughout all pieces. The more solid shapes were inlaid with 5/2 cotton, the others with 20/2 cotton.

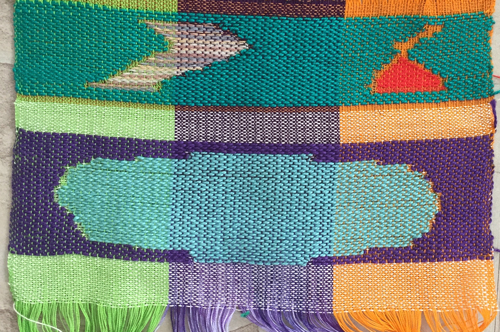
After the Thursday morning lecture, per Molly’s directions, I advanced my warp to the next section of painted primary colors. We were to inlay both the positive and negative spaces. I tried to inlay an oval, but instead got a…flying saucer? Then I was playing with a variegated 20/2 cotton and a ‘not woven’ section.

Molly McLaughlin workshop, more shapes

We had homework for Thursday night…to plan out a 6″x6″ design that would be mounted on a black ‘canvas’ frame Molly provided. We had to consider everything: use of positive and negative space, focal points, movement of the eye, and both color hue and value. I arrived Friday morning with my design, which I liked.

MM-6x6 plan #1

But I couldn’t plan out the colors until I had again advanced my warp, this time to the section of secondary colors. Plus I had to see what color thread was available to use.

Once I’d made those decisions, I began weaving. I’m a relatively fast weaver, but I couldn’t finish the piece before the day ended. I finished weaving at home on Saturday.

MM finished piece #1

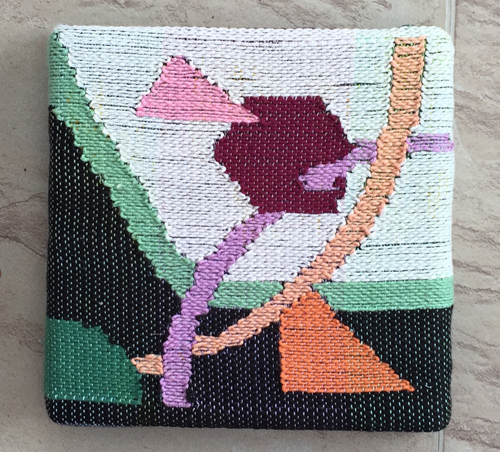
While I was weaving that piece I decided I would do one more piece, this time with thicker yarn. I have very few colors of 5/2 cotton, so settled on using carpet warp since I had a variety of colors. I planned to use the same design and see how much my skill had improved, and I was pretty sure I’d like the thicker yarn much better.

As it turned out, I wasn’t thrilled with that design, so Saturday night I decided I’d modify that. Here’s the design for piece #2, complete with approximations of the colors I’d use for the inlays.

MM 6x6 plan 2

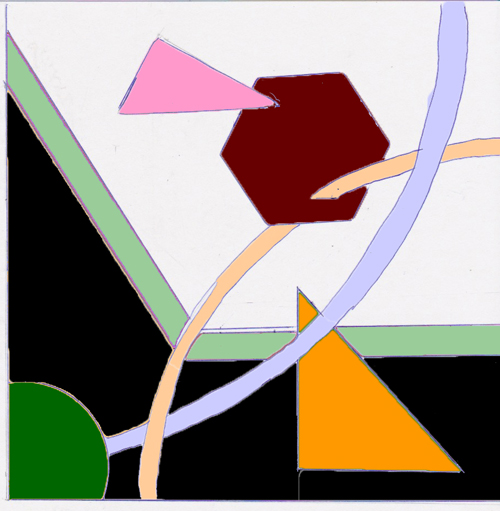
I spent a VERY long day on Sunday weaving this off. I inadvertently switched the colors of the light orange and lavender arcs and wish I hadn’t. I also lost the tip of the orange triangle. C’est la vie. FYI I don’t have black carpet warp, so the black is 8/2 cotton, doubled.

Have I mentioned yet that I don’t anticipate using this technique in the future? I don’t. Still, I’m glad I took the workshop.

This morning I secured the edges of the weaving with my sewing machine and then mounted the second piece on the provided canvas. Woven with carpet warp, the end result is tapestry-like. I’m about as happy as I can be with it – which means I think it’s marginally okay, given the newness of the technique to me and the amount of time I was willing to devote to it. Then I spent a while putting everything away and getting the Missouri loom back to the attic, where it will likely live for a few more years.

MM finished piece #2

Other overall info: Molly is an EXCELLENT teacher. Her work is OUTSTANDING. She put in TONS of time and effort, and provided LOTS of materials for us for this workshop. She generally uses 240/2 silk for her pieces, with a minimum sett of 180 ends/inch, twice that when she does doubleweave. Twice that. Get it? 360 ENDS PER INCH!!!! If you have a chance to study with her, for a day, a week, or more, jump on it, even if, like me, you will probably never use the technique.

Simple pictures are best

Simple Pictures book

About a million years ago when I taught preschool, I remember reading this book to the kids. I was surprised to see that I’d used this same photo back in 2012, and that I’d commented then that I often forget this lesson. Well, I forgot it once again.

Back in August I hand painted a silk warp that has sat there ever since, waiting for me to get to it. It’s another skein vs. warp dye job, this time reverting to the coral & turquoise I’ve done before, although a bit more muted than on the tencel I’ve done. I decided now is the time to weave this piece. I’m loving it going on the back beam.

beaming coral & turquoise silk

I had a draft planned on my computer.

lace dots weave draft

I was prepared to start threading, and then I realized that because of the width of my warp and the design of this draft, I’d have to move 120+ heddles on my loom. Not a fun job. So I came back to the computer and tried my colors and width in one draft after another. Spent over an hour doing this. Ended up rejecting them all.

“Simple pictures are best,” I said to myself. But how would I deal with all those heddles?

I spent a bit of time looking more carefully at the draft. Wait a minute! Shafts 5 & 6 don’t weave lace, so clearly I can modify the draft to spread the tabby heddles over 4 shafts instead of just 2.

I had a few false starts on this, and spent probably 90 minutes getting the draft fully designed. Much better; I’ll only need to move a few heddles to accomplish this. Whew!

lace dots 2 weave draft

I wonder how many more times I’ll have to re-learn this same lesson about simple pictures. I’m guessing many.

I’m going to start threading now.