|
|
Starting with the bad. Or maybe it’s not so bad, but it creeped me out a bit.
I was on my walk a few mornings ago and was stopped by bright splashes of red on a plant I was passing.
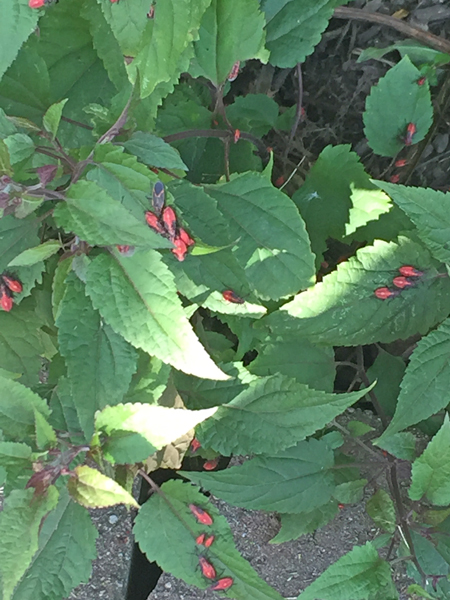
I thought they were interesting looking. Bright and cheery. And then I looked down. OMG there are about a million of these bugs.
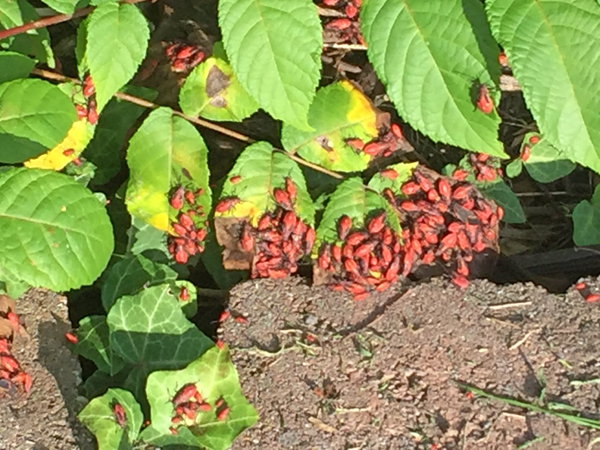
This is just a small sampling of the bugs that were there. I didn’t know what they were so had to do some googling when I got home. Apparently these are boxelder bugs. And they are only bright red in the nymph stage, turning more black as they grow. You can see a few adults if you look close, especially in the first image.
—————
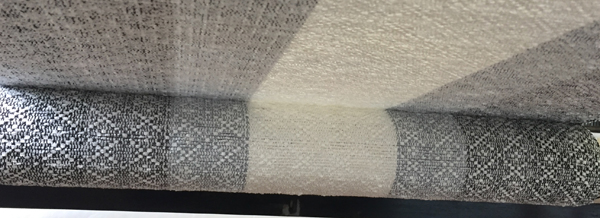
Now for the okay. As planned, once I had that black & white chenille shawl of my loom, I went back to my rigid heddle and re-wove the diamonds in the graduated colors.
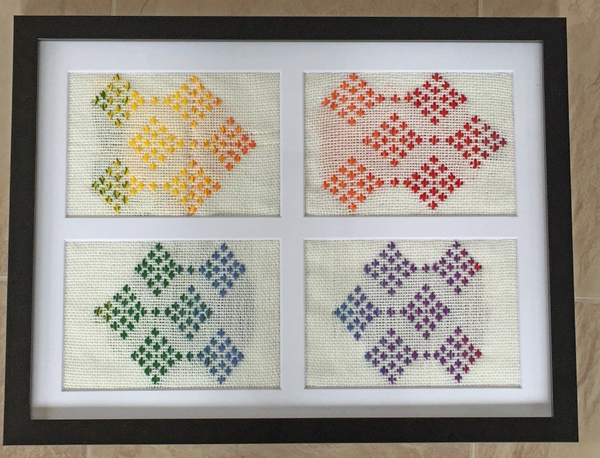
I have to say, now that it’s all done, I find it just meh. It’s okay. Nothing special, especially considering all the time it took. I do think I’ll enter it in the Guild’s 75th Anniversary Diamond exhibit, but I won’t have it juried. I can see what the problems are myself.
—————
Once I got that done, I wanted to weave some more real fabric. I debated and debated – would I weave more rayon chenille to help use up that stash? After all, the Guild’s Holiday Sale is the right time of year to sell that luscious fiber.
Maybe I’d weave another length of fabric for me to sew? I have a few patterns from Get Weaving to make.
But I found I didn’t want to do either of those. I wanted to weave towels. I can sell them at the Holiday Sale or in my Etsy shop. I haven’t put anything new up there in a while, so it’s time.
Once that decision was made, I spent HOURS playing with drafts, and just couldn’t get what I wanted. 🙁
So instead I went to my stash. What yarns do I have that would brighten my day? I found some yummy thick & thin yarns in pink, orange, and yellow variegation, as well as some other variegated yarns in similar colors. They remind me of the zinnias that are currently in bloom, so that’s what I’ll make.
I generally prefer variegated yarns in the warp, but my reed would not like that thick & thin, so I changed plans again and warped a solid natty yarn. This is a 6/2 – an odd size, but I thought it would work well with the variegations, both of which are a bit thicker than my usual yarns.
I decided to thread a straight draw //// and let the colors do the talking. I also decided to just thread on 6 shafts instead of 8 to lighten the lift of the treadles. That made some subsequent decisions a bit more challenging, as I’ve got lots of 8 shaft drafts, but none for 6 shafts.
So I did some poking around and decided on a draft with 3-end floats. Got it on the loom, started weaving, and liked how it looked.
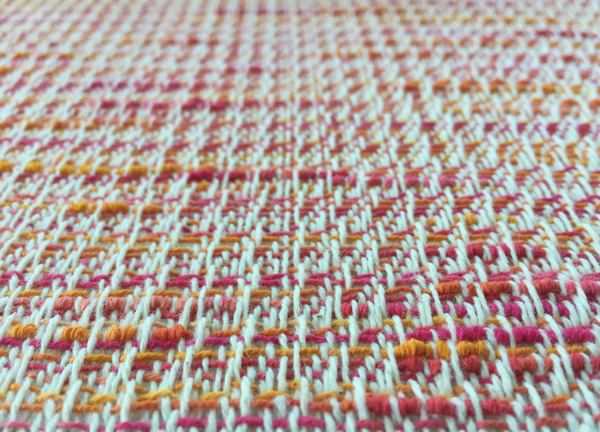
Until I stepped back. Uh oh. This sure looks like a waffle weave to me. And I’d already made a plain weave hem, which will just pucker and ruffle like mad when that waffle draws in during wet finishing.
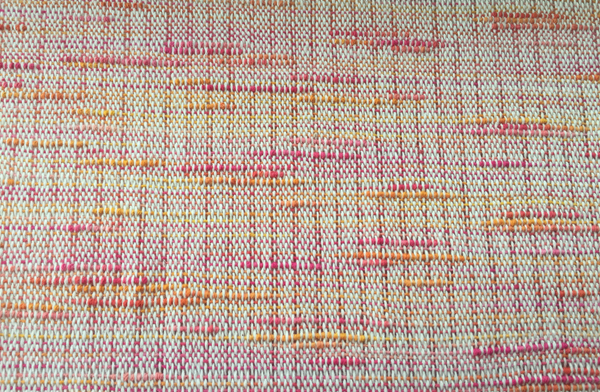
So for the 2nd towel I opted to do plain weave throughout. It’s fine, but the colors are SO much more muted, so that wasn’t the look I wanted, exactly, either.
I changed the tie up for towel 3, which is the last one I’ll be able to weave with this thick & thin yarn, but didn’t take a photo of it. You’ll have to be surprised when I get this warp off the loom.
You know, I tell myself – and sometimes you – what I like and what I don’t. What turns me on and what leaves me cold. And then something happens and I change my mind.
Funny how that works, isn’t it? This latest work is an example of that.
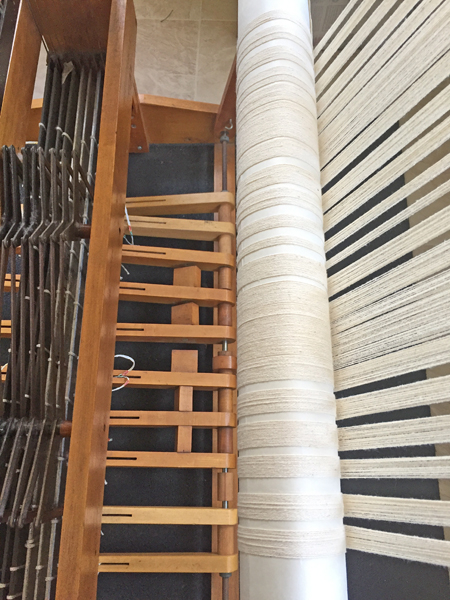
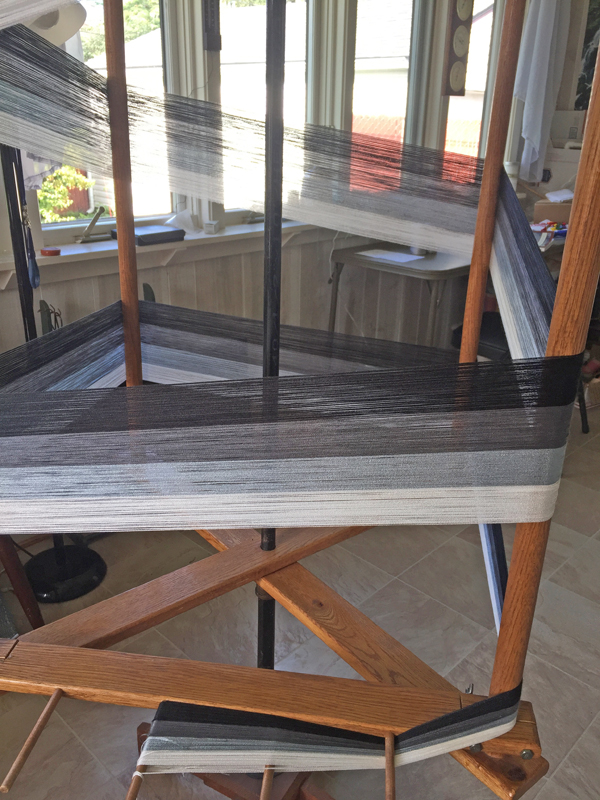
Following my experience with that Fires Everywhere scarf, I wanted to do something similar but different for a shawl-width piece. After a bunch of playing around with various ideas, I decided on a black to white warp in solid colors, not gradients.
I also decided I was going to wind the warp out of 100% tencel, 8/2 sett at 24EPI, and even though 2 shuttle weaves are not my favorite, I would try out an alternating weft with tencel and rayon chenille. So I got busy winding. Here’s half of the width wound on my warping mill.
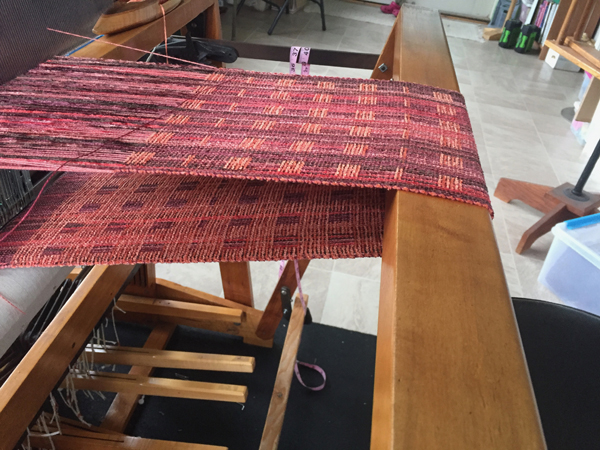
As always with tencel, the winding, beaming, and threading went smoothly. No hitches. So it was time to try the weaving. Again, everything was working well. Here’s the simple twill threading and treadling, as seen from the top while I was weaving. The warp alternates that 8/2 tencel in tabby with a fairly thick white rayon chenille, only about 800 yards per pound.
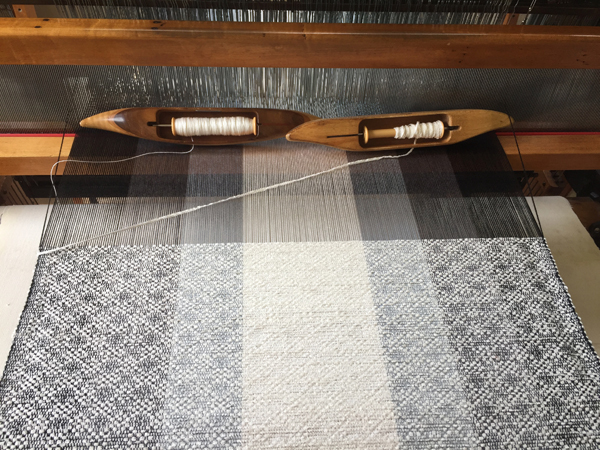
It is often the case that I like the ‘back’ side better than the ‘front’, and this was no exception. You can’t see much of it here, but I think you get the idea. Little crosses inside the diamonds.
I had some company for a few days, and fringe twisting just takes time, so the pieces sat for about a week after they were cut off the loom. I finally got that all done and wet finished. This is where the surprise came in.
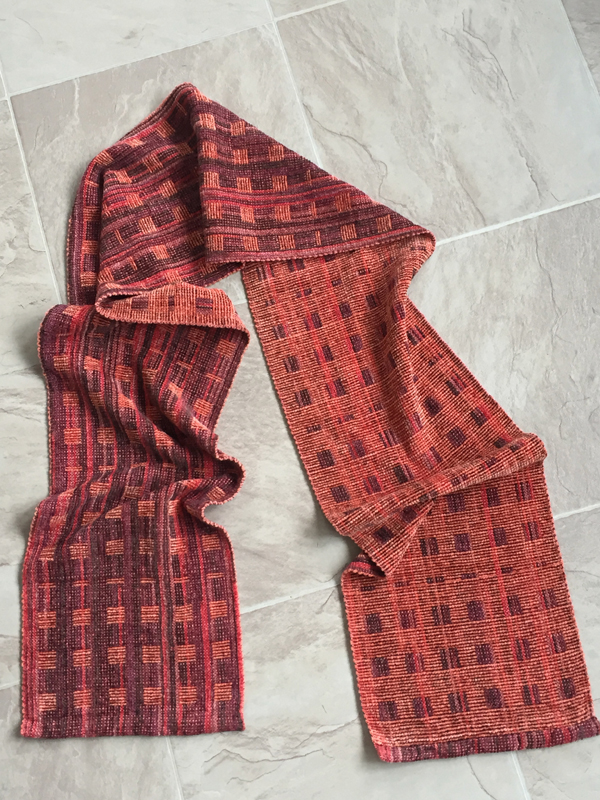
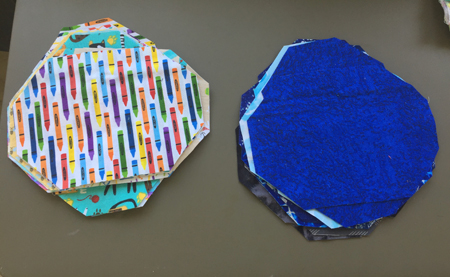
I had differential shrinkage. Or something similar that created strong vertical crinkles in the cloth. Which I surely didn’t expect. Here you can see the crinkly piece on the left and its fraternal twin that I’ve given a press to (needs more) on the right. Look at the width difference between these two pieces!
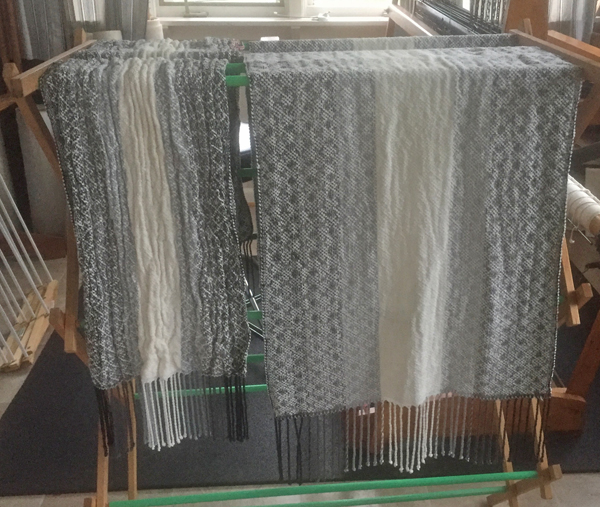
I honestly liked that crinkly piece, which surprised me. I sent photos of both pieces to my daughter and a friend to get their input. Of course, I got two different opinions. And now that everything is totally fully dry I’m again second guessing. One piece will get mailed to The Copper Shop on the Roycroft Campus for sale, the other will go to the Weavers’ Guild Holiday Sale. I keep changing my mind and my opinion. Do I really like that crinkly piece, which is now a scarf and not a shawl? It feels so much different than the flatter, wider piece; harder/stiffer, of course, since it’s so much thicker. On the other hand, there are still so many wrinkles in the wider piece – will I be able to get them out if I use my steam press?
I need to move forward. I have one day to make a decision. Your input, dear readers?
I sewed the masks for my grandsons in a sort of assembly line fashion. Cut out all the masks. Then, starting with the masks for the 5th grader, did step 1 on all masks, then step 2 on all masks, and so on through all steps. Repeat with the masks for the kindergartener.
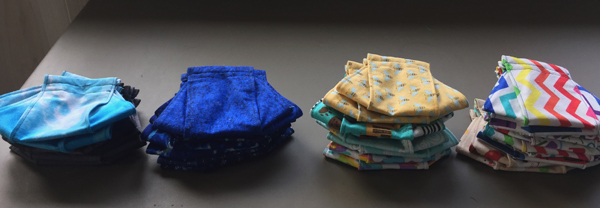
After this photo was taken I threaded the elastic in all 32 masks. I won’t tie the knots until I’m with the boys to make sure I get the length right. I also found two more fabrics that the 5th grader approved so each boy has 18 new masks.
Then it was time to weave some rayon chenille for that gallery. I planned to weave 2 scarves and 2 shawls. I wanted to try a diversified plain weave for the scarves, as I’ve not done that before. That involved using a combination of Tencel and rayon chenille in both warp and weft.
I wound the warp and really liked the way it looked after it was chained.
But AAAARRRGGGHHH!!!! The instant it left the warping mill I started kicking myself. I’d forgotten to tie the cross. In fact, I’d not put in a single choke tie! This is bad enough with any warp, but rayon chenille is notoriously ‘sticky’, with threads jumping onto and twisting into their neighbors until back under tension on the loom.
I tried to finger thread my way through the cross and put the lease sticks in. As soon as I tried to spread it in the raddle it was clear that I’d done a horrible job of choosing the threads for the cross.
On to Plan B. That was to cut the ends of the warp threads and roughly re-thread the lease sticks in what I sort of thought was the order. I did that, but as soon as I started winding on the back beam it was clear that once again I hadn’t chosen the threads well and there were so many tangles that I couldn’t wind the warp.
Now, it was time to walk away for a bit. Plan C emerged while I had dinner with a friend. Untie those knots I’d made in Plan B. Pull everything out of the lease sticks. Go a few feet back from the end and do that thing you’re not supposed to do – comb the warp. I took a bundle of threads that I estimated to be a few inches wide and gently and carefully combed down to the end of the warp. Once I got there I simply divided that in half and put it in the lease sticks, through the raddle, and tied another knot. I worked my way across the width of the warp.
It was far from perfect, but I was able to get the warp beamed. I figured I’d invested enough time already that it was worth threading and see if I could weave. I’d had to cut length on both ends so knew I wouldn’t get 2 scarves from the warp, but was hoping I could get one.
I started weaving and things were going reasonably well. Although I had sort of forgotten how much longer it takes for a two-shuttle weave than using a single shuttle.
Of course, the more I wove and advanced the warp, the more the tangles behind the heddles were apparent. After I got one scarf woven I decided it was time to cut that dog off the loom and ‘waste’ the rest of the warp. Far better than continuing to waste my time. After hemming and wet finishing, the scarf is nice and soft. I won’t be in a hurry to do a diversified plain weave again, though.
And I am positive I won’t forget to do choke ties for a while.
I have no idea how a whole month has gone by without me posting. It’s not been for lack of doing things, some with photographs, some not.
Let’s start with the not. I’ve used my Macomber pretty exclusively for a long time. Knowing that for the past (?)three(?) years the only thing I’d used my counterbalance loom for was holding fabric, I decided it was time to move it on. I thought about the best way to do that, and decided that I was going to gift it to a new weaver. I worked with one of the instructors from our Weaving & Fiber Arts Center and quickly had a taker. She and her husband picked it up a few weeks ago, and it happily fit in their van. I am thrilled with all the space created in my studio, and have used it for sewing, weaving, exercising, and card playing so far. It’s such a pleasant space, I’m sure I’ll continue to enjoy it. And the new owner will hopefully enjoy the loom. She lives nearby, and I’ve encouraged her to call me if she needs help with it, so I’m betting I get to see it. 🙂
Next up, I did do a third round of geode dyeing, this time the final Tshirts for my grandson for his birthday. I used rubber bands for some of the ties, till I ran out of rubber bands of an appropriate size, then re-using the artificial sinew with a slightly different strategy. I’m happy with them.
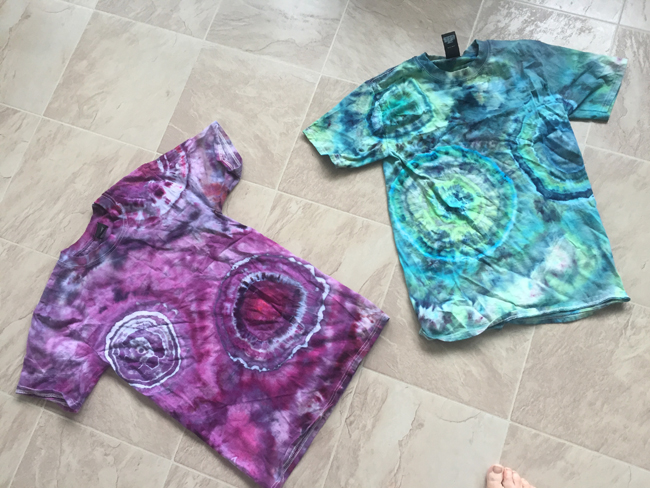
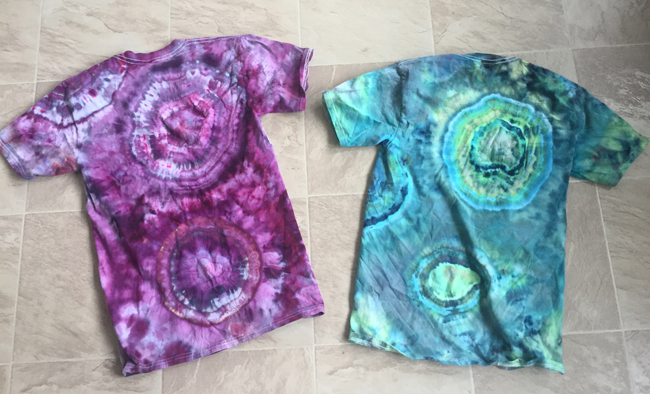
Still, when my daughter asked (jokingly, I’m sure) if I was willing to make them for all of my grandson’s friends who admired them, for a fee, of course, I immediately replied, “NO!” I learned a lot, but this was not worth my time and effort to make them to sell.
Sticking with my grands for a moment, we assume that they will both be wearing masks all day at school. So they picked out a bunch of fabrics, and today I cut out 3D masks, their favorite style. 14 for the 10-year old, 18 for the 5-year old.
I’m taking bets – which child will lose more masks more quickly, the 5th grader or the kindergartener?
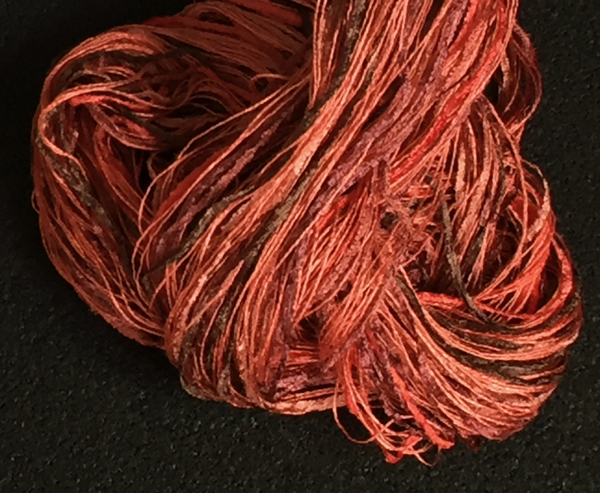
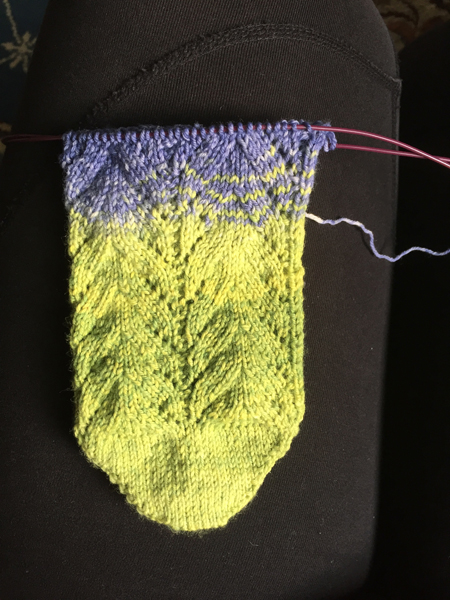
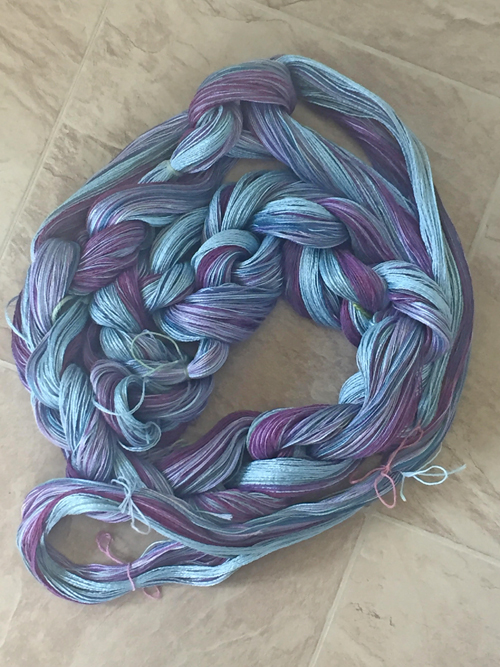
Back to dyeing, Rebecca over at ChemKnits has LOTS of great YouTube tutorials about dyeing sock yarn and other wool-based yarns. She uses a WIDE variety of things to provide the color on her yarns: acid dyes, fiber reactive dyes, food dyes, Skittles, and many more unusual items. She makes everything accessible and fun. So I dyed another sock blank with my fiber reactive dyes, this time hand painting it.
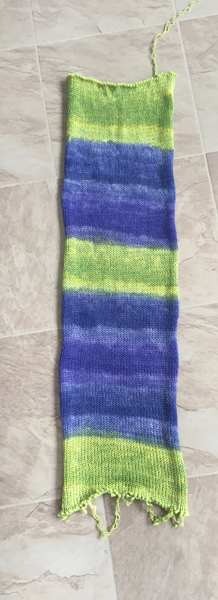
Again, I learned things, this time mostly about how much dye I needed (way less than I mixed up) and the difference needed between dark and light values of the same color (more than 50% difference). I’m really liking the chartreuse a lot, but wish there’d been more visual difference between the blue and the purple, and between the values, especially of those last 2 colors.
Still, I’m enjoying the process both of dyeing and of knitting with this yarn, and expect I’ll have to buy more sock blanks to dye. 🙂
On the weaving front, Elizabeth Tritthart did some amazingly beautiful pickup using vintage embroidery patterns. She inspired me. And since I’m not pressing to produce for selling, now is the time for me to try different things.
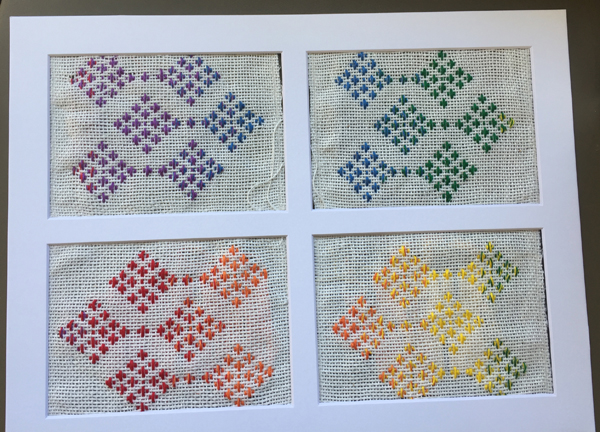
We are rapidly approaching the Weavers’ Guild’s 75th anniversary – the diamond anniversary. Some Guild members are planning for a great exhibition in honor of this event, one part of which will feature diamonds in weaving. So I decided to do some pickup. I threaded my rigid heddle, an appropriate and easily moveable loom for this. Then I did some sampling, trying various yarns, weights, and designs.
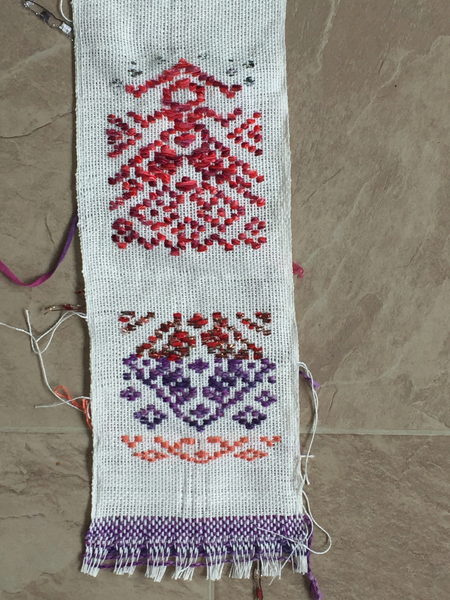
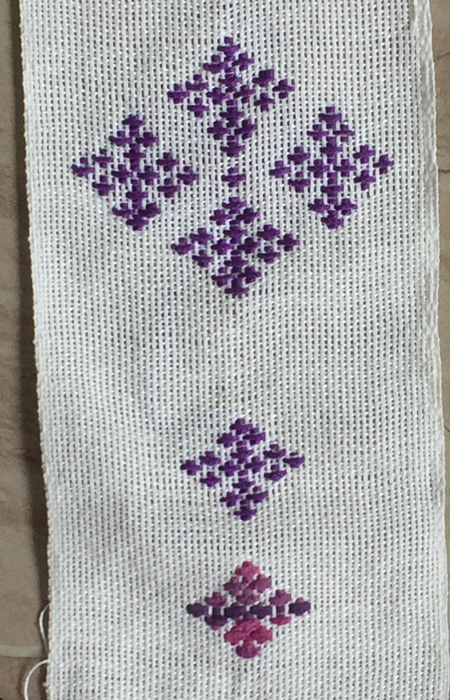
I decided I liked the relatively simple diamond-shaped designs, so did some really careful planning that had to include how my finished work would be displayed, since the back of these pieces have really long and ugly floats. I got my act together and slowly wove 4 sections and bought a frame to display them. I absolutely used the carpenter’s rule: measure twice and cut once. I sewed a machine stitch, using both straight and zigzag stitches to secure the ends. Then cut the 4 pieces out. D*%#! I only measured the first piece, red to orange and counted the rows on that! Clearly my gauge isn’t identical on all 4 pieces. Only the first one is appropriately sized for the frame. The others are all too stitched and cut too small. They will have to be re-woven. But here you get the concept anyway.
And fortunately I have plenty of time to re-weave, as the exhibit isn’t until the spring of 2022. So first I will sew all those masks, then I have to get some rayon chenille woven for a gallery that sells a bit of my work. Maybe the rigid heddle will come back out after that; maybe I’ll need more time to get back to it. The good news is that I used readily available embroidery thread for the pickup, so at least that won’t be a problem.
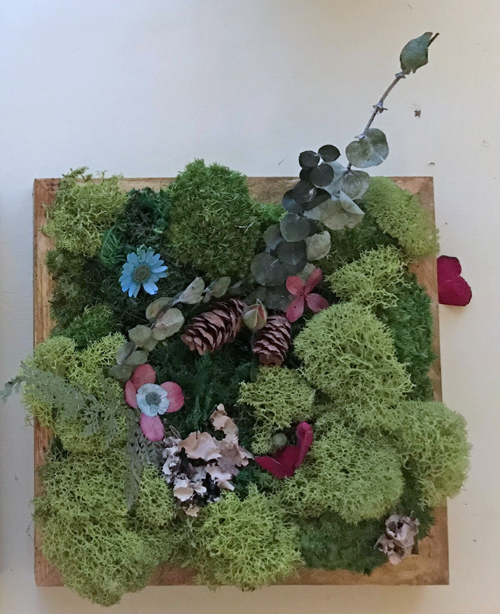
For Mother’s Day my sweet daughter bought 2 kits to make moss pictures, with the plan for us to do this activity together. It took a week or so to find an evening that would work for her, and then after the boys were in bed she came to my house and we had a good time creating.
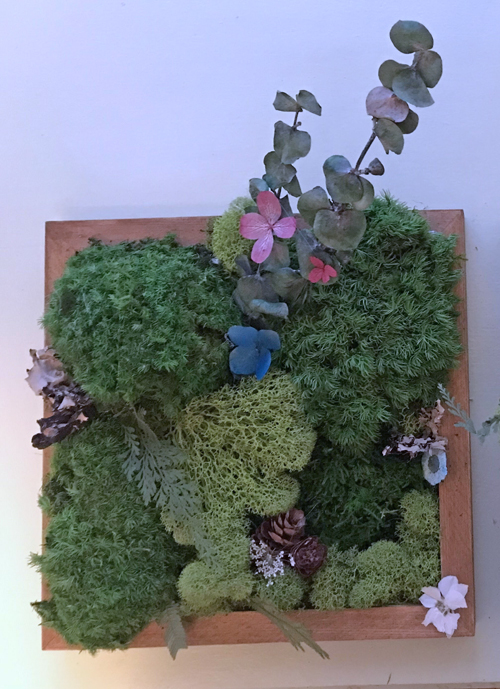
The mosses in our kits were the same; the embellishments were a bit different. And we arranged our mosses a bit differently as well. Here’s mine.
And my daughter’s.
This was a lot of fun, and could even be done via Zoom or Skype with people who are geographically distant with just a little advance planning.
*********************
Last month I told you I’d purchased some patterns for garments designed to be sewn from handwoven fabric. Well, like everything else in the world, this didn’t move quite as smoothly as I’d hoped from beginning to end. Through no fault of Sarah Howard‘s, I want to quickly add. She could not have been more helpful or generous in answering all of my questions.
Of course, every weaving project starts with planning. I decided to use a mix of cottons – a bunch of 5/2, some 8/2, and some 10/2. This, of course, made my project more complex than it would have been if I’d used all the same size yarn. But (a) I’m committed to using up my stash, and (b) this gave me the various colors of yarn I wanted. So I wound the warp.
As I prepared to put it on the loom, I decided that the 10/2 was far too thin to use without supplementation. So I measured out a bunch of medium blue 5/2 to pair with it. This was easy enough to intersperse where I needed it since I hadn’t yet beamed the warp.
Then I threaded the heddles and reed. Hmmm…I still had too much 10/2 that doesn’t have a thicker partner. So I pulled that half of the warp out of the reed and changed it to a much closer sett. But now, not only was I still not happy, but my warp was too narrow. Since I couldn’t be positive of the amount of draw-in and shrinkage, I needed the warp to be a solid 20″ – probably wider – at the reed.
So next I measured out a dozen ends of 10/2, hung it over the back beam, and partnered it with the existing 10/2 ends so they’d each be doubled through the heddles. Once again threaded the reed, decided I was happy with it, and started weaving.
All was going well…although I knew from my calculations that it would be very close for me to have enough weft yarn. If I’d planned what I would use for weft more clearly from the beginning of the plan, that wouldn’t have been an issue; some of the warp ends were that yarn I later decided to use for weft. It would have been a relatively simple matter to choose a different warp yarn to replace some of those ends.
This is a plain weave, so the weaving was simple. I just had to keep adjusting all those weighted ends as the warp advanced.
Finally, the warp was all woven. It was about 8″ shorter than I wanted it to be, but since I’m significantly shorter than Sarah, I didn’t think that would be a problem. Each leg would be cut 2″ shorter than her pattern, which would probably (hopefully) be fine for my crops. Or maybe my fabric wouldn’t shrink as much as I’d allowed for. (Fingers crossed.)
Cut off the warp, secured the ends with a run through the sewing machine and then into the washer and dryer.
Meanwhile, I made a muslin of the pattern using and old & stained sheet I had just for this purpose. (Trust me – I hate making muslins as much as I hate sampling. But my experience assured me that this was necessary if I wanted to be happy with the pants when they were done.)
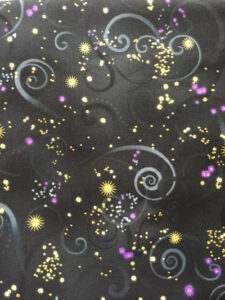
It came close to fitting, but wasn’t just right, so I made some modifications to the pattern, cutting the adjusted pattern out of tissue paper. I purchased some fun cotton fabric to make a pair of pants I could wear out of it before I cut into my handwoven fabric.
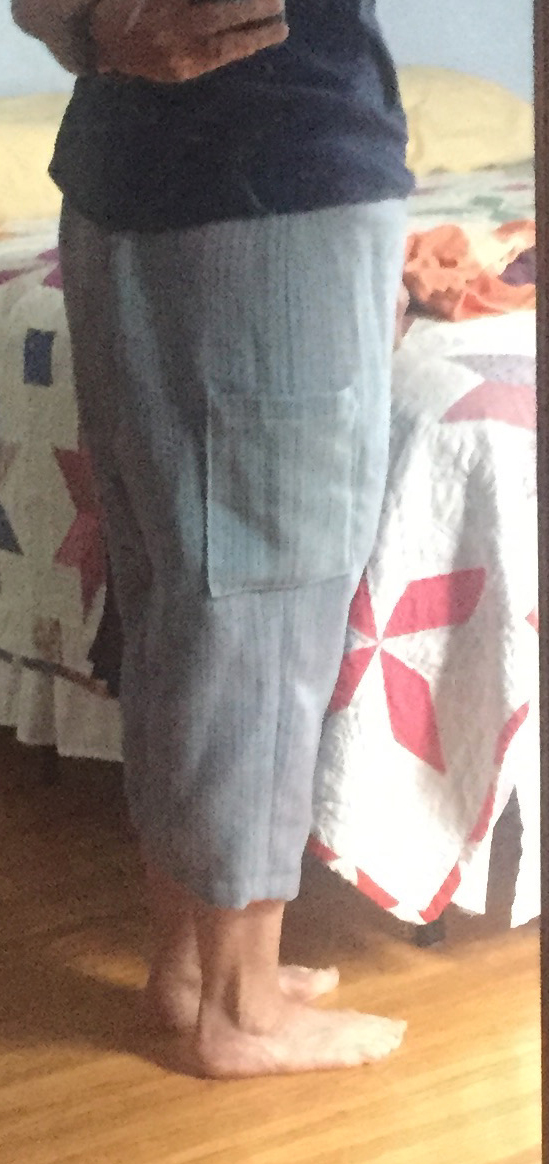
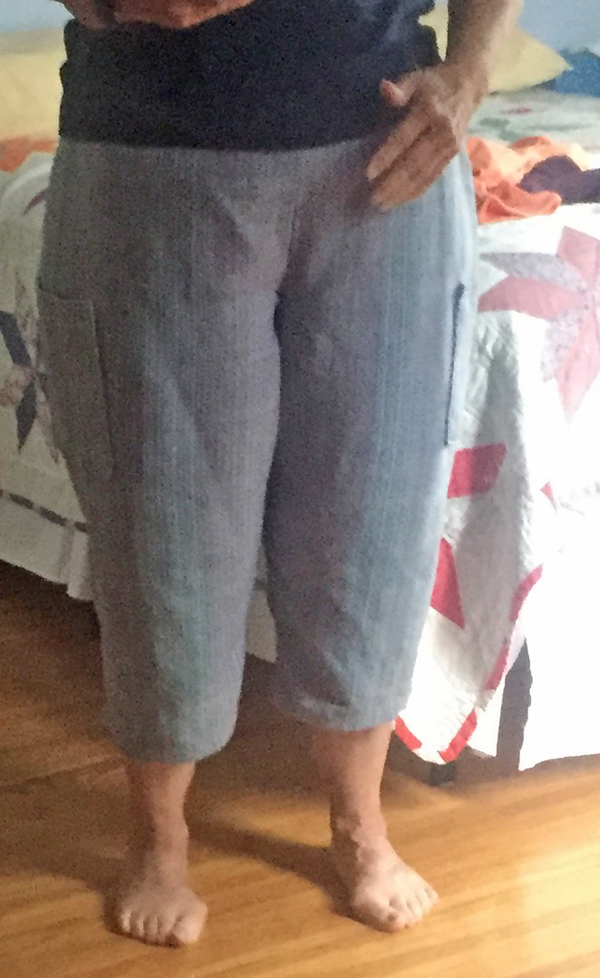
I purposely cut them shorter than the pattern expected since I knew I’d need to do that with my handwoven. These pictures were taken prior to hemming, and I cut off another 2″ before hemming. I was happy with these, although I could see that the pattern needed a few more minor modifications.


I know some people wouldn’t like the patch pockets, but they’re just fine with me. And MUCH easier than side seam pockets. And who wants pants without pockets? Not me!
The next step was to use more tissue paper. I had only one each pants front and pants back pattern piece, and since these pants are cut out in a single layer, I wanted two of each to make my life easier.
Then a good thing happened. It was my turn to host and Open Studio at the Weaving Center. Two-and-a-half hours at a place with six-foot tables. That would make things much easier – my kitchen table is just over three feet wide, and with that leaf up it takes up most of my kitchen.
So I brought my fabric, tissue paper, iron, and other supplies to the Center with me. I made the needed mod to the 2nd pattern piece, adjusted my modified original, laid out and cut the fabric, and then ironed on the woven interfacing along all the cut edges to secure it. Came home and zigzagged all the cut edges for another measure of security and started sewing.
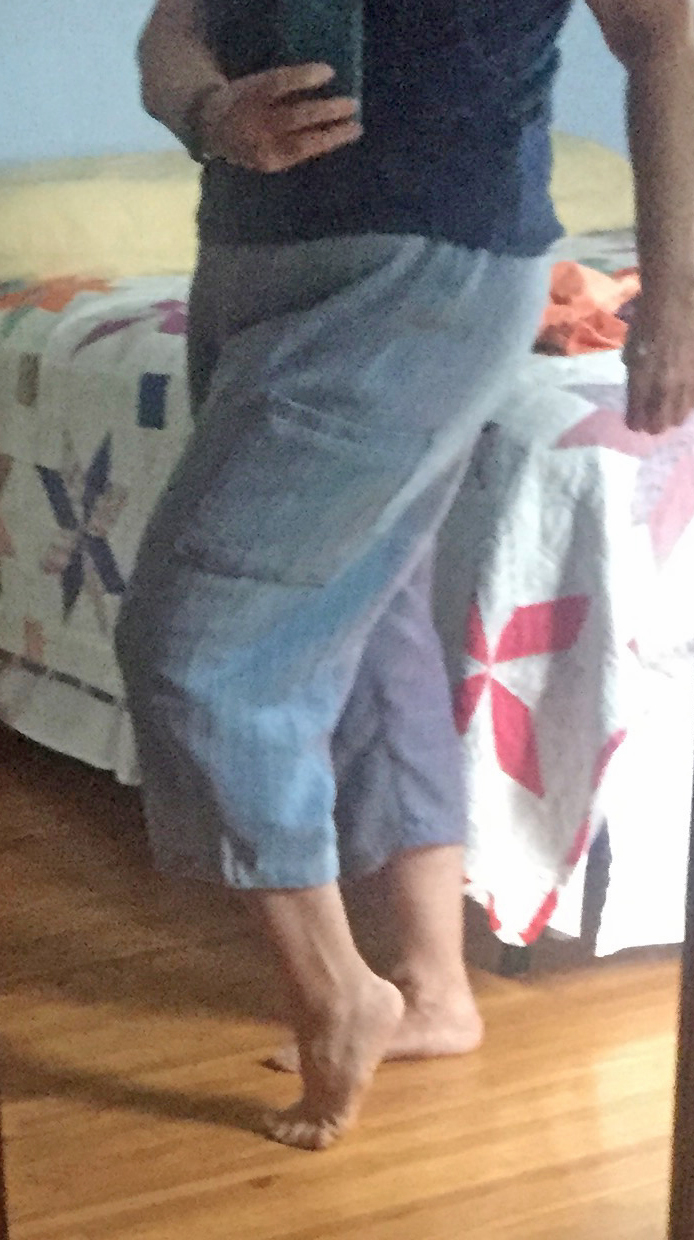
NOTE: I’m not happy with the photos being so grainy. But here’s the thing…by the time I take the images in my mirror and crop them to show you just the pants, this is what happens. I don’t want to go through taking them, cropping them, and inserting them again. That’s why I chose to show you the crops with the fun fabric above at a smaller size. But I didn’t want to do that with this pair. Maybe next time I need to take a photo like this I can do better. Maybe.
I finished the hemming today. I am really happy with these pants, and can’t wait to wear them to a Guild meeting for Show & Tell. 🙂 Unfortunately, I fear that by the time the Guild meets in person again, it’ll be too cold for crops. 🙁
I learned a bit about stripe placement and would have laid out the colors on my warp a bit differently, but that’ll be for the next time. Assuming I can remember that long. 😉
I know I gained a lot of confidence with these, and will definitely weave more fabric to use the other patterns I purchased from Sarah. I have something else I have to do first…no hints, as it may be a total bust.
|
|
