Archives

Ironing out the differences

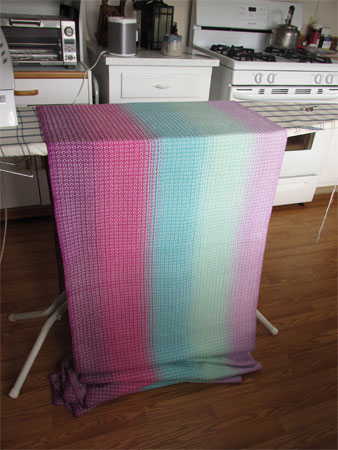
RH's wrap on the ironing board

Most weavers – for sure every weaver who knows, or knows of, Laura Fry – understand that wet finishing is an important part of the weaving process. And part of wet finishing is a hard press. The purpose isn’t to get out wrinkles, but rather to seal the deal with the threads, to make sure that they know where they belong and set them in their place.

In my old country home I had a built-in ironing board. Think 1950. You open a narrow, shallow cupboard and an ironing board folds down out of it. My hubby built it for me, and I loved it. It was very convenient for all the years that I had to iron blouses for work, and then for when I had to press my weaving. Since it was a built-in, it obviously stayed with the house.

When I moved to my new house, much smaller in size, I decided to buy an over-the-door ironing board. It hangs neatly inside the closet when not in use and folds down easily for use. But — and it’s a big but — it really must be used with the door closed. Most of my doors won’t close with the ironing board hanging on it, and there isn’t room for me to stand behind it on the door that does close. So it requires me to adopt an interesting stance to stabilize a door with my right foot while I’m ironing. Plus, I’m short. In my glory days I was 5’2.5″. I’m probably shorter now. Not tall enough to work comfortably at the not-adjustable-height of this ironing board. So it had to be replaced by a traditional ironing board.

I was blown away when I tried to buy one! Target had ironing boards for $45 and up. What??!! I had to go to Joann’s and I had a coupon for 30% off, so I’d buy an ironing board there. WHAT??!! The only ironing board at Joann’s was….drum roll….$90! Yes, ninety dollars! For an IRONING BOARD!!! No one even irons these days! Has it become a specialty item? What’s up with a $90 ironing board?!

Fortunately, for reasons she doesn’t remember, my daughter, who reportedly irons something once every 18 months or so, had two ironing boards, and was happy to give me one.

Nothing fancy. It goes up, the height is adjustable, you set it wherever you want to, and then you fold it up and put it in the closet. It was so much better than the over-the-door one! I’ll be donating that.

Who would have thought I could devote 6 paragraphs to ironing boards? Enough!

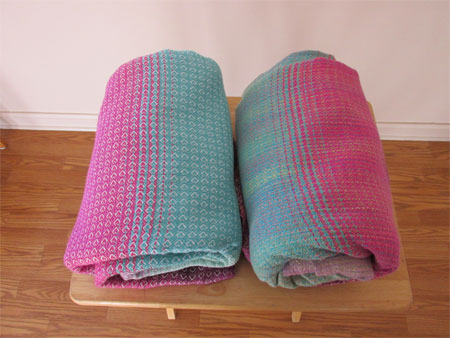
RH & RBG's wraps, rolled

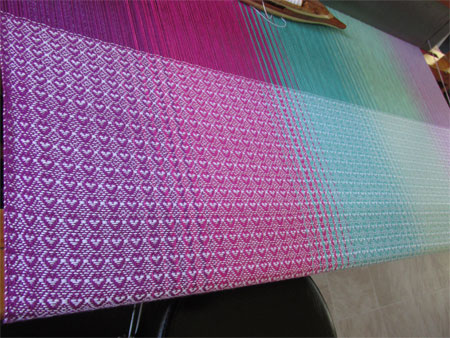
One of the things that surprised me in the difference between these two wraps is how much more distinct each of the warp colors look in RH’s wrap with the solid white weft. Plus you can see the hearts clearly. In RBG’s wrap with the variegated weft the color plays the major role, not the weave pattern.

Here’s a full view of RH’s wrap with the white weft.
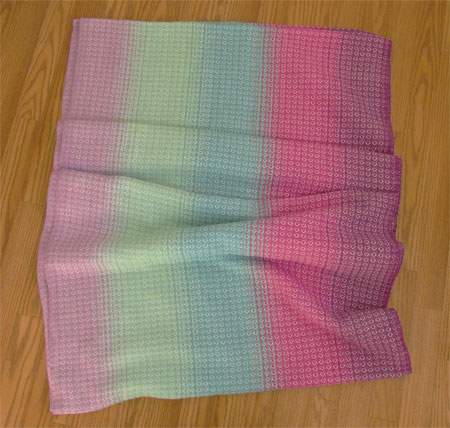
RH's wrap

And RBG’s, showing the change in the tails she requested.
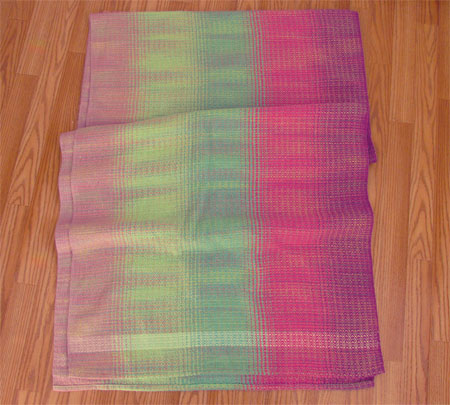
RBG's wrap with variegated weft

Those wraps are well on their way to their new homes, both in places I haven’t sent them before: one to Indiana and one to Belgium.

This afternoon I ordered the yarn for the next two warps. Maybe I’ll get a short warp for presents on the loom while I wait for the yarn to arrive.

Covering chairs

I’ve had a request to post a photo of the hand painted yarn I used for RGB’s wrap.
RGB's hand painted yarn

Once the yarn is wound from skein to ball, it’s really hard to see what the end result will be. I unwound a little, but still, there’s really no way to know how the colors will work across the width of a piece until you throw the shuttle. The way the colors will pool is dependent on several factors, most notably the length of the skein when painted, the number of dye colors used, and the width of the warp. All three have major impacts on the end result.

Now for the post I intended to write… I have finally found the time to cover my kitchen chairs with the fabric that I wove for this purpose. Like many (most?) things, it took a lot longer than I’d thought.

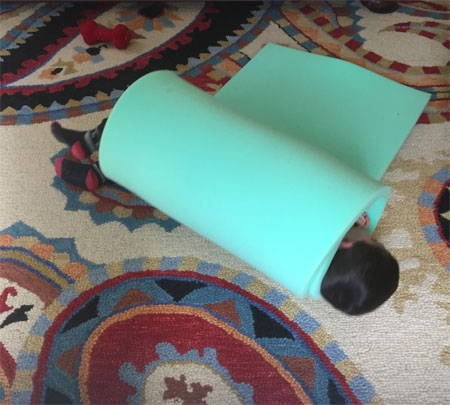
But first for some fun. My grandson was visiting the other day and we had a grand time playing Sushi Boy. I’d roll him up in the foam I’d purchased for chair padding, then he’d unroll himself. This caused peals of laughter every time. And requests to do it again. And again. And again. He’ll be disappointed next time he comes that the foam roll is gone. ;-(

Sushi grandson

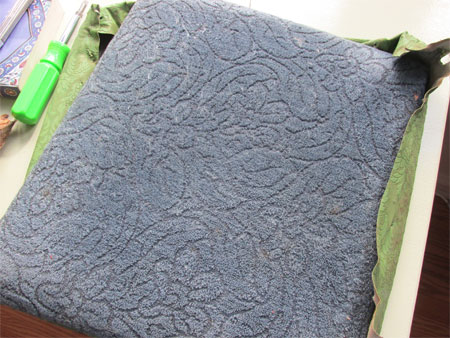
So now for the work. Each of these chairs already had 3 layers of covering. Under the (ahem) lovely green vinyl was a blue woven fabric. I wish I knew correct terms…maybe this is called damask? I’m guessing it was scratchy in its youth.

blue seat covering

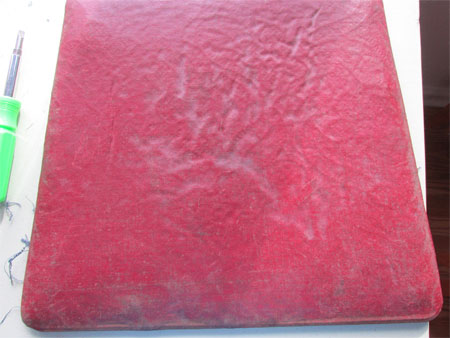
Under that was red cloth. Based on how deteriorated it was and how it ripped, I’m thinking that was oilcloth. Like all reds, the color is completely inaccurate in this photo…it was a nice, deep red.

red oilcloth

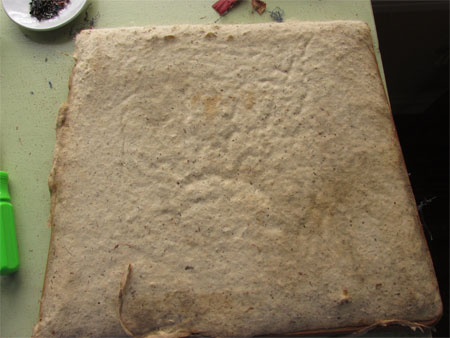
Beneath the red was a layer of cotton batting used for padding. Amazingly, although the chairs were hard as rock with the 3 layers of cloth, by the time I got down to the cotton I could tell it still had some cushioning ability left!

cotton padding

Here’s why the process took so long: each of those layers of cloth had lots of brads holding it in place. I had to count on one of the chairs because otherwise I would have been accused of major exaggeration. In that chair there were 123 brads! I’m sure the number was similar in each of the other 3 chairs. That’s lots of (close to 500) brads to be individually removed.

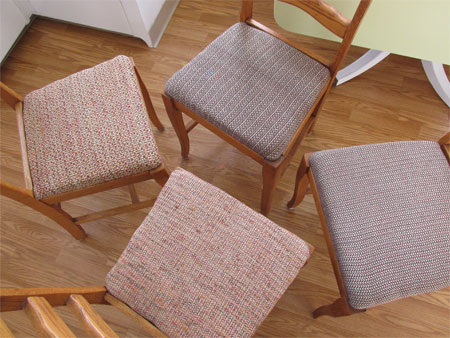
So I got the brads off, cut the foam to size & shape, and stapled on my handwoven fabric, stretching tightly as I went. My corners aren’t as neat as a professional would make them, but I think they’re fine.

all 4 chairs, recovered

My overall reaction? I wish I’d woven more colorful fabric. As I looked at each chair individually and the 4 together, the word ‘staid’ kept entering my mind. These chairs look rather conservative for my personal tastes.

It remains to be seen how well the fabric will hold up. But I know now that if I need to weave more fabric, the weaving doesn’t take long, and since I’ll only have to remove one layer of fabric, held on with admittedly a lot of staples, it won’t take anywhere near as long to remove and replace the seat covers. And now I know that I need to be freer with my color and design choices.

Open sister wraps

open sister KG-10-15

It’s not all that common that I have an ‘open sister’ baby wrap. An open sister means that I can put more length on my loom than I have committed. For the best use of my time, it’s most efficient to warp for between 7 and 10 meters of finished length.

At the moment I’m in an unheard of situation, having two open sisters! I’ve put the info out to my wait list, and thought I’d post them here, too. I’ve shown drafts from my weaving software, with the best I can do to match yarn colors. Both drafts show a black weft and a white weft to give some idea how light and dark colors interact with the warp; the buyer can choose any color weft. I’ve also shown my hearts weave; other weave patterns can be chosen.

I use Maurice Brassard cottons for the warp, and though I most commonly use it for weft as well, I have successfully used tencel, silk, cottolin, and cotton/hemp for weft.

The warp colors in the first draft are periwinkle, bleu, bleu moyen, turquoise, vert pale, gris pale, and gris fonce.

open sister RA-11-15

The second draft uses the following warp colors: fuschia, rose fonce, rose pale, periwinkle, and mauve pale.

If you’re interested in either open sister, email me at peg (at) handwovenscarves (dot) com for pricing and other info, or leave a comment on this post. Act quickly…they’ll likely go fast!

Colorful weft

RBG's variegated weft, side view

RBG had her cotton/hemp blend yarn hand painted in a 6-color variegation. Once again, Susan Pogue did a great job with her fiber artistry. RBG wanted lots of color and variety in her wrap, and her communication and work with Susan on color did a good job achieving that. With variegated yarns it’s often easier to see how to colors move across the warp from a side view than it is from the top.

RBG's variegated weft, top view

I’ve been making good weaving progress the last few days, while still doing things like mowing the lawn, doing laundry, and changing my worn out porch light fixture. I only have about 60″ left to weave. 🙂

I’m working with more moms on their plans for custom wraps, but it’s clear to me that I’ll have a break before the next baby wrap yarn comes in. That’ll give me a chance to cover those kitchen chairs and accomplish some other tasks that are waiting for me. And maybe work on some Christmas presents. (Shh. No hints here.)

5 colors plus white

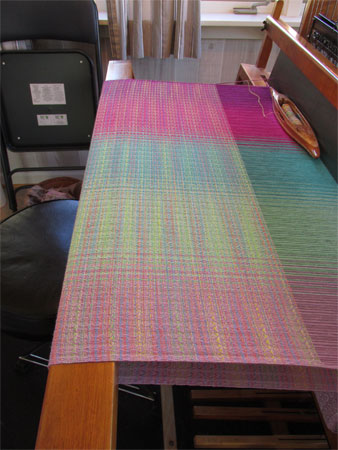
RH's wrap, from the top

I am loving this warp. Is it because there are only 5 color so that I get wider areas of each color? Is it because of these specific colors? Is it for some other reason I can’t identify?

I don’t know, and frankly, I don’t care. I just find this warp, and RH’s white weft, remarkably appealing.

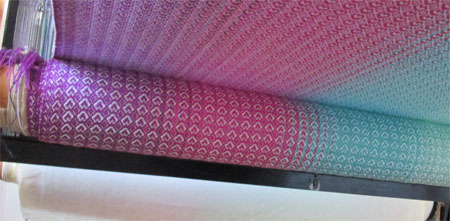
Here’s a look at part of the other side of the wrap as it rolls around the cloth beam. I truly can’t decide which side I like better. RH-do you have a preference which side I put the hem and label on?

RH's wrap, from the bottom

I just finished weaving all of her 210″ of fabric. Either later today or tomorrow I’ll start on RBG’s. I’m really looking forward to that one because RBG chose to have yarn hand painted in 6 different colors. This is more colors than have been used with the prior hand painted yarns I’ve used, so I’m eager to see how they will — or won’t — pool across the width of the warp.

But now I’m going outside with Jack to soak in the marvelously warm and sunny afternoon. 🙂