Archives

Toy Magic

After finishing the mouse family I knit this cute snowman – about 6″ to the top of his pom pom.

knitted snowman

And this tree, just a bit shorter.

knitted tree

What’s this?

tree inside snowman

The tree’s inside the snowman?

Yep. Knitted together, one comprehensive piece.

snowman and tree

Great concept! This is just one of several toys in this book.

Topsy Turvy book

I found the directions clear and easy to follow. The toys — at least the ones I made — were cleverly designed. I think I stuffed my snowman’s head a bit too much so the top of the tree’s a little flat, but hey, it’s a toy, not a work of art.

The designer and author – Susan Anderson – has written other knitting books for kids, too. If there’s a little one in your life, I suggest checking them out. She also has other patterns for big people.

Transformation

Wondering what I’ve been doing instead of blogging?

I got the needed decisions from my next baby wrap moms and did all the time-consuming calculations to determine what exactly I needed to order. Then I got the cotton ordered for the next two warps – 26 tubes of it. I should have it by the end of the week.

Remember this?
mouse parts, small

I spent more hours than I would have guessed, more than it took to do the knitting for sure, to turn them into this:
amigurumi mice
They’re nice and small – to the tip of that blue hat is only 4″.

And how about this:
red rayon chenille taquete, small

I turned it into this:
red rayon chenille scarf

I’ll be honest, this one took far more mental energy than physical energy or time. I was very hesitant, afraid I’d still hate it. As it turns out, the actual work wasn’t so bad, and I rather like the scarves. Granted, at this point I’ve only finished weaving the first and just started the second, but the actual weaving goes pretty quickly.

I’ve also been putting mental energy into what I should be weaving for my new photos for show applications for 2015. Pieces will need to be woven and photographed before I know it. And I can never assume that every idea I have, or certainly every piece I weave, is suitable for jurying. I wish I could say at this point that I knew what my next attempt for this purpose would be, but I don’t. I’m hoping an inspiration will strike…soon.

A new plan?

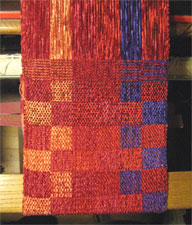
I spent some time on the computer planning a rayon chenille turned taquete. I thought I wanted blue, but at the show last weekend I realized what I really needed was reds. So I started a new computer plan with reds. All in all, I probably spent 2 hours of planning time.

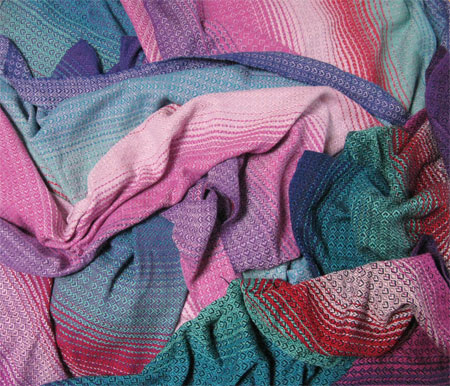
Got the warp measured, beamed, threaded, and tied on the front apron. Started weaving. I hate it. I hate it when I used the 4 colors in the warp. I hate it when I tried a black warp both with the taquete treadling and tabby treadling. The purple – the only purple I have – is way too strong for the 2 reds and the orange.

rayon chenille taquete

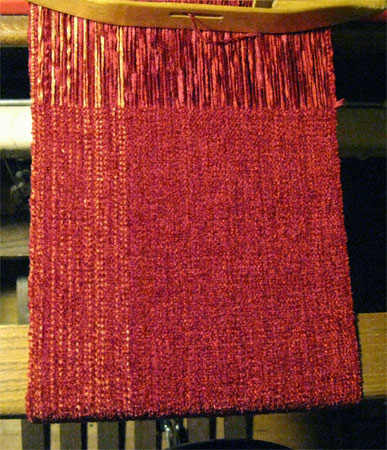
As is my usual in cases like this, I walked away from the loom for a whole day, returning a few times to look at it again and see if I’d change my mind. I didn’t. So I started thinking about whether there was something I could do to save the warp or if I should simply cut the whole warp off and not waste my time as well as my materials.

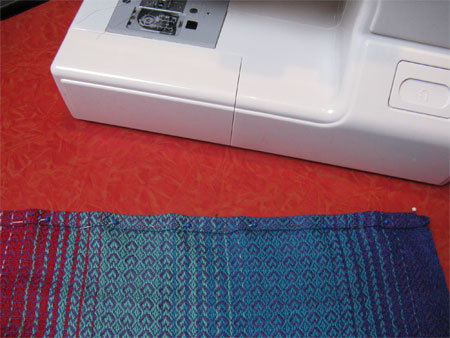
Here’s what I’m thinking…because this warp was planned to be a turned taquete I sett it at 24 ends per inch. For plain weave I sett my rayon chenille warps at 18 ends per inch. So if I pull all the purple threads (39 ends), I’ll still have 200 ends – 20 more than I usually use in my rayon chenille scarves. So I could pull 20 of the orange ends, too. If I do it in a semi-random fashion it’ll probably look better. Then I’ll have to re-thread heddles and reed.

That means I start by re-inserting my lease sticks to re-establish the cross. But not today.

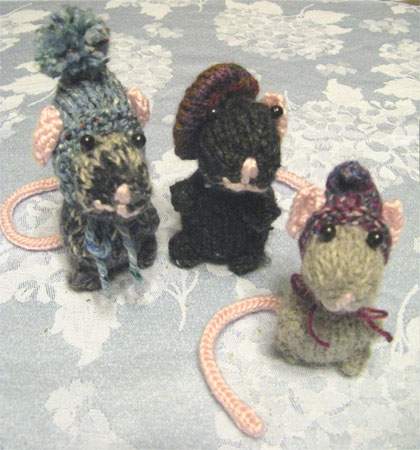
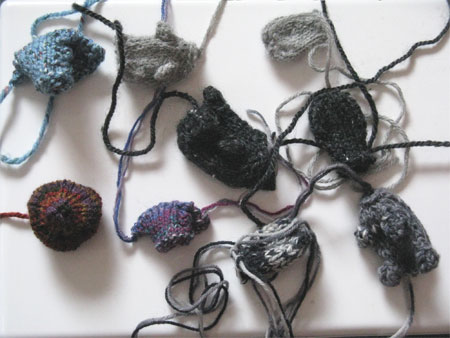
Today I’m knitting some little amigurumi toys for my grandson for Christmas. I’m into it. This may not look like much now, but it’s parts for a family of 3 mice with hats.

knitted mouse parts

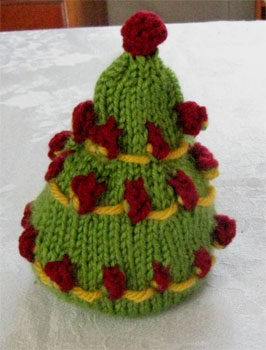
Then Thursday & Friday I’ll be helping Pfeiffer Nature Center by decorating wreaths – it’s their 2nd largest fund raiser and, for me, the one that’s really fun.

I might have some time on Thursday and/or Friday evening to start this warp fix. And it might just work. Or not.

Wrapping it up

3 wraps ready to wash

After the hemming, inspecting, and making any needed repairs, the next step in the baby wrap process is running them through the washer & dryer. This step isn’t just to make sure they’re clean. It’s important to get those threads to shift as much as they’re going to and to soften up from all the tension of the loom (the washer), and to tighten up a bit (the dryer). The three wraps from the last warp are ready for the trip downstairs.

Next they must be hard pressed. Again, not to get rid of wrinkles – the usual purpose of ironing – but to really set those threads in their places. As Laura Fry says, “It isn’t finished until it’s wet finished.” I admit I don’t do as good a job of the hard press on those baby wraps as I should — they’re so long and wide! So I’ve spent a bit of time online looking for a tool that will make this job both more efficient and easier on my arm (my right arm gets REALLY tired pressing the wraps). The old term for such a tool was a mangle; people decided that rebranding was necessary and they’re now called rotary irons. I could buy a new Miele rotary iron for – gulp – $2,000!!!! I don’t think so!! I’m considering checking out an old Ironrite on Craigslist of a maximum of one-tenth of that price.

Anyway, after the pressing comes hand stitching a label with certain information required by Federal law. Then we’re ready to go…along with the Federally-required registration postcard. And if a proposed law passes I’ll have to include more info, too.

3 wraps ready to mail

I need to get the order together for the next batch of wraps (I need a weft color decision from one mom), so in the meantime I think I’m going to try some turned taquete with rayon chenille.

Not spot, but a lot

A lot of cleaning, that is. My house will be shown this weekend and needs to look really good. So instead of the spot cleaning and little bits here and there that I’ve been doing, I had to start at the top and work through every room. True, the really hard stuff was done a few months ago, but dust and dirt gather quickly. So I spent most of my day cleaning.

As with many things, I had to think backwards a bit—start at the end. I finished weaving ML & JJ’s wraps so the next step is cut them off the loom, machine hem, & off to the washer & dryer. I much prefer doing my machine hemming with daylight; I find it so much easier to work in than artificial light. Since I had a late afternoon meeting I’d lose about an hour of our daylight, so if I wanted to hem in daylight I had to stop cleaning and do that. wrap pinned for hemming Here are the steps involved:

  • Cut the whole woven length off the loom.
  • Run a line of machine stitching near each cutting line and each end.
  • Cut between the machine stitches to separate the 3 wraps.
  • Fold & pin hems in place.  I know lots of people are basters, but I never have been.  I remember getting in trouble in home ec in 7th grade because I refused to baste.  I’m a pinner.  It’s pretty much always worked for me, so I keep doing it.
  • Machine stitch near the front of that fold to secure the hem.

After I got the 3 wraps hemmed I left for my meeting. I came home and sewed up some bags for the baby wraps, made dinner, and did the inspection & hand work while I watched Project Runway. I don’t like the All Stars shows as well as the ‘regular’ ones, but I still watch.

Tomorrow I’ll get the wraps in the washer & dryer, finish cleaning, and pack my car for the Women’s Gifts show.